Jul 3, 2024
Tips for Using Lightroom in Photography Editing

Adobe Lightroom is a powerful tool for organizing, editing, and enhancing photographs. Whether you’re a beginner or seasoned photographer, mastering Lightroom can greatly improve your editing efficiency and the quality of your final images. Here are some tips to help you navigate and utilize Lightroom effectively:
Lightroom in Photography Editing

1. Organize Your Catalog

Before diving into editing, organize your photos within Lightroom’s catalog. Use keywords, flags, and ratings to categorize and filter images based on projects, dates, or subjects. This organization system helps streamline your workflow and makes it easier to locate specific photos for editing.

2. Understand the Basic Editing Tools

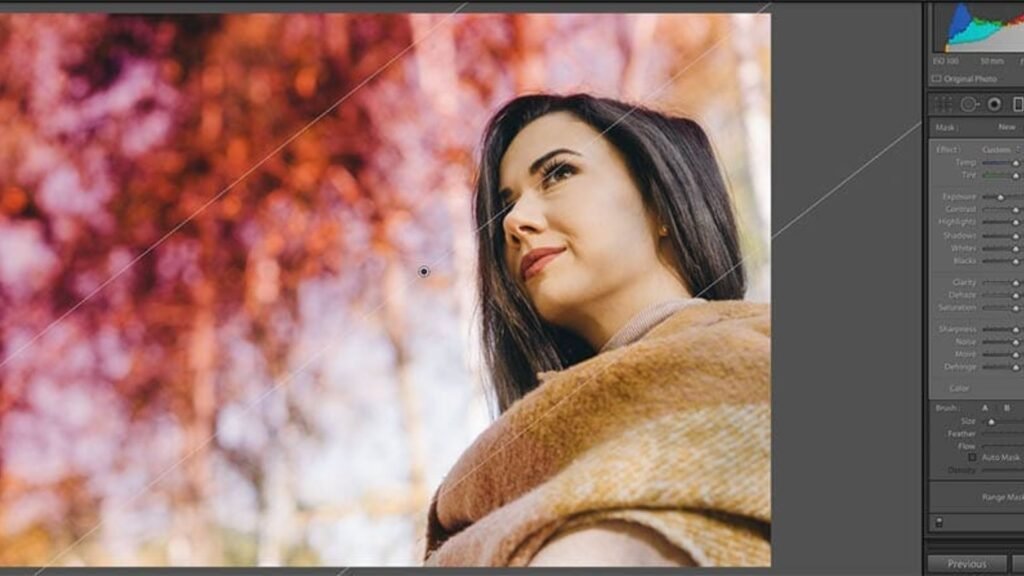
Familiarize yourself with Lightroom’s basic editing tools located in the Develop module. These include exposure, contrast, highlights, shadows, whites, and blacks sliders. Learn how each adjustment affects your image and practice using them to achieve the desired look and feel.

3. Master the Histogram

The histogram in Lightroom displays the distribution of tones in your image, from shadows on the left to highlights on the right. Use the histogram to guide your edits and ensure proper exposure. Adjust exposure and contrast until the histogram is balanced and avoids clipping in the shadows or highlights.

4. Use Presets for Efficiency

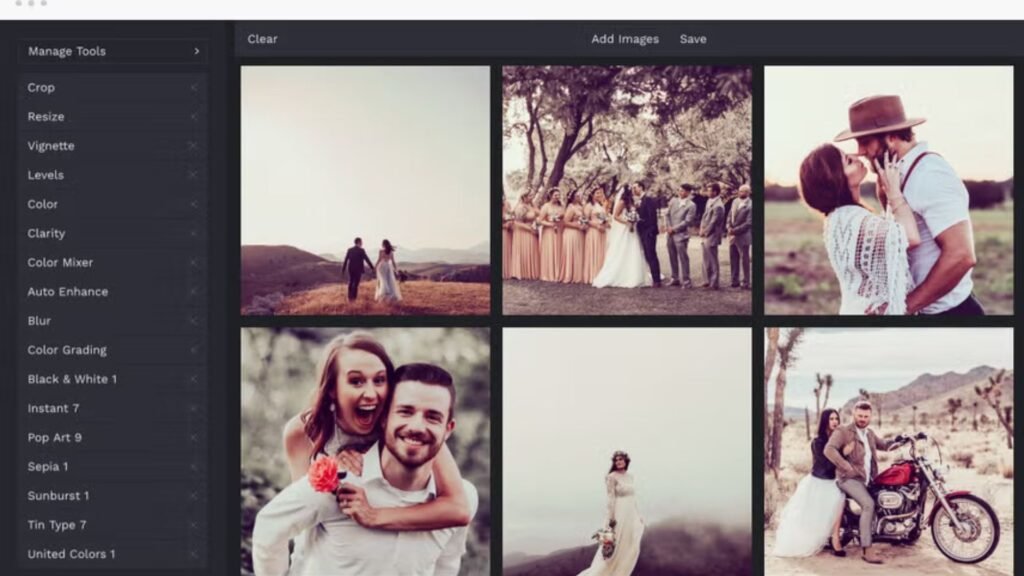
Lightroom presets are pre-defined editing settings that can be applied to your photos with a single click. Experiment with built-in presets or create your own to establish consistent editing styles across your work. Adjust presets as needed to suit different lighting conditions and subjects.

5. Utilize Local Adjustment Tools

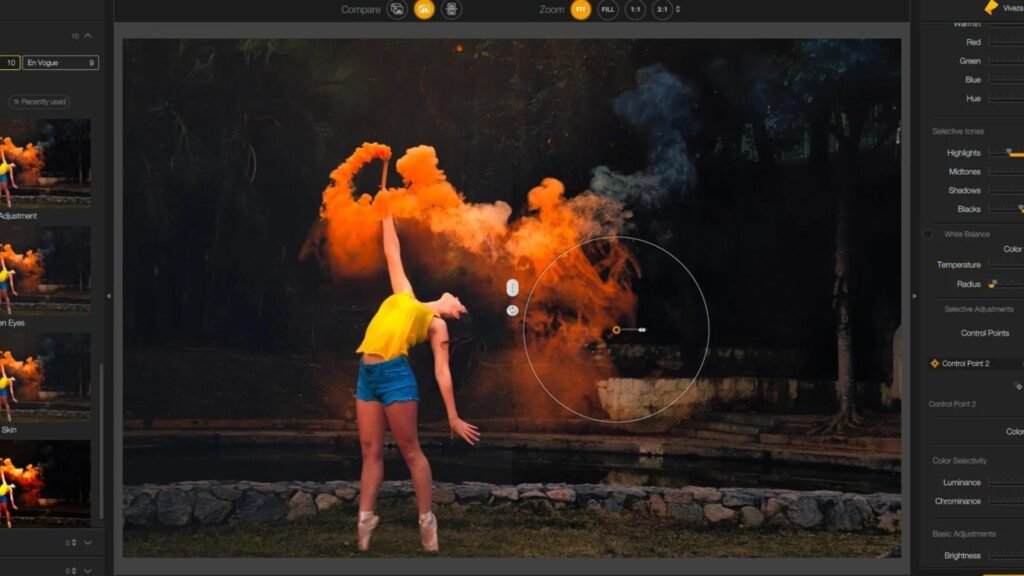
Enhance specific areas of your photo using Lightroom’s local adjustment tools such as the Adjustment Brush, Graduated Filter, and Radial Filter. These tools allow you to selectively apply adjustments to parts of an image, such as brightening a subject’s face or darkening a distracting background.

6. Practice Non-Destructive Editing

Lightroom uses non-destructive editing, meaning your original photos remain untouched. Edits are stored as instructions rather than altering the original file, preserving image quality. Take advantage of this feature by experimenting with different edits and reverting to the original if needed.

7. Utilize Sync and Batch Editing

Save time by using Lightroom’s sync and batch editing features. Apply edits from one photo to multiple images with similar lighting conditions or subjects. Adjustments such as exposure, white balance, and sharpening can be synchronized across selected photos, ensuring consistency in your edits.

8. Monitor Color Management

Pay attention to color accuracy and consistency when editing in Lightroom. Calibrate your monitor regularly to ensure colors appear as intended. Use the Color Calibration panel and the HSL (Hue, Saturation, Luminance) sliders to fine-tune specific color ranges and maintain natural-looking tones.

Conclusion

Mastering Adobe Lightroom enhances your ability to edit and refine photographs efficiently and creatively. By implementing these tips and exploring Lightroom’s extensive features, you can elevate your photography editing skills and achieve professional-quality results. Practice regularly, experiment with different tools and techniques, and adapt your editing workflow to suit your unique style and projects. With dedication and proficiency in Lightroom, you can unlock the full potential of your photographic vision.

More Details

Jul 3, 2024
Best HDR Photography Editing Techniques

HDR photography allows photographers to capture a wider range of light and detail than traditional photography. The editing process involves merging multiple exposures of the same scene to create a balanced image with enhanced contrast and clarity. Here are some essential techniques to help you master HDR photography editing:

HDR Photography Editing Techniques

1. Capture Bracketed Exposures

To create an HDR image, start by capturing a series of bracketed exposures of the same scene. Bracketing involves taking multiple shots at different exposure levels: one underexposed to capture highlights, one properly exposed, and one overexposed to capture shadows and details.

2. Use HDR Software

After capturing bracketed exposures, use dedicated HDR software like Adobe Photoshop, Photomatix Pro, or Aurora HDR to merge these exposures into a single HDR image. These programs offer tools to align and blend exposures seamlessly, ensuring optimal dynamic range and detail.

3. Adjust Tone Mapping

During the HDR merging process, adjust tone mapping settings to control the overall contrast and tone of the image. Tone mapping helps balance highlights, shadows, and mid-tones to achieve a natural-looking HDR photo. Experiment with different presets and sliders to find the right balance for your image.

4. Enhance Details with Deghosting

When merging bracketed exposures, use deghosting tools to address any movement between shots, such as moving subjects or wind-blown foliage. Deghosting ensures sharpness and clarity throughout the image, especially in areas with high contrast or motion.

5. Fine-Tune Color Saturation and Vibrancy

After merging and tone mapping, fine-tune color saturation and vibrancy to enhance the richness and depth of your HDR photo. Adjust sliders for saturation, vibrancy, and individual color channels to achieve a balanced and natural color palette.

6. Reduce Noise and Sharpen

HDR merging can sometimes introduce noise, especially in shadow areas. Use noise reduction tools to clean up grainy textures while preserving detail. Additionally, apply sharpening selectively to enhance clarity and sharpness, focusing on key elements of the composition.

7. Maintain a Natural Look

While HDR photography allows for enhanced dynamic range, strive to maintain a natural and realistic appearance. Avoid over-processing or excessive HDR effects that can lead to unnatural colors or halos around objects. Use subtle adjustments to retain the scene’s authenticity.

8. Experiment with Different Styles

HDR photography offers creative possibilities beyond realistic rendering. Experiment with different HDR styles, such as surrealistic or painterly effects, to add artistic flair to your images. Explore presets and custom settings in HDR software to achieve the desired aesthetic.

Conclusion

Mastering HDR photography editing techniques enhances your ability to capture and portray scenes with exceptional dynamic range and detail. By following these techniques and using specialized HDR software effectively, you can create compelling images that stand out with clarity, depth, and visual impact. Practice regularly and experiment with different subjects and lighting conditions to refine your HDR editing skills and unleash your creativity in photography.

More Details
Jul 3, 2024
Best Websites for Photography Equipment Reviews

When looking for reliable reviews and information on photography equipment, several websites stand out for their thorough testing, expert opinions, and user feedback. Here are some of the best websites for photography equipment reviews:

DPReview (Digital Photography Review)

DPReview is known for its in-depth reviews, camera comparisons, and detailed analysis of cameras, lenses, and accessories. They provide comprehensive tests, sample images, and user forums for discussions.

Imaging Resource

Imaging Resource offers detailed camera reviews, lens reviews, and comparisons. They provide extensive testing and analysis, including sample images and in-depth explanations of features and performance.

The Wirecutter

The Wirecutter (owned by The New York Times) offers expert reviews and recommendations for photography gear, including cameras, lenses, tripods, and accessories. They focus on practical testing and real-world usability.

B&H Explora

B&H Explora features articles, reviews, and buying guides for photography equipment. They provide insights into the latest gear, comparisons, and recommendations based on hands-on testing by their expert team.

Photography Life

Photography Life publishes reviews, tutorials, and guides on photography gear. They offer detailed insights into cameras, lenses, and accessories, focusing on both technical specifications and practical usage.

Petapixel

Petapixel covers photography news, tutorials, and gear reviews. They provide reviews and comparisons of cameras, lenses, and accessories, along with photography tips and industry updates.

LensRentals Blog

LensRentals Blog offers technical insights and reviews of lenses and other photography gear. They conduct teardowns and optical tests, providing detailed information on equipment performance.

DPreview Forums

DPreview’s forums are a valuable resource for user opinions, experiences, and discussions about photography equipment. Users share their insights, ask questions, and provide feedback on various gear.

Tom’s Guide – Cameras

Tom’s Guide provides reviews and recommendations for cameras, lenses, and photography accessories. They focus on user-friendly reviews and comparisons to help consumers make informed buying decisions.

Camera Jabber

Camera Jabber offers reviews, news, and guides on cameras, lenses, and accessories. They provide hands-on reviews, comparisons, and photography tips for enthusiasts and professionals.

    These websites offer a wealth of information and reviews to help you make informed decisions when purchasing photography equipment. Whether you’re looking for detailed technical specifications, real-world performance evaluations, or user feedback, these resources can guide you in finding the best gear for your needs.

    More Details
    Jul 3, 2024
    Tips for Batch Editing in Photography

    Batch editing allows photographers to apply the same adjustments to multiple photos simultaneously, saving time and ensuring a cohesive look across a series of images. Whether you’re processing photos from a photoshoot or preparing a batch of images for publication, mastering batch editing techniques can significantly enhance your workflow efficiency. Here are some essential tips to help you optimize your batch editing process:

    Batch Editing in Photography

    1. Organize and Prepare Your Photos

    Before starting the batch editing process, ensure your photos are well-organized. Group them based on the shoot or project to streamline the editing workflow. This organization helps you easily identify which adjustments are needed for each batch of images.

    2. Use Lightroom or Similar Software

    Adobe Lightroom is widely used for batch editing due to its powerful organizational and editing capabilities. Utilize features like Sync Settings or Presets to apply adjustments across multiple photos efficiently. Create custom presets tailored to your editing style to speed up the process further.

    3. Apply Non-Destructive Editing

    When batch editing, it’s crucial to apply non-destructive edits. Non-destructive editing allows you to revert to the original image at any time without losing quality. Use adjustment layers or virtual copies in Lightroom to preserve the integrity of your original photos.

    4. Adjust White Balance and Exposure

    Start your batch editing process by correcting white balance and exposure settings. Use the Develop module in Lightroom to apply adjustments globally or use the Sync Settings feature to synchronize these adjustments across all selected photos.

    5. Fine-Tune with Selective Adjustments

    After applying basic adjustments, fine-tune individual photos using selective adjustments. Use local adjustment tools like the Graduated Filter, Radial Filter, or Adjustment Brush in Lightroom to target specific areas of each photo. This step ensures that each image receives personalized attention while maintaining overall consistency.

    6. Check for Consistency

    Once you’ve applied edits to your batch of photos, review them for consistency. Zoom in to check for any anomalies or inconsistencies in exposure, color, or sharpness. Make necessary adjustments to individual photos to maintain a cohesive look across the entire batch.

    7. Save and Export

    After completing the batch editing process, save your edits. In Lightroom, ensure you choose the appropriate file format and quality settings for export. Consider creating presets for different export requirements, such as web sharing or print.

    8. Backup Your Work

    Always back up your edited photos and the associated metadata. This precaution ensures you have a safe copy of your work in case of hardware failure or accidental deletion. Use external hard drives or cloud storage services to keep your photos secure.

    Conclusion

    Mastering batch editing in photography not only saves time but also enhances workflow efficiency and ensures consistency across your images. By following these tips and utilizing tools like Adobe Lightroom effectively, you can streamline your editing process and achieve professional-quality results with ease. Experiment with different techniques to find the batch editing workflow that best suits your photography style and project requirements.

    More Details
    Jul 3, 2024
    Best Online Courses for Advanced Photography Techniques

    Finding online courses that cover advanced photography techniques can help photographers refine their skills and explore new creative possibilities. Here are some highly recommended online courses for advanced photography:

    CreativeLive – Advanced Photography Techniques with Jim Garner

    Jim Garner, a renowned wedding and portrait photographer, shares his expertise in this CreativeLive course. Topics include advanced lighting techniques, posing, composition, and post-processing. The course emphasizes creativity and developing a distinctive style.

    Udemy – Advanced Photography Techniques

    Udemy offers various advanced photography courses tailored to different genres and techniques. Look for courses with high ratings and reviews that cover topics such as advanced composition, lighting techniques, portrait photography, and creative editing.

    KelbyOne – Advanced Photography Techniques

    KelbyOne provides a range of courses on advanced photography techniques taught by industry professionals. Courses cover topics like advanced lighting setups, creative composition, using advanced camera settings, and post-processing techniques.

    Lynda.com (LinkedIn Learning) – Advanced Photography Techniques

    Lynda.com offers courses on advanced photography techniques suitable for different skill levels. Courses cover advanced lighting, HDR photography, long exposure techniques, and advanced editing using software like Adobe Lightroom and Photoshop.

    MasterClass – Annie Leibovitz Teaches Photography

    Annie Leibovitz, a legendary portrait photographer, shares insights into her creative process and advanced techniques in this MasterClass. The course covers topics such as portrait composition, lighting techniques, and working with subjects.

    Skillshare – Advanced Photography Techniques

    Skillshare features a variety of advanced photography courses taught by professionals. Topics range from advanced camera techniques to specialized genres like fashion photography, landscape photography, and documentary photography.

    Phlearn – Advanced Photography Tutorials

    Phlearn offers advanced photography tutorials focusing on creative techniques and post-processing skills. Courses cover topics like advanced retouching, compositing, color grading, and using Photoshop for professional-level editing.

    The Art of Photography – Advanced Techniques

    This online platform offers courses and tutorials on advanced photography techniques, including mastering exposure, composition rules, using filters and lenses creatively, and exploring experimental photography.

      When choosing an online course, consider your specific interests and goals in photography. Look for courses that align with your preferred genre (e.g., portrait, landscape, fashion) and the techniques you want to master. Reading reviews and previews of course content can help you find the right fit for advancing your photography skills.

      More Details
      Jul 3, 2024
      Best Plugins for Photography Editing in Photoshop

      Photoshop plugins are powerful tools that extend the functionality of Adobe Photoshop, offering specialized features for photography editing. Whether you’re looking to streamline your workflow, achieve specific effects, or enhance productivity, these plugins can significantly enhance your editing capabilities. Here are some of the best plugins for photography editing in Photoshop:

      Plugins for Photography Editing in Photoshop

      1. Nik Collection by DxO

      The Nik Collection is a popular suite of plugins offering a range of creative effects and tools for photographers. It includes plugins like Color Efex Pro for color correction and creative effects, Silver Efex Pro for black and white conversions, and Viveza for selective adjustments.

      2. Topaz Labs Plugins

      Topaz Labs offers a variety of plugins known for their advanced AI-driven features. Plugins like Topaz Adjust for creative adjustments, Topaz DeNoise AI for noise reduction, and Topaz Sharpen AI for sharpening are highly regarded among photographers for their effectiveness and ease of use.

      3. Alien Skin Exposure

      Exposure by Alien Skin Software is renowned for its film emulation presets and creative editing tools. It provides a wide range of film presets, textures, and overlays to replicate the look of traditional analog photography while offering modern editing capabilities.

      4. Luminar AI

      Luminar AI is an all-in-one photo editing solution that includes advanced AI-enhanced editing tools. It features AI Sky Replacement for easily replacing skies, AI Structure for enhancing details, and AI Enhance for one-click improvements. Luminar AI can be used both as a standalone application and as a plugin for Photoshop.

      5. ON1 Effects

      ON1 Effects offers a collection of filters and presets for creative editing in Photoshop. It includes a wide range of effects such as textures, borders, and stylized looks. ON1 Effects also provides tools for masking, blending, and applying adjustments selectively.

      6. Imagenomic Portraiture

      Imagenomic Portraiture is a specialized plugin for portrait retouching, offering automatic skin smoothing and enhancement tools. It simplifies the process of retouching portraits by automatically detecting skin tones and applying adjustments for a natural look.

      7. DxO PureRAW

      DxO PureRAW is a plugin designed to enhance RAW files before editing in Photoshop. It uses advanced algorithms to reduce noise, optimize detail rendering, and correct lens distortions, providing a cleaner and more detailed starting point for editing.

      8. Athentech Perfectly Clear

      Perfectly Clear by Athentech Imaging is a plugin that automatically corrects color, exposure, and other parameters in photos. It offers one-click corrections for batch processing and can be customized for specific editing needs.

      9. Adobe Camera Raw

      While not a third-party plugin, Adobe Camera Raw (ACR) is an essential tool for processing RAW files directly within Photoshop. It provides extensive controls for adjusting exposure, white balance, contrast, and other settings before proceeding with detailed editing.

      Conclusion

      These plugins offer diverse capabilities to enhance your photography editing workflow in Photoshop. Whether you’re focusing on creative effects, precise adjustments, or portrait retouching, integrating these plugins into your workflow can help you achieve professional-quality results efficiently. Experiment with different plugins to find the ones that best suit your editing style and creative vision, empowering you to elevate your photography to the next level.

      More Details
      Jul 3, 2024
      How to Master Portrait Photography

      Portrait photography is both an art and a skill that goes beyond capturing a person’s likeness—it’s about conveying their personality, emotions, and essence through images. Whether you’re just starting or looking to refine your techniques, mastering portrait photography requires a blend of technical proficiency, creative vision, and the ability to connect with your subjects. This comprehensive guide delves into essential techniques, tips, and strategies to help you elevate your portrait photography game and create stunning, impactful portraits.

      Understanding Portrait Photography Basics

      To excel in portrait photography, it’s essential to grasp the foundational aspects:

      Camera Settings

      Mastering your camera settings is crucial. Understand how aperture affects depth of field, how shutter speed controls motion blur, and how ISO impacts image noise. Adjusting these settings allows you to achieve the desired look and feel for your portraits, whether it’s a softly blurred background or sharp details in low light.

      Focal Length and Lens Choice

      The choice of lens significantly impacts your portraits. A mid-range telephoto lens, typically around 85mm, is favoured for its flattering perspective and ability to compress facial features. Experiment with different focal lengths to understand their effects on composition and perspective.

      Composition Techniques

      Composition plays a vital role in creating compelling portraits. Explore techniques like the rule of thirds, leading lines, and negative space to enhance visual interest and draw the viewer’s eye to your subject. Experiment with framing, angles, and perspectives to capture unique and engaging portraits.

      Mastering Light and Lighting Techniques

      Lighting is arguably the most critical element in portrait photography:

      • Natural Light: Utilize natural light for its softness and warmth, especially during the golden hour—shortly after sunrise or before sunset. Position your subject facing the light source or use reflectors to fill in shadows and create flattering, even illumination.
      • Artificial Light: In studio settings, experiment with artificial lighting setups using softboxes, umbrellas, or continuous lights. Learn to balance key, fill, and backlighting to sculpt your subject’s features and create mood and depth in your portraits.

      Creating Connection and Expression

      A great portrait captures more than physical appearance—it reveals emotion and personality:

      • Building Rapport: Establishing a connection with your subjects is crucial. Put them at ease by engaging in conversation, providing gentle direction, and showing genuine interest in their stories. A relaxed and comfortable atmosphere enhances natural expressions and authenticity in portraits.
      • Directing Poses: Guide your subjects with posing techniques that complement their physique and personality. Encourage natural movements and expressions to capture genuine moments that reflect their character. Avoid stiff poses by encouraging fluidity and spontaneity in their movements.

      Post-Processing and Editing

      Post-processing enhances your portraits and adds a professional finish:

      • Basic Adjustments: Use editing software to adjust exposure, contrast, and color balance to achieve a balanced and pleasing look. Fine-tune white balance to ensure accurate skin tones and adjust tones to enhance mood and atmosphere in your portraits.
      • Retouching: Apply subtle retouching techniques to enhance facial features while maintaining a natural appearance. Remove blemishes, soften skin texture, and emphasize eyes and lips using techniques like dodging and burning. Pay attention to details without over-editing to preserve the authenticity of your subjects.

      Continuous Learning and Practice

      Improving your portrait photography skills is an ongoing journey:

      • Study and Inspiration: Study the works of renowned portrait photographers to gain inspiration and insights into different styles and approaches. Analyze compositions, lighting techniques, and use of color to expand your creative repertoire.
      • Experimentation: Embrace experimentation by trying new lighting setups, locations, and creative concepts. Challenge yourself to push boundaries and explore unconventional ideas to develop your unique photographic style.

      Conclusion

      Mastering portrait photography goes beyond technical proficiency—it’s about capturing the essence of your subjects and telling their stories through compelling images. By understanding camera settings, mastering light, connecting with your subjects, refining your editing skills, and continuously learning and experimenting, you can elevate your portrait photography to new heights. Embrace creativity, hone your craft, and embark on a fulfilling journey of mastering the art of portrait photography.

      More Details
      Jul 3, 2024
      Tips for Editing Landscape Photography

      Editing landscape photography allows you to transform raw images into captivating scenes that reflect the beauty of nature. Whether you’re capturing rugged mountains, serene lakes, or vast forests, editing plays a crucial role in refining your photos. Here are essential tips to help you enhance your landscape photography through editing.

      Editing Landscape Photography

      1. Start with RAW Files

      Begin your editing process with RAW files rather than JPEGs. RAW files contain more data and allow for greater flexibility in adjusting exposure, contrast, and colors without compromising image quality.

      2. Adjust White Balance

      Correcting white balance ensures accurate colors in your landscape photos. Use presets like daylight, cloudy, or shade to achieve natural tones, or manually adjust temperature and tint sliders to fine-tune color balance.

      3. Enhance Contrast and Clarity

      Increase contrast to make elements in your landscape stand out. Adjusting clarity enhances mid-tone contrast, bringing more detail to textures like rocks or foliage without overdoing it.

      4. Work with Shadows and Highlights

      Balance shadows and highlights to reveal details throughout the image. Use the shadow slider to brighten dark areas and the highlight slider to recover details in overexposed parts of the photo, ensuring a balanced exposure.

      5. Use Graduated Filters for Sky and Land

      Graduated filters are essential for adjusting exposure in specific areas of your landscape. Apply a graduated filter to darken or lighten the sky while preserving the exposure of the land, creating a balanced and well-exposed scene.

      6. Fine-Tune Saturation and Vibrance

      Adjust saturation and vibrance to enhance the intensity of colors in your landscape photos. Saturation increases the overall color intensity, while vibrance targets muted colors without oversaturating already vibrant ones, maintaining a natural look.

      7. Sharpen Selectively

      Apply sharpening selectively to emphasize details in key areas of your landscape, such as mountains or trees. Use masking to sharpen specific parts of the image while preserving smooth areas like the sky.

      8. Remove Distractions with Cloning and Healing Tools

      Use cloning and healing tools to remove distractions from your landscape photos. Remove unwanted elements like power lines, litter, or people to create a cleaner and more focused composition.

      9. Consider Cropping and Straightening

      Crop your landscape photos to improve composition or remove distracting elements along the edges. Straighten horizons to ensure a level perspective, enhancing the overall balance and visual appeal of your image.

      10. Maintain Naturalness

      While editing, strive to maintain the natural look and feel of the landscape. Avoid excessive editing that alters the original scene beyond recognition. The goal is to enhance, not drastically change, the beauty of nature.

      Conclusion

      Editing landscape photography requires attention to detail and a careful approach to bring out the natural beauty of the scenery. By following these tips, you can enhance colors, contrast, and details in your landscape photos effectively. Experiment with different editing techniques, practice regularly, and refine your skills to create stunning landscape images that captivate viewers and showcase the wonders of the natural world.

      More Details
      Jul 3, 2024
      Best Online Courses for Learning Photography Editing

      Photography editing is a crucial skill for photographers aiming to enhance their images and bring their creative vision to life. Whether you’re a beginner looking to learn the basics or an experienced photographer wanting to refine your editing techniques, enrolling in online courses can provide structured learning and valuable insights. Here are some of the best online courses available for learning photography editing:

      Online Courses for Learning Photography Editing

      Introduction to Photography Editing

      Understanding the fundamentals of photography editing is essential for creating compelling and professional-quality images. These online courses cover basic to advanced editing techniques using popular software like Adobe Photoshop and Lightroom.

      1. Adobe Photoshop CC – Essentials Training Course (Udemy)

      This comprehensive course on Udemy is ideal for beginners who want to learn the basics of Photoshop CC. It covers essential tools, techniques, and workflows for editing photos effectively. Topics include layers, masks, retouching, and color correction.

      2. Adobe Lightroom Classic CC – The Complete Guide (Udemy)

      Learn how to organize, edit, and enhance photos using Adobe Lightroom Classic CC with this extensive course on Udemy. Discover workflow tips, develop presets, and master advanced editing techniques to streamline your photo editing process.

      3. CreativeLive Photography Courses (CreativeLive)

      CreativeLive offers a range of photography courses taught by industry experts. Explore courses on photo editing, composition, lighting, and more. Courses are suitable for all skill levels, from beginners to professionals looking to refine their skills.

      4. The Art of Photography and Editing (Coursera)

      This Coursera course provides an overview of photography fundamentals and advanced editing techniques. Learn how to use editing software to enhance images creatively while understanding the artistic aspects of photography.

      5. Mastering Lightroom: Photo Editing Workflow (LinkedIn Learning)

      LinkedIn Learning offers this course focusing on mastering Adobe Lightroom for efficient photo editing workflows. Learn organizational strategies, editing techniques, and tips for enhancing photos while maintaining a consistent style.

      Advanced Photography Editing Techniques

      For photographers looking to delve deeper into advanced editing techniques and creative approaches, these courses offer specialized knowledge and skills.

      6. Advanced Photoshop Techniques (KelbyOne)

      KelbyOne offers advanced Photoshop courses taught by industry professionals. Explore topics like compositing, advanced retouching, special effects, and digital manipulation techniques to take your editing skills to the next level.

      7. Fine Art Photography: Creating Large Format Prints (Udemy)

      This course on Udemy focuses on preparing photos for large-format printing, emphasizing detailed editing techniques and color management. Ideal for photographers interested in producing high-quality prints for exhibitions or portfolios.

      8. Portrait Retouching Fundamentals in Photoshop (Phlearn)

      Phlearn’s course teaches essential portrait retouching techniques using Photoshop. Learn skin retouching, color correction, and enhancing facial features to create polished and professional-looking portraits.

      Specialized Photography Editing Skills

      Expand your editing skills with specialized courses that cater to specific genres or techniques in photography.

      9. Landscape Photography Editing Masterclass (Nick Page)

      Join landscape photographer Nick Page in this masterclass focused on editing techniques for landscape photography. Learn how to enhance colors, manage dynamic range, and create compelling compositions using Lightroom and Photoshop.

      10. Food Photography Editing and Styling (Udemy)

      Perfect your food photography editing and styling skills with this course on Udemy. Explore techniques for enhancing food colors, adjusting lighting, and styling compositions to create mouth-watering food images.

      11. Architectural Photography: Editing in Lightroom and Photoshop (KelbyOne)

      KelbyOne’s course teaches editing techniques specifically for architectural photography. Learn how to correct perspective, enhance details, and achieve balanced exposures for architectural images using Lightroom and Photoshop.

      Free Photography Editing Courses

      For budget-conscious photographers, these free courses offer valuable insights and basic editing skills without any cost.

      12. Adobe Photoshop Lightroom Classic CC – The Absolute Beginner’s Guide (Skillshare)

      Skillshare offers this beginner-friendly course on Adobe Lightroom Classic CC. Learn basic editing tools, photo organization, and workflow tips to start editing your photos effectively.

      13. Introduction to Photo Editing (Alison)

      Alison provides a free introductory course on photo editing, covering fundamental techniques and editing software basics. Perfect for beginners looking to explore photo editing without financial commitment.

      Tips for Choosing the Right Online Course

      When selecting an online photography editing course, consider the following factors to ensure it meets your learning goals and preferences:

      • Course Content: Look for courses that cover topics relevant to your interests and skill level, whether it’s basic editing techniques or advanced retouching.
      • Instructor Expertise: Choose courses taught by experienced photographers or industry professionals known for their expertise in photography and editing.
      • Reviews and Ratings: Read reviews and ratings from past students to gauge the course’s quality, effectiveness, and instructor engagement.
      • Hands-On Practice: Opt for courses that include practical assignments or hands-on exercises to apply what you’ve learned and improve your editing skills.
      • Software Compatibility: Ensure the course is compatible with editing software you have or plan to use, such as Adobe Photoshop or Lightroom.

      Conclusion

      Investing in online photography editing courses can significantly enhance your editing skills and elevate the quality of your photographs. Whether you’re a beginner or experienced photographer, these courses provide valuable knowledge, techniques, and practical insights to help you master the art of photography editing.

      More Details
      Jul 3, 2024
      Best Camera Cleaning Kits for Maintaining Gear

      Cleaning your camera gear regularly is crucial for maintaining its performance and longevity. Here are some of the best camera cleaning kits available that can help you keep your equipment in top condition:

      Altura Photo Professional Cleaning Kit

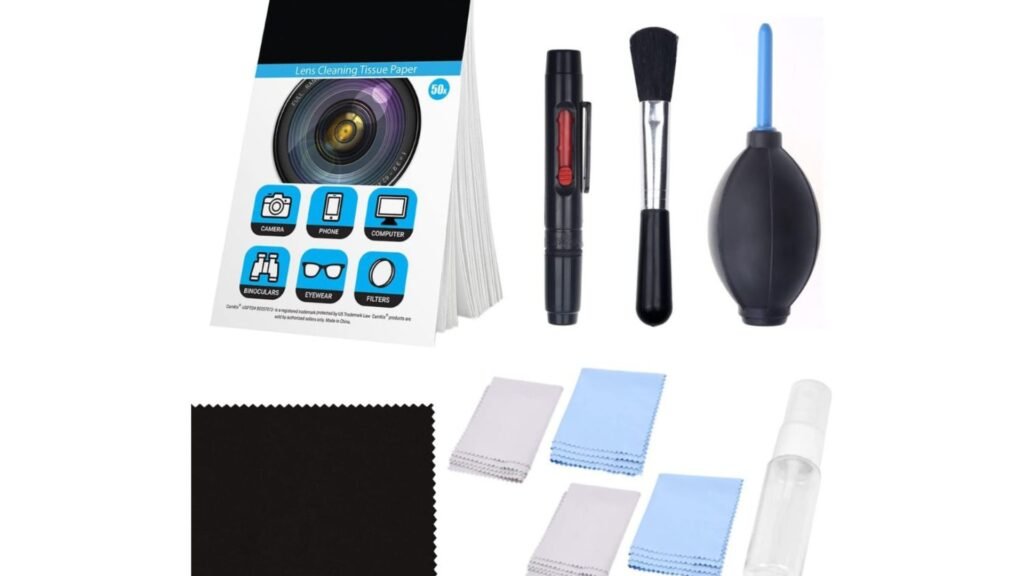
      This comprehensive kit includes a wide range of tools such as lens cleaning pens, lens brush, air blower, cleaning cloths, and lens cleaning solution. It’s suitable for cleaning cameras, lenses, filters, and other sensitive optical equipment.

      Nikon Cleaning Combo Kit

      Specifically designed for Nikon cameras and lenses, this kit includes a lens pen, air blower, microfiber cleaning cloth, and cleaning solution. It’s compact and portable, making it ideal for travel photographers.

      Zeiss Lens Cleaning Kit

      Zeiss is renowned for its high-quality optics, and their lens cleaning kit reflects this standard. It includes a lens cleaning spray, microfiber cloth, and 10 individually wrapped pre-moistened lens wipes. This kit is gentle yet effective for cleaning delicate lenses and filters.

      CamKix Professional Camera Cleaning Kit

      This kit comes with a variety of tools such as lens cleaning pen, air blower, double-sided lens cleaning cloth, and alcohol-free cleaning solution. It’s suitable for both DSLR and mirrorless cameras, providing a thorough cleaning experience.

      Giottos AA1900 Rocket Air Blaster

      The Giottos Rocket Air Blaster is a must-have for safely removing dust and debris from camera sensors, lenses, and other sensitive areas. Its ergonomic design and powerful air stream make it effective and safe to use.

      Photographic Solutions Sensor Swab Ultra Kit

      For those comfortable with sensor cleaning, this kit includes sensor swabs and Eclipse cleaning solution designed for safe and effective sensor maintenance. It’s essential for removing stubborn dust and particles from camera sensors.

      LensPen Pro Cleaning Kit

      LensPen offers a compact and convenient cleaning solution with their Pro Cleaning Kit. It includes a LensPen for cleaning lenses and filters, a MicroPro for eyepieces and viewfinders, and a MiniPro for smartphone lenses. It’s portable and easy to carry on the go.

      KoPa Lens and Screen Cleaning Kit

      This kit includes a lens cleaning pen, microfiber cleaning cloth, cleaning solution, and air blower. It’s suitable for cleaning lenses, screens, and other optical surfaces, providing a complete cleaning solution for photographers.

      Pacroban Camera Cleaning Kit

      Pacroban’s kit includes a lens cleaning pen, air blower, microfiber cleaning cloth, and cleaning solution. It’s designed for DSLR, mirrorless, and point-and-shoot cameras, offering a basic yet effective cleaning solution.

      LensPouch Microfiber Cleaning Cloth Set

      While not a full cleaning kit, LensPouch offers high-quality microfiber cleaning cloths in various sizes and colors. These cloths are ideal for daily maintenance and removing smudges, fingerprints, and dust from lenses and screens.

      Conclusion

      When choosing a camera cleaning kit, consider your specific needs, the type of camera gear you have, and the frequency of cleaning required. Regular maintenance using these kits will help you preserve the quality of your equipment and ensure optimal performance for years to come.

      More Details