Jul 3, 2024
Best Photography Editing Software for Mac Users

Having the right editing software can make all the difference, especially for Mac users who value seamless integration and performance. Whether you’re a professional photographer or an enthusiast looking to elevate your photo editing game, choosing the right software is crucial. Here’s a roundup of some of the best photography editing software options available for Mac users in 2024:
 Photography Editing Software for Mac Users

Adobe Lightroom Classic CC

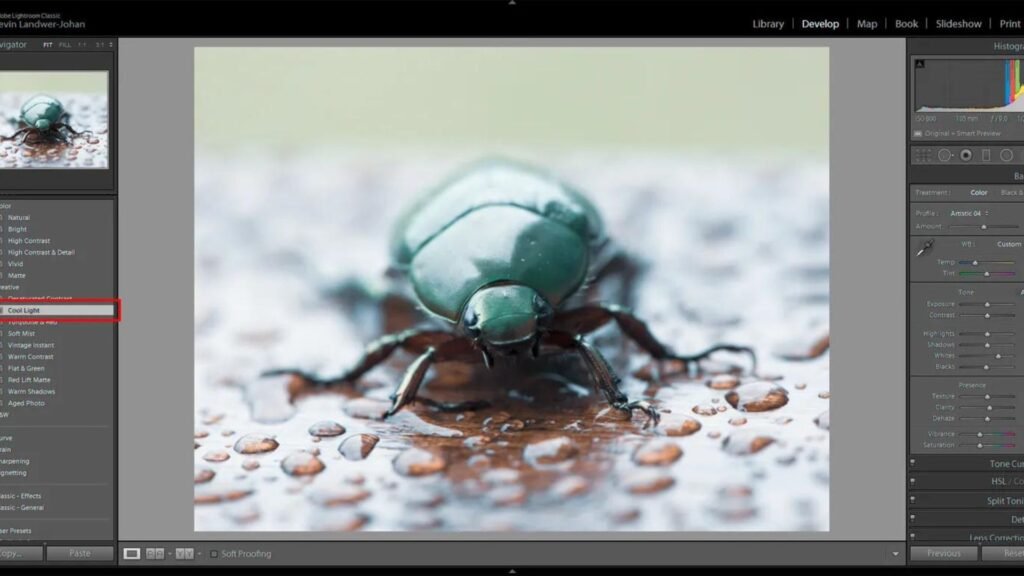
Adobe Lightroom Classic CC remains a favorite among photographers for its robust editing capabilities and organizational features. It offers non-destructive editing, a wide range of presets, and powerful tools for adjusting colors, exposure, and more. Lightroom’s seamless integration with Adobe Photoshop makes it a versatile choice for photographers of all levels.

Capture One Pro

Capture One Pro is known for its exceptional RAW processing capabilities and color grading tools. It provides precise control over color adjustments and boasts excellent tethering capabilities, making it popular among professional photographers. Capture One’s intuitive interface and customizable workflow cater well to Mac users seeking high-quality editing solutions.

Affinity Photo

Affinity Photo is gaining recognition for its affordability and powerful editing tools that rival industry standards. It offers features like advanced brush dynamics, HDR merging, and panorama stitching, all optimized for macOS. Affinity Photo’s one-time purchase model and regular updates make it a cost-effective alternative to subscription-based software.

Luminar AI

Luminar AI combines artificial intelligence with traditional editing tools to streamline workflow and enhance creativity. Mac users appreciate its user-friendly interface and AI-driven editing suggestions that simplify complex tasks. With features like AI Sky Replacement and Portrait Enhancer, Luminar AI is ideal for photographers looking to experiment with innovative editing techniques.

Pixelmator Pro

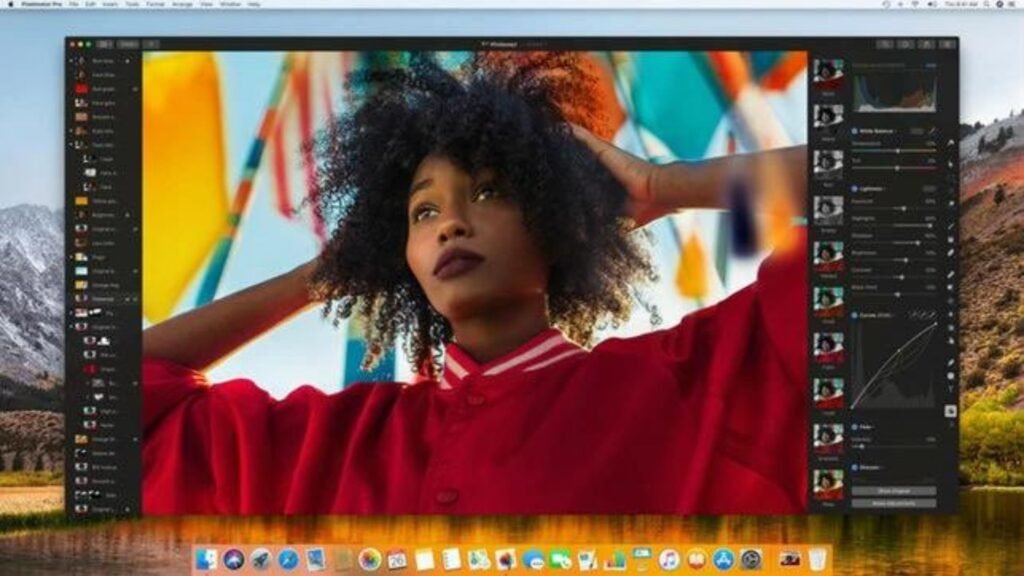
Pixelmator Pro is designed exclusively for macOS and offers a clean interface with powerful editing capabilities. It supports non-destructive editing, machine learning-enhanced image editing tools, and seamless integration with macOS features like iCloud and Continuity Camera. Pixelmator Pro’s affordability and performance make it a popular choice among Mac users.

DxO PhotoLab

DxO PhotoLab excels in RAW processing and optical corrections, making it a favorite among photographers who prioritize image quality. Its advanced noise reduction and lens correction tools ensure precise edits, while its customizable workspace and batch processing capabilities enhance productivity. DxO PhotoLab’s integration with macOS ensures smooth performance and efficient editing workflow.

Apple Photos

For Mac users seeking a simple yet effective editing solution, Apple Photos provides basic editing tools integrated into macOS. It offers features like auto-enhancement, cropping, and filters, ideal for quick edits and organizing your photo library. While not as advanced as dedicated editing software, Apple Photos is convenient for casual photographers and beginners.

Conclusion

Choosing the best photography editing software for Mac depends on your specific needs and editing style. Whether you prioritize professional-grade features, affordability, or user-friendly interfaces, there’s a software option tailored to enhance your editing experience on macOS. Evaluate these options based on your requirements and start transforming your photos into stunning works of art.

By selecting the right photography editing software for your Mac, you can unlock your creativity and achieve professional-quality results with every photograph.

More Details
Jul 3, 2024
How to Master the Art of Panning in Photography?

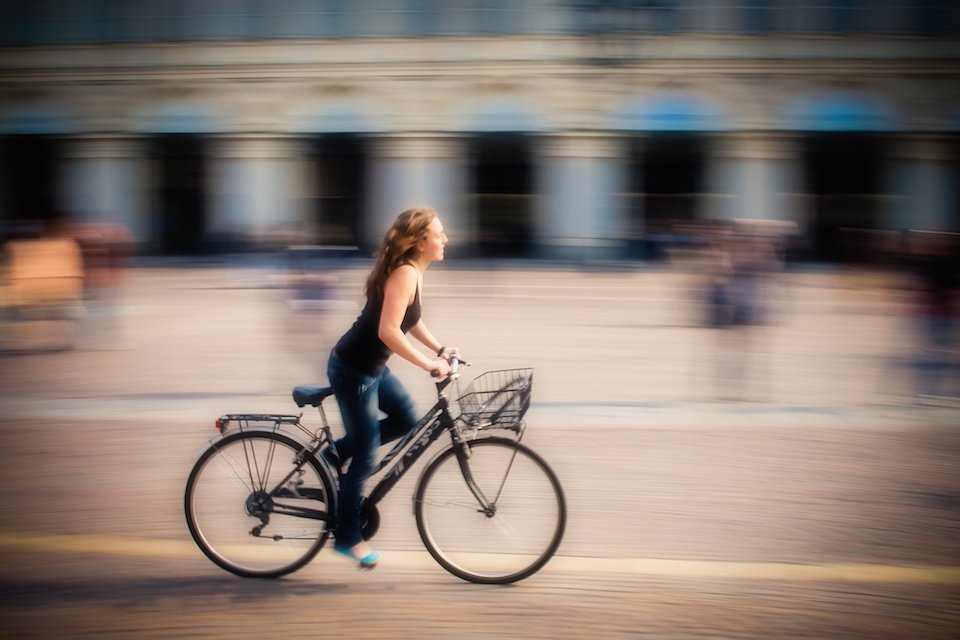
Panning in photography is an essential technique that allows you to capture the dynamic movement of a subject while keeping it in sharp focus against a blurred background. This technique not only adds a sense of motion and speed to your images but also enhances the visual impact of your photographs. Whether you’re photographing sports events, wildlife, or everyday street scenes, mastering the art of panning can elevate your photography skills to the next level. Let’s dive into the steps and tips to help you master panning in photography.

Understanding the Basics

Before you start practising panning in photography, it’s important to understand the basic principles. Panning involves tracking a moving subject with your camera while using a slower shutter speed. This combination keeps the subject in focus while the background becomes a blur of motion. The key to successful panning is synchronizing your camera’s movement with the speed of your subject.

Setting Up Your Camera

Choosing the right settings on your camera is crucial for effective panning in photography. Start by switching your camera to Shutter Priority mode (Tv or S mode) which allows you to control the shutter speed while the camera adjusts the aperture accordingly. A good starting point for shutter speed is around 1/30th to 1/60th of a second, but this can vary depending on the speed of your subject.

Choosing the Right Lens

The lens you use can significantly impact your success with panning in photography. A telephoto lens is often preferred because it allows you to maintain a comfortable distance from your subject while still filling the frame. Lenses with image stabilization (IS) or vibration reduction (VR) can also help reduce camera shake, making it easier to achieve sharp results.

Finding Your Subject

Selecting the right subject is another critical factor for mastering panning in photography. Look for subjects that move at a consistent speed, such as cyclists, runners, or cars. Predictable movement allows you to practice your panning technique without sudden changes in direction or speed.

Positioning Yourself

Your position relative to the moving subject can greatly influence your success with panning in photography. Stand parallel to the path of your subject to minimize changes in distance and movement direction. This position will help you maintain a smooth and steady panning motion.

Practicing the Motion

Panning in photography requires smooth and fluid camera movement. Begin by locking your elbows into your sides and using your torso to swivel as you track your subject. Keep your movements as smooth as possible, and avoid jerky or abrupt motions. It’s helpful to practice the motion without taking photos to get a feel for the rhythm and timing.

Focusing Techniques

Achieving a sharp focus on your subject is crucial for effective panning in photography. Switch your camera to continuous autofocus mode (AF-C or AI Servo) to allow the camera to adjust focus as the subject moves. Pre-focus on a point where you anticipate the subject will pass, then track the subject through your viewfinder and press the shutter button while maintaining a steady panning motion.

Timing Your Shot

Timing is everything in planning in photography. As you track your subject, press the shutter button smoothly and steadily. It’s often helpful to use burst mode, which allows you to capture a series of shots in quick succession. This increases your chances of getting a perfectly timed shot with the desired motion blur.

Experimenting with Shutter Speeds

Experimenting with different shutter speeds is essential for mastering panning in photography. Slower shutter speeds create more pronounced motion blur, while faster speeds can freeze the action too much. Adjust your shutter speed based on the speed of your subject and the desired effect. Remember, practice and experimentation are key to finding the right balance.

Reviewing and Adjusting

After each panning session, review your shots to see what worked and what didn’t. Pay attention to the sharpness of your subject and the quality of the motion blur in the background. Adjust your technique, camera settings, and positioning based on your observations. Over time, you’ll develop a better understanding of how to achieve the perfect panning shot.

Conclusion

Mastering the art of panning in photography takes practice, patience, and persistence. By understanding the basics, setting up your camera correctly, choosing the right subjects and lenses, and refining your technique, you’ll be well on your way to capturing stunning images that convey a sense of motion and energy. Remember, the key to success is practice. Keep experimenting, learning from your shots, and refining your skills. With dedication and effort, you’ll master panning in photography and add a powerful technique to your photographic repertoire.

More Details
Jul 3, 2024
How to Plan a Photography Trip

Planning a photography trip involves careful consideration of locations, logistics, gear, and timing to ensure you capture memorable images and make the most of your experience. Here’s a step-by-step guide on how to plan a photography trip effectively:

Define Your Objectives

  • Determine the purpose and goals of your trip. Are you focusing on landscape photography, wildlife, street photography, or a specific theme?
  • Research destinations that align with your interests and photographic style.

Choose Your Destination

  • Research potential locations based on photographic opportunities, seasons, and accessibility.
  • Consider factors such as natural landmarks, cultural sites, local events, and lighting conditions that may influence your photography.

Research and Plan Shot Lists

  • Create a shot list or storyboard to outline specific images or themes you want to capture.
  • Research iconic landmarks, viewpoints, and off-the-beaten-path locations that offer unique photographic opportunities.

Check Weather and Seasonal Conditions

  • Review weather forecasts and seasonal conditions for your chosen destination.
  • Plan your trip during seasons that offer optimal lighting, wildlife activity, or unique weather patterns conducive to photography.

Plan Travel and Logistics

  • Arrange transportation, including flights, car rentals, or local transportation options.
  • Book accommodations that are conveniently located to photography spots or offer unique views.

Pack Essential Gear

  • Select photography gear based on your planned activities and locations.
  • Pack camera bodies, lenses (wide-angle, telephoto, macro), tripod, filters, memory cards, batteries, chargers, and cleaning kit.
  • Consider weather protection gear such as rain covers and lens hoods.

Study Local Laws and Permits

  • Check if permits or permissions are required for photography in certain locations or for specific activities (e.g., national parks, private properties, cultural sites).
  • Respect local customs and regulations regarding photography and privacy.

Create a Flexible Itinerary

  • Plan a flexible itinerary that allows time for exploration and unexpected discoveries.
  • Prioritize photography during optimal lighting conditions, such as sunrise and sunset.

Backup and Storage

  • Bring backup storage devices (external hard drives, cloud storage) to safely store your images during the trip.
  • Have a system for organizing and backing up photos daily to avoid loss.

Embrace Local Culture and Experience

Immerse yourself in the local culture and environment to capture authentic and compelling images. – Interact with locals, attend cultural events, and explore off-the-beaten-path locations for unique photographic opportunities.

Review and Edit Photos

Allocate time for reviewing and editing photos during your trip or upon your return. – Share your best images with friends, family, or online communities to showcase your experience.

By following these steps, you can effectively plan and execute a photography trip that allows you to capture stunning images, explore new environments, and create lasting memories. Adjust your plans based on feedback from fellow photographers or local experts to enhance your photography experience further.

More Details
Jul 3, 2024
Tips for Editing Low-Light Photography

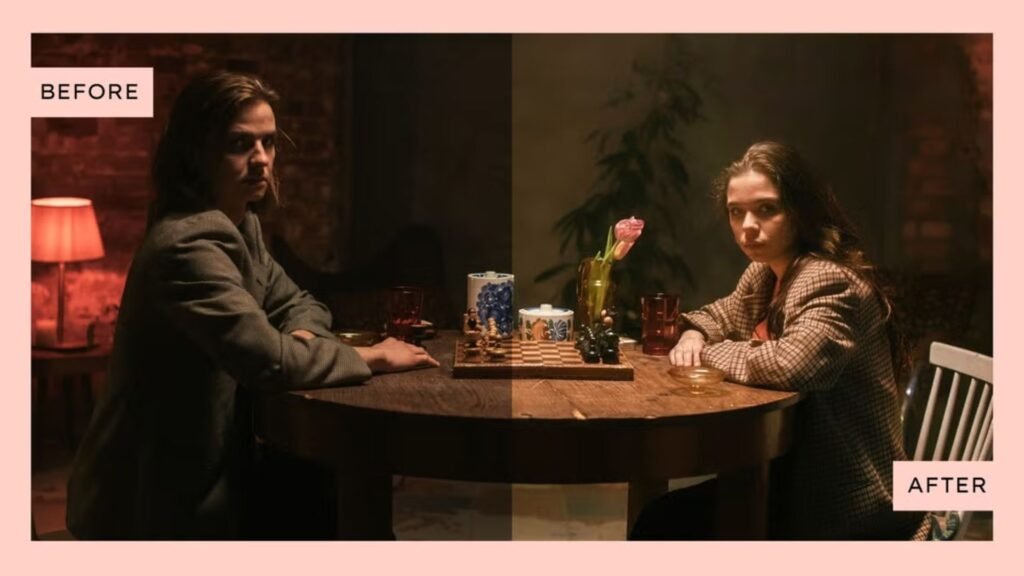
Editing low-light photography requires careful attention to detail and specific techniques to bring out the best in your images. Here are some essential tips to help you enhance your low-light photos during the editing process:

Editing Low-Light Photography

Understanding Low-Light Photography Challenges

Low-light photography often results in images with noise, lack of detail, and sometimes incorrect white balance. These challenges can be effectively addressed through editing techniques tailored to low-light conditions.

Tips for Editing Low-Light Photography

  1. Correct Exposure and White Balance:
    • Start by adjusting exposure and white balance to correct any underexposure or color casts caused by low light. Use tools like exposure adjustment sliders and white balance presets to achieve a natural look.
  2. Reduce Noise:
    • Noise is a common issue in low-light photos. Use noise reduction tools in your editing software to smoothen out grainy textures without losing too much detail. Balance noise reduction carefully to maintain sharpness.
  3. Adjust Shadows and Highlights:
    • Low-light photos often have deep shadows and bright highlights. Use shadow and highlight adjustments to recover details in these areas. Gradually adjust these sliders to maintain a natural balance.
  4. Enhance Details and Sharpness:
    • Increase clarity and sharpness to bring out details that may be obscured in low-light conditions. Use local adjustment tools or sharpening filters sparingly to avoid introducing artifacts.
  5. Use Curves and Levels for Contrast:
    • Fine-tune contrast using curves or levels adjustments. Adjusting curves allows you to control contrast in specific tonal ranges, enhancing the overall depth of your photo.
  6. Adjust Saturation and Vibrance:
    • Enhance colors by adjusting saturation and vibrance sliders. Low-light conditions can sometimes desaturate colors, so increase these settings subtly to make your photo more vibrant.
  7. Consider Black and White Conversion:
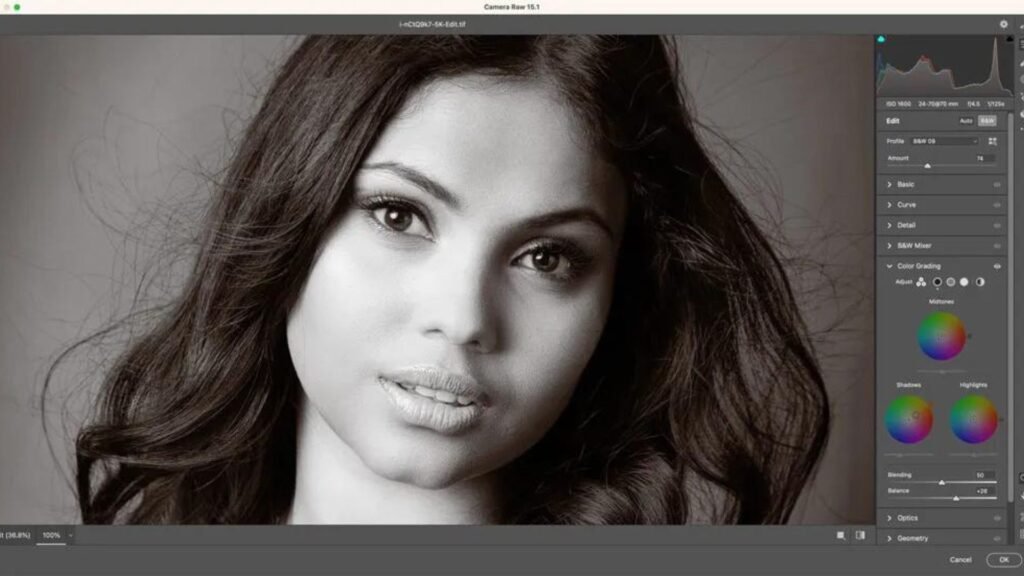
    • If colors appear dull or muted in low-light photos, consider converting the image to black and white. This can emphasize textures and contrast, creating a striking monochromatic composition.
  8. Use Dodge and Burn Techniques:
    • Dodge (lighten) and burn (darken) specific areas of your photo to add depth and emphasize focal points. This technique helps to direct the viewer’s attention and enhance overall composition.
  9. Experiment with Filters and Presets:
    • Explore filters and presets designed for low-light photography. These can provide a quick starting point for editing and help achieve a desired mood or style.

Conclusion

Editing low-light photography requires a combination of technical adjustments and artistic decisions to bring out the best in your photos. By understanding the challenges unique to low-light conditions and applying these tips during the editing process, you can enhance your images and create compelling visuals that capture the atmosphere and mood of the scene.

Whether you’re adjusting exposure, reducing noise, or fine-tuning colors, each step in the editing workflow plays a crucial role in transforming your low-light photos into stunning works of art.

More Details
Jul 3, 2024
Understanding Golden Hour Photography

Golden hour photography is a captivating art form that revolves around capturing the soft, warm light that occurs shortly after sunrise and before sunset. This guide delves into the essence of golden hour photography, offering insights into its appeal and techniques for maximizing its visual impact.

What is Golden Hour Photography?

Golden hour refers to the period around sunrise and sunset when the sun is low in the sky, creating a soft, diffused light that bathes everything in a warm glow. This magical light is highly sought after by photographers for its ability to transform ordinary scenes into extraordinary compositions filled with warmth and depth.

Benefits of Shooting During Golden Hour

Photographers are drawn to the golden hour for several compelling reasons. Firstly, the soft, directional light during this time minimizes harsh shadows and highlights, resulting in a more evenly illuminated scene. This softness also enhances textures and details, making landscapes appear more vivid and captivating. Colours during the golden hour are richer and more saturated, adding a natural warmth that brings out the beauty of any subject. For portraits, the warm tones of a golden hour create flattering skin tones and a gentle, luminous quality that enhances the overall mood of the photograph.

Techniques for Golden Hour Photography

Successfully capturing the essence of the golden hour requires careful planning and execution:

  • Timing: Timing is crucial; plan your shoot around sunrise or sunset to make the most of the soft, golden light. Utilize apps or websites to pinpoint the exact timing based on your location.
  • Composition: Incorporate elements such as silhouettes, leading lines, or foreground interest to add depth and interest to your photographs during golden hour.
  • Exposure Management: Adjust your camera settings to achieve a balanced exposure that preserves the warm tones and details of the scene. Utilize spot metering to accurately expose your subject against the backdrop of the golden sky.
  • Use of Filters: Consider using graduated neutral density filters to balance the exposure between the bright sky and darker foreground, especially during sunset or sunrise shots.

Capturing Different Subjects in Golden Hour

Golden Hour offers versatility across various genres of photography:

  • Landscape Photography: Capture expansive landscapes with enhanced colours and dramatic lighting that emphasize the textures and contours of the terrain.
  • Portrait Photography: Leverage the soft, flattering light of golden hour to create intimate portraits with gentle shadows and warm, glowing skin tones.
  • Cityscapes: Golden Hour transforms urban scenes into magical vistas with warm light reflecting off buildings and streets, enhancing the architectural details and ambience.
  • Nature and Wildlife: Use golden hour to capture the beauty of natural environments, accentuating the hues of flora and fauna and bringing out intricate details in wildlife photography.

Editing Golden Hour Photos

Post-processing is an essential step in enhancing the beauty of golden hour images:

  • White Balance Adjustment: Fine-tune the white balance settings to accentuate the warm tones and correct any colour casts introduced by the golden light.
  • Enhancement of Contrast and Colors: Use editing software to increase contrast, saturation, and vibrancy to intensify the colours and make the golden hour hues pop.
  • Noise Reduction: Address noise issues that may arise from shooting at lower light levels during sunset or sunrise, ensuring a clean and polished final image.

Conclusion

In conclusion, golden hour photography is more than just capturing light; it’s about embracing the magic and beauty that this unique time of day offers. By understanding the characteristics of golden hour light, mastering essential shooting techniques, and employing effective editing strategies, photographers can elevate their craft and create compelling, evocative images that resonate with viewers. Embrace the enchantment of the golden hour and let its warm embrace inspire your photography journey.

More Details
Jul 3, 2024
Best Photography Gear for Outdoor Adventures

When preparing photography gear for outdoor adventures, it’s crucial to prioritize portability, durability, weather resistance, and versatility. Here’s a selection of essential photography gear ideal for outdoor adventures:

Camera Body

Choose a camera body that is weather-sealed and rugged, capable of handling various outdoor conditions. Options like the Canon EOS R5 or the Sony Alpha a7R IV offer excellent image quality and durability.

Lenses

  • Wide-Angle Zoom Lens: Ideal for capturing landscapes and expansive outdoor scenes. Consider lenses like the Nikon AF-S NIKKOR 16-35mm f/4G ED VR or the Canon RF 15-35mm f/2.8L IS USM.
  • Telephoto Zoom Lens: For wildlife and distant subjects. Options include the Sony FE 100-400mm f/4.5-5.6 GM OSS or the Nikon AF-S NIKKOR 200-500mm f/5.6E ED VR.

Tripod

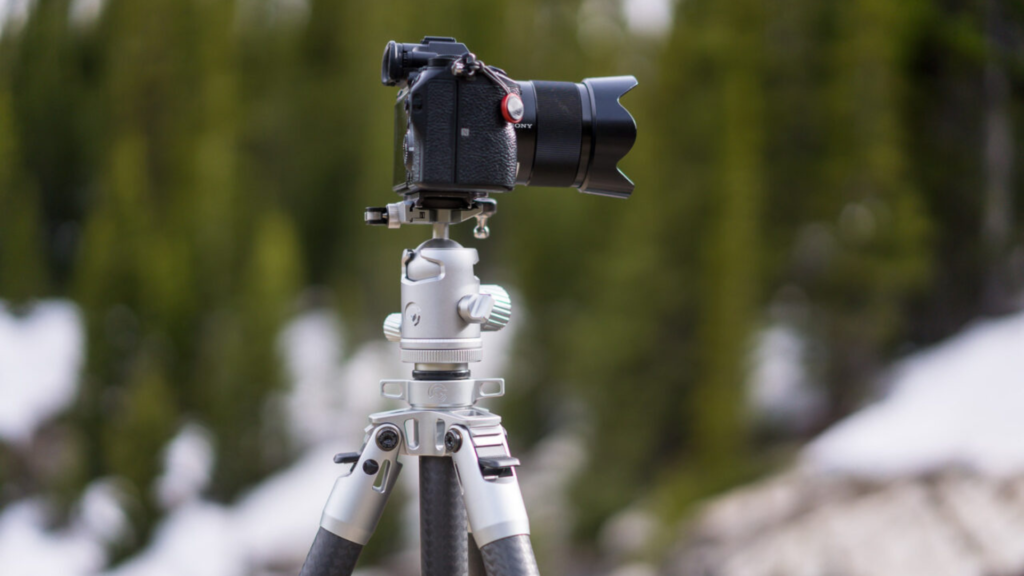
A lightweight and sturdy tripod such as the Manfrotto Befree Advanced Travel Tripod provides stability for long exposures, landscape photography, and video recording.

Camera Backpack

Choose a backpack that offers comfort, protection, and easy access to your gear. Look for features like weather resistance, padded compartments, and adjustable dividers. The Peak Design Travel Backpack or the Lowepro ProTactic BP 450 AW II are excellent choices.

Weather Protection

  • Rain Cover: Ensure your camera backpack includes a rain cover or invest in a dedicated rain sleeve to protect your gear during unexpected weather changes.
  • Lens Filters: UV filters and polarizers can protect your lenses from dust, moisture, and scratches while enhancing image quality in bright conditions.

Portable Power and Charging

Carry extra batteries and a portable power bank to keep your devices charged, especially when shooting in remote locations without access to electricity.

Lighting and Reflectors

Consider portable LED lights or reflectors for adding fill light or overcoming harsh sunlight during outdoor shoots.

Cleaning Kit

Pack a camera cleaning kit with essentials like a lens pen, microfiber cloths, and a blower to maintain your gear and remove dust and debris.

GPS Device or Smartphone App

Use a GPS device or smartphone app to track locations and geotag your photos, enhancing the storytelling aspect of your outdoor adventures.

Personal Safety Gear

Don’t forget essentials like sunscreen, insect repellent, and appropriate clothing for outdoor comfort and protection.

    By selecting gear that prioritizes durability, weather resistance, and versatility, you can ensure that your photography equipment enhances rather than hinders your outdoor adventures. Adjust your gear based on the specific type of outdoor photography you plan to pursue, whether it’s landscape, wildlife, sports, or adventure photography.

    More Details
    Jul 3, 2024
    Best Photo Editing Monitors for Precise Color Correction

    In the world of photography and graphic design, having a reliable monitor for color correction is crucial. Whether you’re a professional photographer, a graphic designer, or a hobbyist, the right monitor can make a significant difference in how accurately you can edit and finalize your photos. Here, we explore some of the best photo editing monitors available in 2024 that are renowned for their precise color accuracy and other essential features.

    Photo Editing Monitors for Precise Color Correction

    Introduction to Photo Editing Monitors

    When it comes to editing photos, having a monitor that accurately displays colors and details is essential. Photo editing monitors are specially designed to reproduce colors faithfully, ensuring that what you see on the screen is as close to reality as possible. This accuracy is vital for photographers and designers who need to make critical adjustments to brightness, contrast, color balance, and other aspects of their images.

    Key Features to Consider in a Photo Editing Monitor

    Before diving into our top picks, let’s discuss the essential features to look for in a photo editing monitor:

    1. Color Accuracy: Look for monitors that support high color accuracy, typically measured by their ability to display a wide range of colors and maintain consistency across different viewing angles.
    2. Resolution: Higher resolution monitors (such as 4K or even 5K) provide more detail, which is beneficial when editing photos with intricate details.
    3. Panel Type: IPS (In-Plane Switching) panels are preferred for photo editing due to their superior color reproduction and wide viewing angles compared to TN (Twisted Nematic) or VA (Vertical Alignment) panels.
    4. Brightness and Contrast: Monitors with high brightness levels and excellent contrast ratios ensure that details in both dark and bright areas of your photos are accurately represented.
    5. Calibration: Some monitors come with built-in calibration tools or support external calibration devices to maintain color accuracy over time.

    Top Picks for 2024: Best Photo Editing Monitors

    Now, let’s explore some of the best photo editing monitors available this year:

    1. Dell UltraSharp U2720Q

    • Key Features: 27-inch 4K UHD resolution, IPS panel, 99% sRGB color coverage, factory calibrated for color accuracy.
    • Why We Love It: Exceptional color accuracy out of the box, wide viewing angles, and USB-C connectivity for easy laptop docking.

    2. BenQ SW271

    • Key Features: 27-inch 4K HDR resolution, IPS panel with AQCOLOR technology, 99% Adobe RGB color space coverage, hardware calibration support.
    • Why We Love It: Designed for photographers with HDR support, excellent color accuracy, and advanced shading hood included.

    3. ASUS ProArt PA32UCX

    • Key Features: 32-inch 4K HDR resolution, IPS panel with Mini LED backlighting, 99.5% Adobe RGB color space coverage, HDR10 and Dolby Vision support.
    • Why We Love It: Ultimate color precision with Mini LED technology, 1,200 nits peak brightness, and professional-grade calibration options.

    Conclusion

    Choosing the right photo editing monitor is crucial for achieving accurate color correction and ensuring your photos look their best across various devices and print media. Consider your budget, workflow needs, and the level of color precision required when selecting a monitor. Each of the monitors mentioned above offers unique features tailored to photographers and graphic designers looking to elevate their editing process.

    Whether you prioritize color accuracy, resolution, or HDR capabilities, investing in a high-quality photo editing monitor will undoubtedly enhance your workflow and the quality of your final images.

    More Details
    Jul 3, 2024
    Tips for Editing RAW Photography Files

    Editing RAW photography files is essential for photographers who seek maximum control over their images. RAW files contain unprocessed data directly from the camera sensor, preserving the highest level of detail and flexibility for adjustments. Whether you’re new to RAW editing or looking to refine your skills, mastering these tips will help you achieve professional-quality results.

    Editing RAW Photography Files

    Understanding RAW Files

    RAW files are different from JPEGs or other compressed formats because they retain all the original data captured by the camera sensor. This allows photographers to make precise adjustments to exposure, white balance, sharpness, and more without compromising image quality.

    Essential Tips for Editing RAW Photography Files

    1. Utilize Professional RAW Converters

    Choosing the right RAW processing software is crucial. Adobe Camera Raw, Capture One, and DxO PhotoLab are popular choices among photographers for their advanced editing capabilities and excellent image quality retention. These tools offer a range of adjustment options tailored specifically for RAW files.

    2. Adjust Exposure and White Balance

    Exposure: Correct exposure errors and fine-tune brightness levels using exposure sliders. RAW files allow you to recover details in overexposed highlights or underexposed shadows more effectively than JPEGs.

    White Balance: Achieve accurate color representation by adjusting temperature and tint sliders. RAW files preserve more color information, making it easier to correct color casts and achieve natural-looking tones.

    3. Enhance Details and Sharpness

    Sharpening: Use sharpening tools to enhance image clarity and sharpness. Adjust sharpening amount, radius, and detail sliders carefully to avoid introducing noise.

    Noise Reduction: Apply noise reduction selectively to smooth out grainy textures, especially in low-light or high ISO photos. Strike a balance between noise reduction and preserving image sharpness.

    4. Fine-Tune Tone and Contrast

    Tone Curves: Use tone curves to adjust contrast and fine-tune tonal range. Experiment with curves for highlights, shadows, and midtones to add depth and drama to your photos.

    HDR Techniques: Merge multiple exposures or use HDR (High Dynamic Range) techniques to capture a wider range of tones and details in challenging lighting conditions.

    5. Color Correction and Vibrancy

    HSL Adjustments: Modify individual colors using hue, saturation, and luminance sliders. Refine color intensity and balance to enhance image vibrancy and visual impact.

    Creative Color Grading: Experiment with split-toning or color grading techniques to add mood and atmosphere to your photos. Adjust color balances to evoke specific emotions or enhance storytelling elements.

    6. Utilize Presets and Batch Processing

    Presets: Save time by using pre-set editing profiles or creating your own. Apply presets to multiple photos to maintain consistency in style and color grading across your portfolio.

    Batch Processing: Edit multiple RAW files simultaneously to streamline your workflow. RAW converters often include batch processing features that allow you to apply edits uniformly across selected photos, saving you valuable time.

    Conclusion

    Editing RAW photography files offers photographers unparalleled control and flexibility in post-processing. By mastering these tips and techniques, you can enhance image quality, correct exposure and color balance, and bring out the best in your photos. Experiment with different tools, practice regularly, and develop a personalized editing style to elevate your photography to new heights with RAW files. Embrace the creative possibilities that RAW editing provides and enjoy the process of refining your images to achieve stunning, professional results.

    More Details
    Jul 3, 2024
    Tips for Better Exposure in Photography

    Understanding exposure in photography is crucial for capturing well-balanced and visually appealing images. It refers to how light enters and interacts with the camera sensor to create an image. Achieving optimal exposure ensures that your photos are neither too bright (overexposed) nor too dark (underexposed). Let’s delve into some essential tips to help you master exposure in your photography journey.

    Importance of Proper Exposure

    Proper exposure is fundamental because it directly affects the brightness and clarity of your photos. It determines the details in shadows and highlights, impacting the overall mood and tone of your images. Whether you’re photographing landscapes, portraits, or events, mastering exposure allows you to convey your intended message effectively.

    Tip 1: Master Your Camera’s Exposure Modes

    Modern cameras offer various exposure modes such as aperture priority, shutter priority, and manual mode. Understanding these modes is essential for controlling exposure settings effectively. Aperture priority lets you adjust the aperture while the camera selects the corresponding shutter speed, ideal for controlling depth of field. Shutter priority allows control over shutter speed while the camera adjusts the aperture, great for capturing motion.

    Tip 2: Use Exposure Compensation Wisely

    Exposure compensation is a useful tool for adjusting exposure beyond the camera’s automatic settings. By adjusting this setting, you can make your photos brighter or darker without switching to manual mode. For example, when photographing a bright scene, dialing in negative exposure compensation helps prevent overexposure, preserving details in highlights.

    Tip 3: Understand the Histogram

    The histogram is a graphical representation of the exposure levels in your image. It shows the distribution of tones from shadows to highlights. Learning to read the histogram helps ensure you have balanced exposure. A well-balanced histogram shows a spread of tones without clipping shadows or highlights, indicating a well-exposed image.

    Tip 4: Utilize Exposure Bracketing

    Exposure bracketing is a technique where you take several shots of the same scene at different exposure levels. This allows you to capture a range of exposures from underexposed to overexposed. It is particularly useful in tricky lighting conditions or when you’re unsure of the correct exposure. Later, you can choose the best-exposed shot during editing.

    Tip 5: Use Natural Light to Your Advantage

    Natural light plays a crucial role in exposure. Understanding the quality and direction of light helps you achieve the desired exposure effects. For instance, soft, diffused light on a cloudy day is ideal for even exposure without harsh shadows, while direct sunlight can create strong contrasts and highlights.

    Tip 6: Post-Processing for Exposure Correction

    Post-processing software like Adobe Lightroom or Photoshop offers powerful tools for adjusting exposure. These tools allow you to fine-tune exposure, recover details from shadows, and tone down highlights. They are invaluable for correcting exposure mistakes and achieving the desired look in your photos.

    Tip 7: Practice and Experiment

    Like any skill, mastering exposure in photography requires practice. Experimenting with different exposure settings in various lighting conditions helps you understand their impact on your photos. Don’t be afraid to make mistakes; they are opportunities to learn and improve your photography skills.

    Conclusion

    In conclusion, mastering exposure in photography is crucial for producing captivating and well-balanced images that effectively convey your artistic vision. By familiarizing yourself with various exposure modes such as aperture priority and shutter priority, using exposure compensation to fine-tune brightness levels, interpreting histograms to ensure proper tonal distribution, and harnessing the qualities of natural light, you can consistently achieve optimal exposure in your photographs. Remember, continuous practice and experimentation are key to refining your skills and adapting to different shooting conditions, enabling you to capture stunning images that stand out for their clarity, detail, and emotional impact. Strive to understand the nuances of exposure, as it forms the foundation for compelling visual storytelling in photography.

    More Details
    Jul 3, 2024
    Best Photography Editing Techniques for Black and White Photos

    Black and white photography is timeless, offering a unique perspective that emphasizes light, shadow, and composition. Editing these photos requires attention to detail and an understanding of how different adjustments affect the final image. Here are some essential techniques to elevate your black and white photography editing skills:

    Photography Editing Techniques for Black and White Photos

    1. Adjusting Contrast and Tones

    • Contrast Adjustment: Enhance contrast to make your blacks deeper and whites brighter. Use Lightroom’s contrast slider to adjust overall contrast, ensuring a balanced tonal range without losing detail in shadows or highlights.
    • Tonal Curves: Utilize the Tone Curve tool to fine-tune contrast and tones in specific areas of your photo. Adjusting the curve allows you to control highlights, shadows, and midtones individually for precise tonal adjustments.

    2. Enhancing Texture and Detail

    • Clarity and Texture: Increase clarity to enhance midtone contrast and bring out textures in your black and white photos. Adjust the texture slider to emphasize fine details without oversharpening the image, creating a more tactile appearance.
    • Sharpening: Use the sharpening tool sparingly to enhance details and edges. Adjust the amount, radius, and detail sliders in Lightroom’s Detail panel to achieve crispness while avoiding noise and artifacts.

    3. Utilizing Filters and Presets

    • Black and White Filters: Experiment with different black and white presets or filters to achieve different moods and styles. Lightroom offers various presets that simulate classic black and white film types or create dramatic contrasts.
    • Gradient Filters: Apply gradient filters to adjust exposure and contrast selectively. Use these filters to darken skies, lighten foregrounds, or enhance specific areas of your photo without affecting the entire image.

    4. Playing with Highlights and Shadows

    • Highlight and Shadow Recovery: Recover details in overexposed highlights or underexposed shadows using Lightroom’s highlight and shadow recovery sliders. Fine-tune these adjustments to maintain a balanced tonal range and preserve important details.

    5. Fine-Tuning with HSL Adjustments

    • Hue, Saturation, and Luminance (HSL): Use the HSL panel to control the luminance and contrast of different colors in your black and white photos. Adjusting these sliders allows you to manipulate how colors convert to shades of gray, enhancing tonal separation and overall impact.

    6. Cropping and Composition

    • Aspect Ratios: Experiment with different aspect ratios to enhance the composition of your black and white photos. Consider the rule of thirds, leading lines, and symmetry to create visually compelling images.

    Conclusion

    Editing black and white photography involves more than simply converting color images to grayscale. It requires a thoughtful approach to contrast, tones, textures, and composition to convey emotion and narrative effectively. By mastering these editing techniques in programs like Adobe Lightroom, you can transform ordinary photos into stunning black and white masterpieces. Remember to experiment, practice regularly, and develop your unique editing style to achieve captivating results in your black and white photography journey.

    More Details