Jul 3, 2024
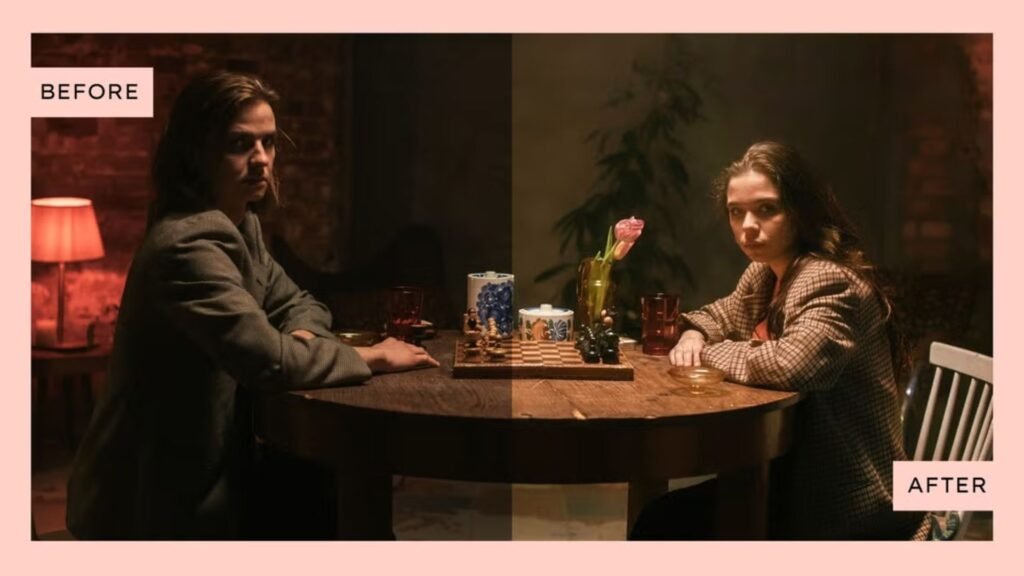
Tips for Editing Low-Light Photography
Editing low-light photography requires careful attention to detail and specific techniques to bring out the best in your images. Here are some essential tips to help you enhance your low-light photos during the editing process:
Understanding Low-Light Photography Challenges
Low-light photography often results in images with noise, lack of detail, and sometimes incorrect white balance. These challenges can be effectively addressed through editing techniques tailored to low-light conditions.
Tips for Editing Low-Light Photography
- Correct Exposure and White Balance:
- Start by adjusting exposure and white balance to correct any underexposure or color casts caused by low light. Use tools like exposure adjustment sliders and white balance presets to achieve a natural look.
- Reduce Noise:
- Noise is a common issue in low-light photos. Use noise reduction tools in your editing software to smoothen out grainy textures without losing too much detail. Balance noise reduction carefully to maintain sharpness.
- Adjust Shadows and Highlights:
- Low-light photos often have deep shadows and bright highlights. Use shadow and highlight adjustments to recover details in these areas. Gradually adjust these sliders to maintain a natural balance.
- Enhance Details and Sharpness:
- Increase clarity and sharpness to bring out details that may be obscured in low-light conditions. Use local adjustment tools or sharpening filters sparingly to avoid introducing artifacts.
- Use Curves and Levels for Contrast:
- Fine-tune contrast using curves or levels adjustments. Adjusting curves allows you to control contrast in specific tonal ranges, enhancing the overall depth of your photo.
- Adjust Saturation and Vibrance:
- Enhance colors by adjusting saturation and vibrance sliders. Low-light conditions can sometimes desaturate colors, so increase these settings subtly to make your photo more vibrant.
- Consider Black and White Conversion:
- If colors appear dull or muted in low-light photos, consider converting the image to black and white. This can emphasize textures and contrast, creating a striking monochromatic composition.
- Use Dodge and Burn Techniques:
- Dodge (lighten) and burn (darken) specific areas of your photo to add depth and emphasize focal points. This technique helps to direct the viewer’s attention and enhance overall composition.
- Experiment with Filters and Presets:
- Explore filters and presets designed for low-light photography. These can provide a quick starting point for editing and help achieve a desired mood or style.
Conclusion
Editing low-light photography requires a combination of technical adjustments and artistic decisions to bring out the best in your photos. By understanding the challenges unique to low-light conditions and applying these tips during the editing process, you can enhance your images and create compelling visuals that capture the atmosphere and mood of the scene.
Whether you’re adjusting exposure, reducing noise, or fine-tuning colors, each step in the editing workflow plays a crucial role in transforming your low-light photos into stunning works of art.
More Details