Jul 3, 2024
Tips for Portrait Photography Lighting
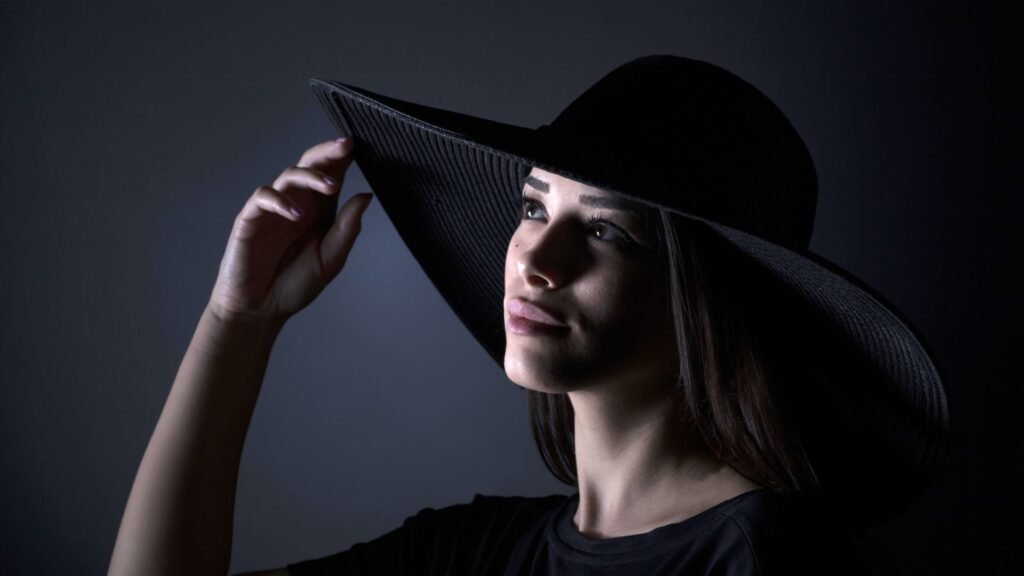
Lighting is one of the most crucial elements in portrait photography, as it shapes the subject, creates mood, and highlights features. Here are some essential tips for mastering lighting in portrait photography:

Understand Natural Light
Natural light is often the best and most readily available light source for portrait photography. The quality of natural light changes throughout the day, with golden hours (shortly after sunrise and before sunset) providing soft, warm light that is flattering for portraits. Midday sun can be harsh, creating strong shadows; in these cases, find open shade or use diffusers to soften the light.
Use Reflectors
Reflectors are inexpensive and highly effective tools for manipulating light. They can bounce light back onto the subject, filling in shadows and providing a more balanced illumination. Silver reflectors provide a strong, crisp light, while gold reflectors add a warm tone. White reflectors give a soft, neutral light, and black reflectors can be used to deepen shadows.
Experiment with Backlighting
Backlighting can create a beautiful halo effect around the subject, especially when the light source is the sun. Position the subject with their back to the light and adjust your exposure to avoid overexposing the background. You may need to use a reflector or fill light to illuminate the subject’s face and avoid them appearing as a silhouette.
Use Softboxes and Umbrellas
Softboxes and umbrellas are essential tools for studio lighting. They diffuse light from a flash or continuous light source, creating soft, even illumination. Softboxes provide more directional light, while umbrellas spread light over a wider area. Both are excellent for reducing harsh shadows and creating flattering light for portraits.
Try Rembrandt Lighting
Rembrandt lighting is a classic technique named after the painter Rembrandt, known for his dramatic use of light and shadow. To achieve this, position the main light source at about 45 degrees from the subject and slightly above eye level. This creates a triangular patch of light on the cheek opposite the light source, adding depth and dimension to the portrait.
Use a Hair Light or Rim Light
A hair light or rim light is placed behind the subject, aimed at the back of the head or shoulders. This adds separation between the subject and the background, giving a three-dimensional feel to the image. It also adds a touch of glamour by highlighting the edges of the subject’s hair and shoulders.
Control Light with Grids and Snoots
Grids and snoots are modifiers that control the spread of light, creating more focused and directional illumination. Grids attach to softboxes or lights, narrowing the beam and reducing light spill. Snoots create a spotlight effect, directing light precisely where you want it. Both tools are useful for creating dramatic lighting and emphasizing specific parts of the portrait.
Use Catchlights
Catchlights are reflections of the light source in the subject’s eyes, adding life and sparkle to the portrait. Position your light source to ensure that catchlights are visible. They are typically placed at the 10 or 2 o’clock positions within the eyes, which is often the most natural and aesthetically pleasing placement.
Experiment with Color Gels
Color gels are transparent colored materials placed over lights to change the color of the illumination. They can add a creative touch to your portraits by altering the mood and atmosphere. Use gels subtly to enhance skin tones or dramatically to create artistic and surreal effects.
Balance Ambient and Artificial Light
When shooting in environments with existing light sources, balance ambient light with your artificial lighting. This can be achieved by adjusting the power of your flash or continuous light and using the camera’s exposure settings. Balancing the two light sources ensures that the subject is well-lit without overexposing or underexposing the background.
Use Multiple Light Sources
For more complex lighting setups, use multiple light sources to create a well-rounded portrait. A common three-point lighting setup includes a key light (main light source), a fill light (to reduce shadows), and a backlight (to separate the subject from the background). This setup provides depth and dimension to the portrait, creating a professional look.
Practice and Experiment
Mastering lighting in portrait photography requires practice and experimentation. Try different lighting setups, angles, and modifiers to see how they affect your portraits. Don’t be afraid to break traditional lighting rules and develop your unique style.
In conclusion, understanding and controlling light is essential for creating stunning portraits. By utilizing natural light, reflectors, softboxes, and various lighting techniques, you can enhance your portrait photography and capture beautiful, compelling images.
More Details