Jul 3, 2024
Tips for Photography Composition with Lines

Lines are powerful compositional elements in photography. They guide the viewer’s eye, create depth, and can convey movement, structure, and emotion. Here are some tips on how to effectively use lines in your photography compositions.

Understand Different Types of Lines

There are several types of lines you can use in your compositions, each with its unique impact:

  • Horizontal Lines: Convey stability, tranquility, and calmness. They often work well in landscape photography.
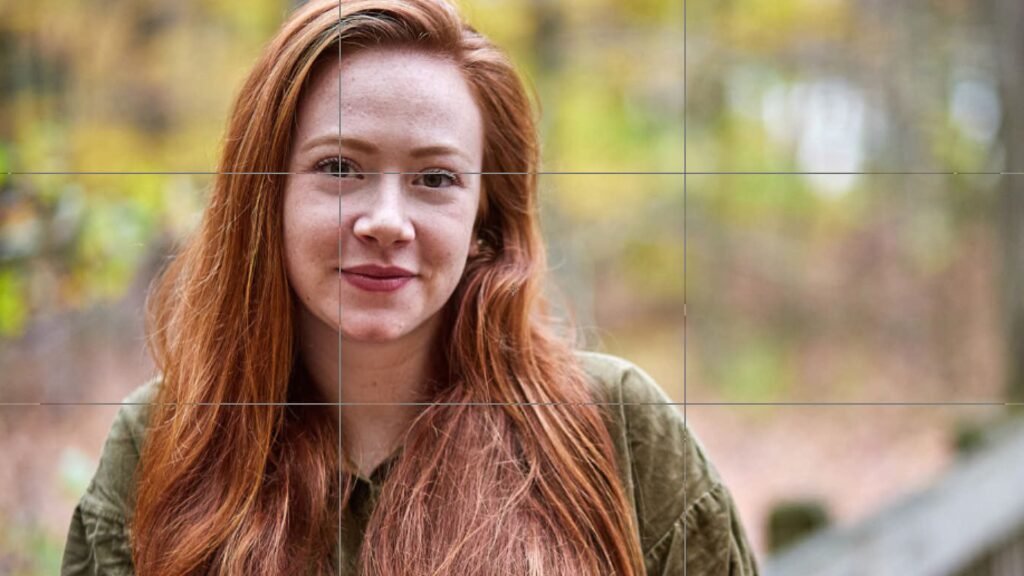
  • Vertical Lines: Suggest strength, growth, and power. They are effective in architecture and portrait photography.
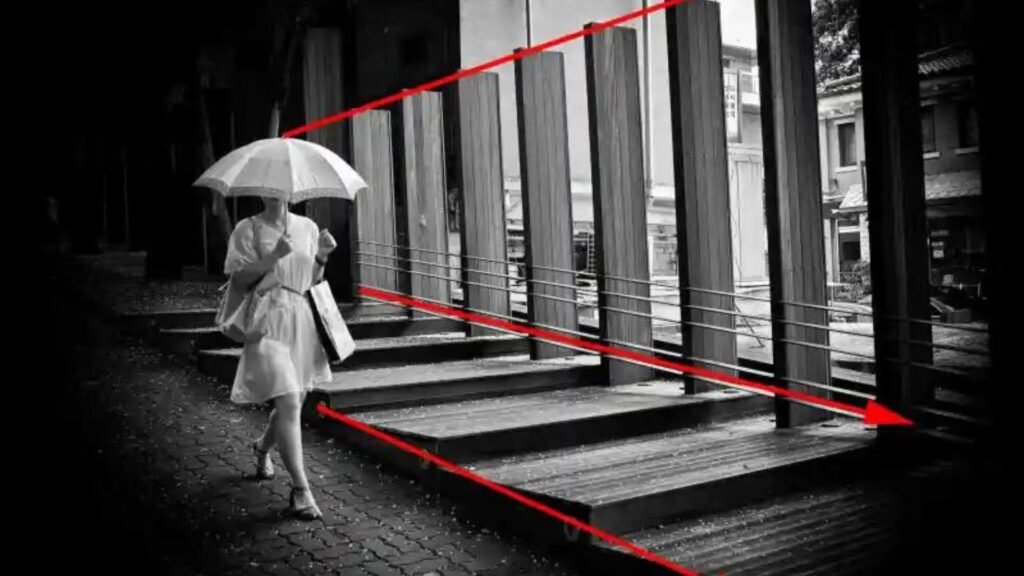
  • Diagonal Lines: Imply movement, action, and dynamism. They add energy and lead the viewer’s eye through the frame.
  • Curved Lines: Create a sense of fluidity, grace, and elegance. They guide the viewer gently through the image and can add a soothing effect.

Use Leading Lines

Leading lines are lines within the image that lead the viewer’s eye to the main subject or focal point. These can be roads, pathways, rivers, fences, or even shadows. By strategically placing leading lines, you can draw attention directly to your subject and create a more engaging composition.

Create Depth and Dimension

Lines can be used to create a sense of depth and three-dimensionality in your photos. Converging lines, such as railroad tracks or a row of trees, lead the viewer’s eye into the distance, giving the image a feeling of depth. This technique is particularly effective in landscape and architectural photography.

Frame Your Subject

Using lines to frame your subject can add emphasis and draw attention to the focal point. Natural frames, like tree branches, windows, doorways, or even shadows, can create a border around your subject. This technique helps to isolate the subject and adds context to the image.

Incorporate Symmetry and Patterns

Symmetrical compositions with lines can create a sense of balance and harmony. Look for patterns and repetitions of lines that can add an interesting visual element to your photos. Symmetry and patterns are often found in architecture, nature, and man-made objects.

Experiment with Angles and Perspectives

Changing your shooting angle or perspective can dramatically alter how lines are perceived in your composition. Shooting from a low angle can make lines appear more dynamic and powerful, while a high angle can create a different visual impact. Experiment with different viewpoints to see how lines interact with other elements in your frame.

Use Implied Lines

Implied lines are not actual lines but are suggested by the arrangement of elements within the image. For example, a person’s gaze or the direction someone is pointing can create an implied line that guides the viewer’s attention. These lines can be subtle but powerful in directing the viewer’s focus.

Play with Light and Shadow

Light and shadow can create strong lines that add depth and interest to your compositions. Harsh light can cast distinct shadows that form lines, while soft light can create more gentle and gradual transitions. Use light and shadow to highlight lines and add a dramatic effect to your photos.

Combine Multiple Types of Lines

Combining different types of lines in a single composition can create complex and interesting images. For instance, you can use horizontal lines in the background with diagonal lines leading to the subject, adding layers and depth to your photo. Experiment with various combinations to find what works best for your vision.

By incorporating these tips into your photography, you can harness the power of lines to create more compelling and visually engaging compositions. Whether you are shooting landscapes, portraits, architecture, or street scenes, understanding how to use lines effectively will elevate your work and make your photos more dynamic and impactful.

More Details
Jul 3, 2024
Strategies for Perfecting Your Product Photograph

Compelling product photography is essential for businesses looking to stand out online. Whether you’re selling handmade crafts on Etsy or managing an e-commerce store, high-quality product images can make a significant difference in attracting customers and driving sales. In this guide, we’ll explore key strategies to help you perfect your product photography and showcase your merchandise in the best light possible.

Product Photograph

1. Plan Your Shoot in Advance

Before you start photographing your products, take some time to plan your shoot. Consider factors such as the type of products you’re shooting, the ideal backdrop, and the lighting conditions. Planning ahead helps ensure a smooth and efficient photography session.

2. Use Proper Lighting Techniques

Lighting is crucial in product photography as it affects the overall look and feel of your images. Natural light is ideal for most products, but if you’re shooting indoors or in low-light conditions, consider investing in softbox lights or LED panels. Avoid harsh shadows by diffusing the light with umbrellas or reflectors.

3. Invest in Quality Equipment

While you don’t need the most expensive camera gear to take great product photos, investing in quality equipment can significantly improve your results. A DSLR or mirrorless camera with a macro lens allows you to capture detailed close-ups, while a sturdy tripod helps stabilize your shots and maintain consistency.

4. Focus on Composition and Framing

Composition plays a crucial role in product photography. Use the rule of thirds to place your products off-center for a more balanced and visually appealing composition. Experiment with different angles and perspectives to highlight unique features and textures.

5. Pay Attention to Details

Details matter in product photography. Ensure your products are clean and free of dust or smudges before photographing them. Use props or styling elements strategically to enhance the product’s appeal without overshadowing it.

6. Edit Your Photos Carefully

Post-processing can elevate your product photos to the next level. Use photo editing software like Adobe Photoshop or Lightroom to adjust exposure, contrast, and colors. Pay attention to consistency across your product images to maintain a cohesive brand aesthetic.

7. Showcase Product Variations and Details

If you offer products in different colors, sizes, or variations, make sure to photograph each option separately. Include close-up shots of key features or textures to give customers a comprehensive view of what they’re buying.

8. Optimize for Online Platforms

Consider where your product photos will be displayed and optimize them accordingly. For e-commerce websites, use high-resolution images that allow customers to zoom in for a closer look. Follow platform guidelines for image sizes and formats to ensure compatibility.

9. Tell a Story with Your Photos

Effective product photography goes beyond showcasing the product—it tells a story and evokes emotions. Use lifestyle photography to show your products in real-life scenarios or create themed photo sets that resonate with your target audience.

Conclusion

Perfecting your product photography requires a combination of technical skills, creativity, and attention to detail. By planning your shoots, mastering lighting techniques, investing in quality equipment, and refining your editing skills, you can create compelling product images that drive engagement and sales. Implement these strategies consistently, and you’ll be well on your way to mastering the art of product photography.


By following these strategies for perfecting your product photography, you can create stunning images that effectively showcase your products and attract customers to your brand. Whether you’re a small business owner or a seasoned entrepreneur, investing time and effort into improving your product photography can yield significant benefits for your online presence and sales.

More Details
Jul 3, 2024
Photography Myths Debunked

Photography, like any art form, is surrounded by myths and misconceptions. These myths can hinder your progress and limit your creativity. Let’s debunk some of the most common photography myths to help you enhance your skills and enjoy your photographic journey more fully.

You Need an Expensive Camera to Take Great Photos

One of the most pervasive myths is that only high-end cameras can produce excellent photos. While professional cameras offer more control and higher image quality, the photographer’s skill and creativity are far more important. Many stunning images are captured with smartphones or entry-level cameras. Understanding composition, lighting, and storytelling can lead to great photos, regardless of the equipment used.

Always Follow the Rule of Thirds

The rule of thirds is a helpful guideline for beginners to learn composition, but it’s not a strict rule that must be followed at all times. Great photography often involves breaking the rules to create unique and compelling images. Experiment with different compositions to find what works best for your subject and style. Creativity thrives when you explore beyond traditional guidelines.

Post-Processing is Cheating

Post-processing has been a part of photography since its inception. In the film era, photographers used darkroom techniques to enhance their images. Today, digital editing software like Photoshop and Lightroom allows photographers to adjust exposure, color, and sharpness to bring out the best in their photos. Editing is an essential skill that helps photographers achieve their artistic vision and correct any technical issues.

Natural Light is Always Better

While natural light can be beautiful, it’s not always the best option for every situation. Harsh midday sunlight can create unflattering shadows and highlights. Artificial lighting, such as studio lights or flash, offers control over the direction, intensity, and color of light, allowing for more consistent results. Learning to use both natural and artificial light effectively will expand your creative possibilities.

More Megapixels Means Better Photos

Megapixels refer to the resolution of a camera sensor, but more megapixels don’t necessarily equate to better image quality. High megapixel counts are beneficial for large prints and detailed cropping, but other factors like sensor size, lens quality, and image processing play significant roles in photo quality. A camera with fewer megapixels can produce superior images if it excels in these areas.

You Must Shoot in Manual Mode

Manual mode gives photographers full control over their camera settings, which is beneficial in certain situations. However, other modes like Aperture Priority, Shutter Priority, and even Program mode can be useful and efficient, especially in rapidly changing conditions. Understanding how and when to use different modes can help you adapt to various shooting scenarios and capture better images.

You Need to Travel to Exotic Locations for Great Photos

While traveling to beautiful destinations can inspire and provide unique photo opportunities, compelling images can be found everywhere. Great photography is about seeing and capturing the extraordinary in the ordinary. Explore your local surroundings, look for interesting details, and challenge yourself to find beauty in everyday scenes.

You Have to Get It Right in Camera

While aiming to get the best possible shot in-camera is important, expecting perfection straight from the camera is unrealistic. Factors like dynamic range, lighting conditions, and subject movement can make it difficult to capture a perfect image in one shot. Post-processing allows for fine-tuning and correcting issues that couldn’t be controlled during the shoot.

Prime Lenses are Always Better than Zoom Lenses

Prime lenses, with their fixed focal lengths, are known for their sharpness and wide apertures. However, modern zoom lenses offer excellent image quality and flexibility. The choice between prime and zoom lenses depends on your shooting style and needs. Zoom lenses are convenient for versatile shooting scenarios, while prime lenses are great for low-light conditions and achieving a shallow depth of field.

You Need Formal Training to Be a Good Photographer

While formal education can provide valuable knowledge and skills, many successful photographers are self-taught. Passion, practice, and continuous learning through online resources, workshops, and experimentation are key to improving your photography. The most important factor is your dedication and willingness to learn and grow as a photographer.

Always Use a Flash Indoors

While a flash can be useful indoors to combat low light, it’s not always necessary. Natural light from windows or existing artificial light sources can create beautiful and more natural-looking images. If you do use a flash, learn to use it effectively by diffusing it or bouncing it off surfaces to avoid harsh shadows and highlights.

By debunking these myths, you can approach photography with a more open and informed mindset. Embrace creativity, experiment with different techniques, and focus on developing your unique style. Photography is a journey of continuous learning and exploration, and breaking free from these myths will help you become a more confident and versatile photographer.

More Details
Jul 3, 2024
Strategies for Capturing Emotion in a Photograph

Capturing emotion in a photograph is like freezing a moment that speaks directly to the heart. Whether it’s a smile that lights up a face or a gaze filled with longing, photographs have the power to convey emotions vividly. Understanding how to capture these emotions effectively can transform a simple image into a powerful storytelling tool. In this guide, we’ll explore strategies and techniques that can help you master the art of capturing emotion in your photographs.

 Emotion in a Photograph

Understanding the Power of Emotion in Photography

Emotion in a photograph isn’t just about what’s visible on the surface. It’s about capturing the essence of a moment—the feelings, the mood, and the atmosphere. Here’s how you can enhance your skills in capturing emotion:

1. Connect with Your Subject

Connecting with your subject is key to capturing genuine emotions. Whether you’re photographing people, animals, or landscapes, take the time to understand what you want to convey. Engage with your subject to create a comfortable environment where their true emotions can shine through.

2. Focus on Facial Expressions and Body Language

Facial expressions and body language are powerful indicators of emotion. Pay attention to subtle changes in expression and posture—they can reveal a lot about what your subject is feeling. Zoom in on these details to capture raw and authentic emotions.

3. Use Lighting to Set the Mood

Lighting plays a crucial role in setting the mood of your photograph. Soft, diffused light can create a warm and intimate atmosphere, perfect for capturing tender moments. Experiment with different lighting techniques to enhance the emotional impact of your images.

4. Choose the Right Composition

Composition can amplify the emotional content of your photograph. Experiment with framing, angles, and perspective to evoke specific emotions. For example, a close-up shot can create intimacy, while a wide-angle view can convey a sense of grandeur or isolation.

5. Wait for the Right Moment

Patience is essential in capturing genuine emotions. Sometimes, the most powerful moments occur unexpectedly. Anticipate and wait for those fleeting moments when emotions are most intense and authentic.

6. Edit with Care

Post-processing can enhance the emotional impact of your photographs. Use editing tools to adjust colors, contrast, and clarity while staying true to the mood and atmosphere you want to convey.


Conclusion

Capturing emotion in a photograph is an art that requires sensitivity, patience, and skill. By understanding the power of emotion, connecting with your subjects, and mastering technical aspects like lighting and composition, you can create photographs that resonate deeply with viewers. Practice these strategies consistently, and you’ll be able to capture powerful emotions that tell compelling stories through your photographs.

More Details
Jul 3, 2024
Tips for Photography Composition in Portraits

Portrait photography is an art that involves more than just capturing a person’s likeness; it’s about telling a story and evoking emotions through composition. Here are some essential tips to help you master composition in portrait photography.

Use the Rule of Thirds

The rule of thirds is a fundamental guideline in composition. Imagine dividing your frame into a grid of nine equal parts by two equally spaced horizontal lines and two equally spaced vertical lines. Position your subject’s eyes along one of these lines, or at the intersections, to create a balanced and engaging composition. This technique draws the viewer’s attention directly to the subject’s eyes, which are the focal point of any portrait.

Consider the Background

A clean and uncluttered background helps to keep the focus on your subject. Ensure the background complements but does not distract from your subject. Use a wide aperture (small f-stop number) to create a shallow depth of field, which blurs the background and makes your subject stand out. Alternatively, look for backgrounds that add context and interest to the portrait without overpowering the subject.

Experiment with Framing

Framing involves using elements within the scene to create a “frame” around your subject. This could be natural elements like tree branches, doorways, or windows. Framing adds depth to your images and draws the viewer’s eye directly to the subject. It also provides a sense of context and place, enhancing the storytelling aspect of your portrait.

Utilize Leading Lines

Leading lines are lines that guide the viewer’s eye through the image towards the subject. These can be roads, pathways, fences, or even shadows. Incorporating leading lines into your composition can add depth and dimension to your portraits, making them more visually engaging. Ensure the lines lead towards your subject to emphasize their importance.

Play with Perspective and Angles

Experiment with different perspectives and angles to add variety and interest to your portraits. Shooting from a low angle can make your subject appear more powerful, while a high angle can create a sense of vulnerability. Try capturing portraits at eye level for a more natural and intimate feel. Changing your angle can also help eliminate distracting elements from the background.

Focus on the Eyes

The eyes are the windows to the soul and should be the sharpest part of any portrait. Use a single autofocus point and place it over one of the subject’s eyes to ensure they are in sharp focus. If the subject is turned slightly, focus on the eye that is closest to the camera. Sharp, well-lit eyes can make a portrait feel more engaging and alive.

Use Symmetry and Patterns

Symmetry and patterns can create visually appealing compositions. Symmetrical compositions provide a sense of balance and harmony, while patterns can add an interesting visual element to your portraits. Be mindful of symmetry in the background and your subject’s pose to create a cohesive and striking image.

Include Negative Space

Negative space, or the empty space around your subject, can add a sense of simplicity and elegance to your portraits. It allows the viewer to focus solely on the subject without any distractions. Negative space can also help convey emotions and create a particular mood in your portrait.

Capture Natural Poses and Expressions

Encourage your subject to move naturally and express genuine emotions. Candid shots often result in more compelling and authentic portraits. Give your subject something to interact with or talk about to evoke natural expressions and poses. The composition will benefit from the subject’s relaxed and genuine demeanor.

By incorporating these tips into your portrait photography, you can create more engaging, compelling, and aesthetically pleasing images. Remember that composition is a tool to enhance your artistic vision and should be used creatively to convey your subject’s essence and story.

More Details
Jul 3, 2024
Tips for Street Photography

Street photography is a dynamic and captivating genre that captures the essence of everyday life. Whether you’re documenting fleeting moments, candid expressions, or the hustle and bustle of urban environments, street photography offers endless opportunities for creativity. To help you master this art form, here are some valuable tips to enhance your street photography skills.

Understanding Street Photography

Before diving into techniques and tips, it’s essential to understand what street photography is all about. Street photography focuses on capturing spontaneous and unposed moments in public spaces. It’s about observing and documenting the world around you, often highlighting the beauty in the mundane. The unpredictability and rawness of street photography make it both challenging and rewarding.

Choosing the Right Gear

While street photography doesn’t require an extensive array of equipment, selecting the right gear can make a significant difference. A lightweight, portable camera is ideal, as it allows you to move quickly and remain inconspicuous. Many street photographers prefer using prime lenses, such as 35mm or 50mm, for their versatility and ability to capture sharp images with a natural perspective.

Blending In and Staying Invisible

One of the keys to successful street photography is blending in with your surroundings. The more you can go unnoticed, the more authentic your shots will be. Dress inconspicuously and avoid drawing attention to yourself. This allows you to capture candid moments without disrupting the scene. Additionally, practice shooting from the hip or using a silent shutter mode to remain discreet.

Observing and Anticipating Moments

Street photography requires a keen eye and the ability to anticipate moments before they happen. Spend time observing your environment and the people within it. Look for interesting interactions, unique expressions, or patterns that tell a story. The more you practice, the better you’ll become at predicting and capturing those decisive moments.

Composing Your Shots

Composition is crucial in street photography. Pay attention to the elements within your frame and how they interact. Use leading lines, symmetry, and framing to create visually compelling images. Experiment with different angles and perspectives to add depth and interest to your shots. Remember, the goal is to capture the essence of the scene in a visually appealing way.

Embracing Candidness

Candid moments are the heart of street photography. Capture people in their natural state, unaware of the camera. This raw authenticity adds depth and emotion to your photos. Don’t be afraid to get close to your subjects, but always respect their personal space and privacy. Building a rapport with your environment helps you capture more genuine and impactful images.

Playing with Light and Shadows

Lighting can dramatically impact the mood and tone of your street photography. Experiment with different lighting conditions, such as the harsh midday sun, golden hour, or even the soft glow of streetlights at night. Shadows and contrast can add drama and intrigue to your shots. Pay attention to how light interacts with your subjects and the environment to create visually striking images.

Capturing Urban Stories

Street photography is not just about taking pictures of people; it’s about telling stories. Look for scenes that convey a narrative or evoke a certain emotion. Whether it’s a solitary figure lost in thought, a bustling market, or an old building with character, each photograph should tell a part of a larger story. Think about the context and the message you want to convey through your images.

Respecting Your Subjects

While street photography often involves photographing strangers, it’s essential to respect their privacy and dignity. If someone expresses discomfort or asks not to be photographed, honour their wishes. Developing a sense of empathy and understanding helps you build a positive rapport with your subjects and creates a more ethical approach to street photography.

Post-Processing with Care

Editing plays a significant role in enhancing your street photography. Use post-processing software to adjust exposure, contrast, and colour balance. However, be mindful not to over-edit. The goal is to enhance the natural beauty of your shots, not to alter them beyond recognition. Subtle adjustments can make your photos pop while retaining their authenticity.

Practicing Patience and Persistence

Street photography requires patience and persistence. Not every outing will yield perfect shots, but the more you practice, the more you’ll improve. Spend time walking the streets, exploring different neighbourhoods, and immersing yourself in the environment. The best moments often come when you least expect them, so stay patient and keep your camera ready.

Conclusion

Street photography is a journey of discovery and creativity. By understanding the essence of street photography, choosing the right gear, and honing your observational skills, you can capture the beauty and spontaneity of everyday life. Embrace candidness, play with light and shadows, and always strive to tell compelling urban stories. Remember, each click of the shutter is an opportunity to freeze a unique moment in time, creating a visual narrative that resonates with viewers. So, grab your camera, hit the streets, and let your creativity shine through your lens.

More Details
Jul 3, 2024
Photography Accounts to Follow on Instagram

Instagram is a treasure trove for photographers looking to find inspiration, learn new techniques, and admire breathtaking work from around the world. Here are some photography accounts you should follow to enrich your feed with stunning images and valuable insights.

@natgeo (National Geographic)

National Geographic’s Instagram account is a must-follow for anyone interested in exceptional photography. It features a diverse range of images from wildlife and landscapes to cultures and historical events, all captured by talented photographers. The storytelling and quality of images are unmatched, offering daily doses of awe-inspiring visuals.

@hannes_becker (Hannes Becker)

Hannes Becker is a renowned travel and adventure photographer known for his dramatic landscapes and breathtaking compositions. His feed is filled with moody, atmospheric shots that transport viewers to some of the most remote and beautiful places on Earth. His ability to capture the essence of nature in his photos is truly inspiring.

@humansofny (Humans of New York)

Humans of New York, created by Brandon Stanton, is not just about photography but also about powerful storytelling. The account features portraits of people from New York (and beyond) along with their personal stories. It’s a fascinating look at humanity through the lens of a talented photographer, blending portraiture with narrative.

@chrisburkard (Chris Burkard)

Chris Burkard is an acclaimed outdoor, adventure, and lifestyle photographer. His Instagram feed showcases stunning images of surf, landscapes, and extreme sports in some of the world’s most beautiful and rugged locations. His use of natural light and composition techniques makes his work stand out.

@stevemccurryofficial (Steve McCurry)

Steve McCurry is best known for his iconic “Afghan Girl” photo. His Instagram account features a collection of his work from over the years, showcasing powerful portraits and scenes from around the globe. His images often tell deep and moving stories, capturing the essence of the subjects and their environments.

@benjaminhardman (Benjamin Hardman)

Benjamin Hardman’s feed is a visual journey through the icy and volcanic landscapes of Iceland. His work focuses on the stark, cold beauty of the Arctic, often highlighting the contrasts and textures of these remote environments. His minimalist approach and attention to detail create striking and memorable images.

@alexstrohl (Alex Strohl)

Alex Strohl is a travel and adventure photographer whose work has been featured in major publications. His Instagram account is filled with stunning landscapes, often featuring mountains, lakes, and forests. His photos are characterized by their clarity and the sense of adventure they evoke.

@annstreetstudio (Jamie Beck)

Jamie Beck, the creator behind Ann Street Studio, offers a unique blend of photography and cinemagraphs (photos with moving elements). Her feed features elegant and timeless imagery, often focusing on fashion, still life, and travel. Her work is refined and beautifully crafted, providing a different perspective on photography.

@paulnicklen (Paul Nicklen)

Paul Nicklen is a marine biologist and photographer for National Geographic. His Instagram feed is dedicated to wildlife photography, particularly in polar regions. His images not only showcase the beauty of wildlife but also highlight important environmental issues. His passion for conservation is evident in every shot.

@sarahpannell (Sarah Pannell)

Sarah Pannell is a documentary and travel photographer whose work focuses on capturing cultural landscapes and the everyday life of the places she visits. Her feed features vibrant, colorful images that tell the story of diverse cultures and communities around the world. Her eye for detail and composition makes her work stand out.

Following these Instagram accounts will fill your feed with stunning visuals and provide a wealth of inspiration and knowledge. Whether you’re looking to improve your photography skills or simply appreciate beautiful images, these accounts offer something for everyone.

More Details
Jul 3, 2024
Strategies to Enhance Smartphone Photograph

In today’s digital age, smartphone cameras have become powerful tools capable of capturing stunning photographs. Whether you’re an amateur photographer or a seasoned professional, mastering the art of smartphone photography can significantly elevate your photo-taking experience. Here are some effective strategies and tips to enhance your smartphone photography skills:

Smartphone Photograph

1. Understand Your Smartphone Camera

Smartphone cameras vary in features and capabilities. Take time to familiarize yourself with the settings and functionalities of your device. Explore options like HDR mode, Night Mode, and Portrait Mode to understand how they affect your photos.

2. Keep Your Lens Clean

A simple yet often overlooked tip is to keep your smartphone camera lens clean. Smudges and fingerprints can distort your images, especially in bright light or against the sun. Regularly wipe your lens with a microfiber cloth to ensure clarity.

3. Use Gridlines for Composition

Most smartphone cameras offer gridline options that help apply the rule of thirds—a fundamental principle in photography. Aligning your subject or horizon with these gridlines can create balanced and visually appealing compositions.

4. Adjust Exposure and Focus

Tap on your smartphone screen to adjust the exposure and focus of your shot. This feature allows you to control brightness levels and ensure your subject is sharp and well-defined.

5. Experiment with Lighting

Lighting plays a crucial role in photography. Experiment with different lighting conditions—such as natural light, soft light, or backlighting—to see how they affect your photos. Understanding light helps you capture mood and atmosphere effectively.

6. Utilize HDR Mode for High-Contrast Scenes

HDR (High Dynamic Range) mode helps capture details in both bright and dark areas of your photo. This mode is particularly useful for landscapes or scenes with extreme lighting contrasts, providing a balanced and realistic image.

7. Explore Third-Party Camera Apps

Consider downloading third-party camera apps that offer more manual controls and advanced features than your default camera app. Apps like Snapseed, VSCO, or Adobe Lightroom Mobile provide options to fine-tune your photos and apply creative edits.

8. Practice Different Perspectives

Change your perspective to add interest to your photos. Experiment with shooting from high above, crouching down low, or capturing angles that highlight unique details. Different perspectives can transform ordinary scenes into captivating compositions.

9. Edit Your Photos

Editing can enhance the visual appeal of your photos. Use editing apps to adjust brightness, contrast, color balance, and apply filters to achieve the desired look. However, aim to maintain a natural appearance and avoid over-editing.

10. Keep Your Camera Steady

Stability is key to avoiding blurry photos. Hold your smartphone with both hands and steady your elbows against your body for support. Alternatively, consider using a mini tripod or stabilizer for sharper images, especially in low-light conditions.

11. Learn Basic Photography Principles

Understanding basic photography principles—such as composition, framing, and the rule of thirds—can elevate your smartphone photography skills. These principles guide you in creating visually appealing and well-balanced photographs.

By implementing these strategies, you can enhance your smartphone photography skills and capture stunning photos with ease. Whether you’re photographing everyday moments, landscapes, portraits, or creative compositions, these tips will help you make the most of your smartphone camera capabilities. Practice regularly, experiment with different techniques, and enjoy the process of capturing memorable images wherever you go.

More Details
Jul 3, 2024
Best Online Photography Communities

Joining online photography communities can be a game-changer for photographers at any skill level. These platforms offer a wealth of knowledge, inspiration, and support, making them essential for anyone looking to enhance their photography skills. Whether you’re a seasoned professional or a budding enthusiast, participating in online photography communities can provide you with valuable feedback, networking opportunities, and a sense of belonging. Let’s explore some of the best online photography communities and how they can benefit you.

The Benefits of Online Photography Communities

Online photography communities are more than just places to share your photos; they are vibrant ecosystems where you can learn, grow, and connect with like-minded individuals. These communities offer various benefits, such as:

  1. Feedback and Critique: One of the primary advantages of joining online photography communities is the ability to receive constructive feedback on your work. Experienced photographers can offer critiques that help you improve your technique and composition.
  2. Inspiration: Seeing the work of other photographers can be incredibly inspiring. Online photography communities expose you to a diverse range of styles and subjects, sparking new ideas and motivating you to experiment with your photography.
  3. Networking: Building connections with other photographers can lead to collaborative projects, mentorship opportunities, and even job referrals. Networking within these communities can open doors to new possibilities.
  4. Learning Resources: Many online photography communities offer tutorials, workshops, and webinars. These resources can help you develop new skills and stay updated with the latest trends and technologies in photography.

Flickr

Flickr has long been a favorite among photographers for its extensive photo-sharing capabilities and active community. It offers a platform where you can upload and organize your photos, join groups based on your interests, and engage in discussions with other photographers. The ability to see EXIF data (camera settings) on shared photos can be particularly useful for learning new techniques. Additionally, Flickr’s vast user base means you’re likely to find groups tailored to your specific photography interests, from macro photography to street photography.

500px

500px is known for its high-quality imagery and professional user base. This online photography community emphasizes showcasing stunning photos and provides a platform for photographers to gain exposure. The “Pulse” algorithm on 500px ensures that exceptional photos get the attention they deserve, making it a great place to get your work noticed. Moreover, 500px offers licensing opportunities, allowing you to monetize your photography by selling your images as stock photos.

Reddit

Reddit, often referred to as “the front page of the internet,” hosts numerous photography subreddits that cater to various interests and skill levels. Subreddits like r/photography, r/analog, and r/itookapicture offer spaces for photographers to share their work, ask for advice, and engage in discussions. The community-driven nature of Reddit means you’ll find diverse perspectives and a wealth of information on virtually any photography-related topic. Additionally, the upvote system helps surface the most valuable content, ensuring you see high-quality posts and discussions.

Instagram

While Instagram is primarily known as a social media platform, it has become one of the most influential online photography communities. With its visually-driven format, Instagram allows photographers to reach a global audience and build a following. The platform’s features, such as hashtags and Stories, make it easy to discover new photographers and trends. Engaging with other photographers through comments and direct messages can also lead to meaningful connections and collaborations.

Facebook Groups

Facebook hosts a plethora of photography groups that cater to various niches and interests. These groups range from local photography clubs to specialized groups focused on specific genres, such as landscape photography or portraiture. Joining Facebook photography groups allows you to participate in discussions, share your work, and seek advice from other members. The platform’s widespread use ensures that you’ll find active communities where you can connect with photographers who share your passion.

Conclusion

In conclusion, engaging with online photography communities can significantly enhance your photography journey. These platforms provide valuable opportunities for feedback, inspiration, learning, and networking. By participating in communities like Flickr, 500px, Reddit, Instagram, and Facebook groups, you can connect with fellow photographers, gain new insights, and continually improve your craft. So, dive into these online photography communities, share your work, and be open to the endless possibilities they offer. Your next great photo could be just a click away!

More Details
Jul 3, 2024
Tips for Long Exposure Photography

Long exposure photography is a captivating technique that allows you to capture the passage of time in a single frame, creating dreamy and dynamic images. Here are some essential tips to help you master long exposure photography.

Use a Sturdy Tripod

A stable tripod is crucial for long exposure photography. Even the slightest movement can blur your image, so ensure your camera is securely mounted. Consider using a remote shutter release or the camera’s timer to avoid any shake caused by pressing the shutter button.

Choose the Right Location and Time

Select a location with interesting elements that will benefit from the long exposure effect, such as moving water, clouds, traffic, or star trails. The best times for long exposure photography are during the golden hours (sunrise and sunset) or at night, as these times offer dramatic lighting and vibrant colors.

Use a Low ISO

Set your camera to a low ISO setting (e.g., ISO 100 or 200) to minimize noise and achieve a cleaner image. Low ISO also helps to lengthen the exposure time, allowing you to capture more movement.

Select a Small Aperture

Use a small aperture (high f-stop number, such as f/11 or f/16) to achieve a greater depth of field and ensure your entire scene is in focus. A smaller aperture also reduces the amount of light entering the camera, which is beneficial for longer exposures.

Invest in Neutral Density (ND) Filters

ND filters reduce the amount of light entering the lens, allowing for longer exposure times even in bright conditions. They come in different strengths (measured in stops), so choose one that suits your needs. ND filters are particularly useful for capturing long exposures during daylight hours.

Use Manual or Bulb Mode

Switch your camera to manual mode to have full control over the exposure settings. For very long exposures (more than 30 seconds), use the bulb mode, which allows you to keep the shutter open for as long as you hold down the shutter button or use a remote release.

Focus Carefully

Achieving sharp focus is crucial in long exposure photography. Use autofocus to initially focus on your subject, then switch to manual focus to lock it in place. This prevents the camera from trying to refocus during the long exposure.

Compose Your Shot Thoughtfully

Consider the elements in your scene and how they will interact with the long exposure effect. Moving elements like water, clouds, and lights will create beautiful, flowing patterns, while stationary objects will remain sharp and provide contrast.

Experiment with Exposure Times

Different scenes and conditions require different exposure times. Start with a few seconds and adjust based on the effect you want to achieve. Longer exposures will create smoother, more ethereal effects, while shorter exposures will retain more detail in moving elements.

Monitor and Adjust Your Settings

Regularly check your images on the camera’s LCD screen and histogram to ensure proper exposure. Adjust the aperture, ISO, and shutter speed as needed to achieve the desired effect. Remember that changes in light conditions can affect your settings.

By following these tips, you can improve your long exposure photography skills and create stunning images that capture the beauty and movement of the world around you. Whether you’re photographing landscapes, cityscapes, or night skies, long exposure photography allows you to tell a unique and captivating visual story.

More Details