Jul 3, 2024
How to Photograph Birds in Flight

Photographing birds in flight can be challenging but incredibly rewarding. Here are some tips to help you capture stunning photos of birds in action:

Use the Right Equipment

  • Use a camera with fast autofocus capabilities and a high frames-per-second (fps) rate to capture fast-moving birds effectively. A telephoto lens (300mm or longer) is ideal for bringing distant birds closer.

Understand Bird Behavior

  • Observe bird behavior and flight patterns to anticipate their movements. Study their habitats and feeding grounds to increase your chances of capturing them in flight.

Choose the Right Settings

  • Use a fast shutter speed (1/1000 sec or faster) to freeze motion and capture sharp details of birds in flight. Adjust your ISO and aperture settings to ensure proper exposure.

Focus on the Eyes

  • Set your camera’s autofocus mode to continuous (AI Servo for Canon, AF-C for Nikon) to track moving birds and maintain focus on their eyes, which are crucial for sharp, engaging photos.

Use Burst Mode

  • Enable burst mode (continuous shooting mode) to capture a series of rapid-fire shots when birds are in flight. This increases your chances of getting the perfect shot with wings fully extended or interesting flight poses.

Pre-focus on Landing Spots

  • If birds are landing or taking off from a specific spot (such as a perch or feeding area), pre-focus your camera on that spot and use a fast shutter speed to capture decisive moments.

Consider Background and Composition

  • Pay attention to the background and composition of your photos. Aim for clean, uncluttered backgrounds that highlight the bird’s silhouette and flight posture.

Patience and Persistence

  • Bird photography requires patience and persistence. Spend time observing and waiting for opportunities to capture birds in flight. Be prepared to take multiple shots to achieve the desired results.

Be Respectful of Wildlife

  • Practice ethical bird photography by respecting wildlife habitats and observing from a safe distance. Avoid disturbing birds or their nesting areas to minimize stress and ensure their well-being.

Post-Processing and Editing

After the photoshoot, review and edit your photos using software like Adobe Lightroom or Photoshop. Adjust colors, sharpness, and contrast to enhance the visual impact of your bird in flight photos.

Learn from Each Shot

Review your photos to analyze what worked well and areas for improvement. Learn from each experience to refine your techniques and capture better bird in flight photos in the future.

By applying these tips and techniques, along with practice and perseverance, you can improve your skills in photographing birds in flight and capture breathtaking moments of these graceful creatures in their natural environment.

More Details
Jul 3, 2024
Best Photography Editing Techniques for Portraits

Editing portraits is an art form that involves enhancing natural beauty while maintaining authenticity. Whether you’re a beginner or seasoned photographer, mastering these editing techniques can elevate your portrait photography to new heights.

Photography Editing Techniques for Portraits

Understanding Portrait Editing

  1. Skin Retouching: Smooth out skin imperfections while preserving natural texture.
  2. Color Correction: Adjust tones to achieve lifelike skin tones and vibrant colors.
  3. Detail Enhancement: Sharpen eyes and enhance facial features to draw focus.

Techniques for Editing Portraits

1. Skin Retouching

  • Use Healing Brushes: Remove blemishes, spots, and imperfections with healing brushes or clone stamp tools.
  • Soften Skin: Apply a subtle blur or smoothing effect to achieve soft, natural-looking skin.

2. Color Correction and Enhancement

  • Adjust White Balance: Set accurate white balance to correct any color casts in the photo.
  • Enhance Skin Tones: Use selective color adjustments to refine skin tones without altering other colors.

3. Enhancing Details

  • Eyes and Teeth: Brighten eyes and whiten teeth using adjustment layers or specific tools designed for these features.
  • Hair and Clothing: Enhance details in hair and clothing to add depth and texture to the portrait.

4. Portrait Composition

  • Crop and Framing: Adjust composition to focus on the subject’s face and expression.
  • Background Blur: Use blur tools or shallow depth of field techniques to emphasize the subject and minimize distractions.

5. Lighting Adjustment

  • Dodge and Burn: Use dodge and burn techniques to subtly adjust highlights and shadows for better contrast and depth.
  • Selective Lighting: Enhance or reduce lighting on specific areas of the face to create a more balanced portrait.

6. Presets and Filters

  • Use Presets: Develop or download presets tailored for portraits to maintain consistency and speed up your workflow.
  • Custom Filters: Create custom filters or apply existing ones to achieve a unique look while maintaining a cohesive style.

Workflow Tips

  • Shoot in RAW: Capture images in RAW format for greater flexibility in editing and preserving image quality.
  • Backup and Version Control: Keep backups of your original files and save different versions as you progress through your editing process.
  • Feedback and Iteration: Seek feedback from peers or clients to refine your editing techniques and improve your skills over time.

Conclusion

Editing portraits requires a delicate balance between enhancing natural beauty and maintaining authenticity. By mastering these editing techniques and incorporating them into your workflow, you can create stunning portraits that captivate viewers and reflect the essence of your subjects.

Experiment with different tools, techniques, and styles to develop your unique editing approach. With practice and attention to detail, you can elevate your portrait photography to professional levels, capturing memorable moments with clarity, emotion, and artistry.

More Details
Jul 3, 2024
How to Master Silhouette Photography

Silhouette photography is a captivating technique that uses contrast and shape to create dramatic and artistic images. By mastering the art of capturing silhouettes, you can evoke mood, emphasize form, and tell compelling visual stories. Whether you’re photographing landscapes, people, or objects, understanding the fundamentals of silhouette photography will enhance your creative repertoire. This guide explores essential techniques and tips to help you master silhouette photography effectively.

Understanding Silhouette Photography

Silhouette photography focuses on capturing subjects as dark silhouettes against a brighter background. The technique relies on strong backlighting, where the subject appears as a solid, dark shape without visible details or features. Silhouettes create powerful visual impact by emphasizing shapes and outlines, often evoking a sense of mystery, drama, or simplicity in the composition.

Choosing the Right Conditions and Equipment

To achieve striking silhouettes, choose shooting conditions with clear, unobstructed backgrounds and strong backlighting. Position your subject between the camera and a direct light source, such as the sun during sunrise or sunset, to create distinct outlines and contrasts. Use a DSLR or mirrorless camera with manual exposure controls to adjust settings like aperture and shutter speed for optimal silhouette results.

Setting Your Camera for Silhouette Shots

Start by setting your camera to manual mode to have full control over exposure settings. Opt for a narrow aperture (higher f-number) to ensure both the subject and background remain in focus. Adjust the exposure compensation to underexpose the image, focusing on the brightness of the background rather than the subject. Use spot metering mode to measure light directly on the background for accurate exposure readings.

Positioning Your Subject

Effective silhouette photography relies on positioning your subject against a bright, contrasting background. Place your subject in profile or with a distinct outline against the light source to create clear silhouettes. Experiment with different angles and perspectives to find the most compelling composition that emphasizes the subject’s shape and form without revealing details.

Emphasizing Shape and Composition

Focus on capturing strong, recognizable shapes and forms in your silhouette compositions. Look for subjects with distinct outlines or interesting silhouettes, such as trees, buildings, or people in dynamic poses. Pay attention to negative space around the subject to enhance the visual impact and balance of the composition. Utilize leading lines or framing elements to draw attention to the silhouette and create depth within the image.

Experimenting with Creative Effects

Explore creative techniques to enhance your silhouette photography. Incorporate natural elements like clouds, mist, or reflections to add texture and interest to the background. Experiment with silhouette overlays by blending multiple exposures or using editing software to refine contrast and highlight details. Consider capturing silhouettes in different environments or during varied lighting conditions to expand your creative possibilities.

Post-Processing Techniques for Silhouette Photography

After capturing silhouette images, use post-processing techniques to fine-tune contrast, exposure, and composition. Adjust levels or curves in editing software like Adobe Lightroom to deepen shadows and enhance silhouette definition. Experiment with black-and-white conversions to emphasize shapes and minimize distractions. Refine the composition by cropping or straightening the image to enhance visual impact and storytelling.

Mastering the Art of Silhouette Photography

Achieving mastery in silhouette photography requires patience, experimentation, and a keen eye for composition and light. Continuously seek out opportunities to practice and refine your skills, experimenting with different subjects, settings, and techniques. Study the work of renowned silhouette photographers for inspiration and insights into creative approaches. Embrace the challenge of capturing evocative silhouettes that resonate emotionally and visually with viewers, conveying mood, storytelling, and artistic expression.

Conclusion

In conclusion, mastering silhouette photography offers a unique opportunity to explore creativity and visual storytelling through contrast, shape, and composition. By understanding the fundamentals of silhouette techniques, choosing the right conditions and equipment, and refining your artistic vision, you can capture compelling images that evoke emotion, convey narratives, and leave a lasting impression. Embrace experimentation, practice diligently, and enjoy the process of creating stunning silhouette photographs that showcase the beauty and power of shape and contrast in visual art.

More Details
Jul 3, 2024
How to Take Great Family Portraits

Taking great family portraits requires a combination of technical skill, creativity, and effective communication with your subjects. Here are some tips to help you capture memorable family photos:

Plan Ahead

  • Discuss with the family beforehand to understand their expectations, preferences, and any specific ideas they have for the photoshoot.
  • Choose a location that is meaningful or visually appealing, such as a park, beach, or even their home.

Consider Lighting

  • Schedule the photoshoot during the golden hour (early morning or late afternoon) when natural light is soft and flattering.
  • If shooting indoors or during midday, look for shaded areas or use diffusers to soften harsh sunlight.

Coordinate Outfits

  • Advise the family to coordinate their outfits in terms of color palette and style. Avoid busy patterns and opt for complementary colors that enhance each other.

Use a Tripod and Remote Shutter

  • Set up your camera on a tripod to ensure stability and sharpness in your photos. Use a remote shutter or timer to avoid camera shake when taking group shots.

Establish Rapport

  • Create a relaxed and comfortable atmosphere to help the family feel at ease during the photoshoot. Engage with them, share jokes, and encourage natural interactions.

Capture Candid Moments

  • Encourage spontaneous interactions and candid moments among family members. These often result in genuine smiles and emotions that make for memorable photos.

Vary Poses and Compositions

  • Experiment with different poses and compositions to add variety to your family portraits. Include close-ups, full-body shots, and group formations.

Focus on Faces and Expressions

  • Ensure faces are well-lit and in focus. Pay attention to expressions and emotions, capturing genuine smiles and connections between family members.

Use Depth of Field Creatively

  • Create depth and visual interest in your portraits by using a shallow depth of field (low aperture) to blur the background and emphasize the family members.

Edit Thoughtfully

After the photoshoot, review and edit your photos to enhance colors, contrast, and exposure. Use editing software to refine your portraits while maintaining a natural look.

Deliver and Share Photos Promptly

Deliver the edited photos to the family in a timely manner. Consider creating an online gallery or sharing them via cloud storage for easy access and sharing.

By following these tips and adapting them to suit the family’s preferences and dynamics, you can create beautiful family portraits that capture special moments and emotions, providing lasting memories for years to come.

More Details
Jul 3, 2024
How to Use a Camera Drone Effectively

Using a camera drone effectively requires understanding both the technical aspects of drone operation and creative techniques for capturing stunning aerial photos and videos. Here’s a guide on how to use a camera drone effectively:

Familiarize Yourself with Local Regulations

  • Before flying your drone, familiarize yourself with local regulations and obtain any necessary permits or licenses. Follow airspace rules and restrictions to ensure safe and legal operation.

Learn Drone Operation Basics

  • Read the drone’s manual thoroughly to understand its features, controls, and safety protocols.
  • Practice flying your drone in an open, obstacle-free area to gain confidence and proficiency in maneuvering and controlling the drone.

Plan Your Shots

  • Before flight, plan your shots and consider the desired composition, angles, and perspectives. Visualize the scenes you want to capture and determine optimal flight paths.

Use GPS and Autonomous Modes

  • Utilize GPS features and autonomous flight modes (such as waypoints or follow-me mode) to automate flight paths and maintain stability while focusing on capturing photos or videos.

Optimize Camera Settings

  • Adjust camera settings (ISO, shutter speed, white balance) based on lighting conditions and desired effects. Shoot in RAW format for greater flexibility in post-processing.

Monitor Battery Life and Weather Conditions

  • Monitor drone battery levels and flight time to ensure safe return-to-home (RTH) capability. Avoid flying in adverse weather conditions (strong winds, rain) that could affect drone performance.

Frame Your Shots Carefully

  • Frame your shots using the drone’s live video feed on your controller or smartphone. Pay attention to composition rules (rule of thirds, leading lines) to create visually appealing photos and videos.

Experiment with Perspectives

  • Take advantage of the drone’s aerial perspective to capture unique angles and viewpoints that are not possible with traditional photography.
  • Experiment with low-altitude and high-altitude shots to vary the scale and depth of your aerial compositions.

Smooth Movements and Transitions

  • Use slow and smooth movements when panning, tilting, or flying the drone to avoid jerky footage. Gradually accelerate or decelerate movements for cinematic transitions.

Edit and Enhance Footage

After capturing aerial footage, edit and enhance your photos and videos using editing software (e.g., Adobe Premiere Pro, Final Cut Pro, Lightroom) to adjust colors, contrast, and stabilize footage if necessary.

Respect Privacy and Environment

Respect privacy rights and avoid flying over private property or sensitive areas without permission. – Be mindful of wildlife and natural habitats when flying in outdoor settings to minimize disturbance and environmental impact.

By following these tips and practicing regularly, you can maximize the capabilities of your camera drone and capture breathtaking aerial photos and videos that showcase unique perspectives and creative compositions.

More Details
Jul 3, 2024
How to Master Portrait Photography Shots

Portrait photography is a nuanced art form that goes beyond simply capturing an image; it’s about conveying the essence and personality of your subject through visual storytelling. Whether you’re capturing professional headshots, intimate family portraits, or artistic character studies, mastering portrait photography requires a blend of technical proficiency, creativity, and interpersonal skills. This guide delves into essential techniques and considerations to help you elevate your portrait photography skills to new heights.

Understanding Portrait Photography Shots

Firstly, portrait photography centres on capturing the character, emotion, and unique qualities of individuals or groups. It involves creating images that resonate emotionally and aesthetically with viewers, often focusing on the face, expressions, and gestures of the subject. By understanding the fundamentals of composition, lighting, posing, and post-processing, you can create compelling portraits that leave a lasting impression.

Choosing the Right Equipment

Secondly, start by selecting the appropriate camera and lenses for portrait photography. A digital single-lens reflex (DSLR) or mirrorless camera offers versatility and control over settings, while prime lenses (typically 50mm to 85mm) are popular for their natural perspective and ability to achieve pleasing background blur (bokeh). Consider investing in lenses with wide apertures (low f-number) to maximize depth of field control and capture sharp, detailed portraits.

Mastering Composition and Framing

Thirdly, composition plays a pivotal role in portrait photography, influencing how the viewer perceives the subject. Explore compositional techniques such as the rule of thirds, leading lines, and framing to create balanced, visually appealing portraits. Experiment with different angles, perspectives, and distances to find the most flattering and expressive compositions for your subjects.

Utilizing Natural and Artificial Lighting

Lighting is fundamental in portrait photography, affecting mood, texture, and overall image quality. Natural light, such as soft window light or outdoor sunlight during the golden hour, can produce flattering, diffused illumination that enhances skin tones and details. Alternatively, artificial lighting setups using studio lights, reflectors, or speed lights provide control over light intensity and direction, allowing you to create dramatic effects or fill in shadows as needed.

Effective Posing Techniques

Posing is key to capturing authentic expressions and conveying the personality of your subjects. Guide your subjects through natural poses that highlight their best features and complement the overall composition. Encourage relaxed body language and genuine interactions to capture candid moments that reflect their true essence. Use posing variations, such as standing, sitting, or reclining poses, to add variety and visual interest to your portraits.

Managing Depth of Field

Control over depth of field allows you to isolate your subject from the background, drawing attention to their facial expressions and eyes. Use wide apertures (low f-numbers) for shallow depth of field in close-up portraits, emphasizing details while blurring distractions in the background. Adjust aperture settings accordingly for group portraits or environmental portraits, balancing depth of field with the context of the scene.

Engaging with Your Subject

Building rapport and creating a comfortable environment are essential for eliciting natural expressions and emotions from your subjects. Establish clear communication and provide gentle guidance throughout the photo session to help them feel relaxed and confident in front of the camera. Foster a collaborative atmosphere where ideas can flow freely, allowing you to capture genuine moments and expressions that reflect their true personality.

Post-Processing and Editing Techniques

Enhance your portrait photography through post-processing techniques that refine and polish your images. Use editing software like Adobe Lightroom or Photoshop to adjust exposure, contrast, colour balance, and sharpness. Retouch portraits subtly to improve skin tones, remove blemishes, and enhance facial features while preserving natural-looking results. Experiment with black-and-white conversions, creative filters, or selective adjustments to add artistic flair and emphasize mood in your portraits.

Continuous Learning and Practice

Achieving mastery in portrait photography is an ongoing journey of learning, experimentation, and refinement. Study the work of renowned portrait photographers to gain inspiration and insights into different styles and approaches. Dedicate time to practice regularly with diverse subjects and settings, honing your technical skills and developing a distinctive photographic style that resonates with your artistic vision.

Conclusion

In conclusion, mastering portrait photography shots requires a blend of technical expertise, artistic vision, and interpersonal skills to create compelling images that capture the essence and individuality of your subjects. By mastering composition, lighting, posing, and post-processing techniques, you can elevate your portrait photography skills and create memorable images that evoke emotion, tell stories, and leave a lasting impression on viewers. Embrace creativity, explore new techniques, and enjoy the process of capturing portraits that showcase the beauty and personality of your subjects with authenticity and artistry.

More Details
Jul 3, 2024
Tips for Editing Underwater Photography

Underwater photography presents unique challenges due to water’s filtering effect on light and color. Editing these photos requires specialized techniques to restore natural colors, enhance clarity, and bring out the beauty of underwater scenes. This guide explores essential tips and techniques to help you master editing for underwater photography.

Understanding the Challenges

  1. Color Distortion: Water absorbs and scatters light, causing color loss and shifting hues towards blue-green.
  2. Low Contrast: Underwater scenes often lack contrast due to diffused light and particles in the water.
  3. Backscatter: Particles and microorganisms in the water can cause unwanted specks and haze in photos.

Tips for Editing Underwater Photography

1. Correct White Balance

Adjust the white balance to counteract the blue-green tint caused by water. Use the white balance tool in your editing software or manually adjust temperature and tint sliders until natural colors are restored.

2. Enhance Contrast and Clarity

Increase contrast and clarity to add definition to underwater scenes. Use tools like contrast adjustments, clarity sliders, and selective sharpening to bring out details without over-processing.

3. Remove Backscatter

Use the spot healing brush or clone stamp tool to remove backscatter and unwanted particles from your photos. Work carefully to preserve the natural look of the underwater environment.

4. Adjust Exposure

Correct exposure to balance highlights and shadows. Underwater environments may have uneven lighting, so use exposure adjustments to recover details in darker areas and prevent overexposure in brighter parts.

5. Use Vibrancy and Saturation Sparingly

Increase vibrancy or saturation slightly to enhance colors without making them appear unnatural. Avoid excessive saturation, which can distort colors and make the photo look unrealistic.

6. Fine-Tune Levels and Curves

Adjust levels and curves to fine-tune tonal range and contrast. Use the histogram to guide adjustments and achieve a balanced distribution of tones in your underwater photos.

7. Sharpen Wisely

Apply sharpening selectively to enhance details without introducing noise. Use masking to apply sharpening only to areas with distinct edges, such as marine life or coral formations.

Workflow Tips

  • Shoot in RAW: RAW files retain more image data and provide greater flexibility during editing, especially for correcting white balance and exposure.
  • Use Presets: Develop or download presets tailored for underwater photography to streamline your editing process and maintain consistency across your photos.
  • Batch Process: Apply similar adjustments to a batch of underwater photos to save time and ensure uniformity in editing style.

Conclusion

Editing underwater photography requires a blend of technical skills and artistic judgment to overcome the challenges posed by water’s influence on light and color. By applying these tips and techniques, you can enhance the vibrancy, clarity, and natural beauty of your underwater shots. Experiment with different editing tools and workflows to develop your unique style and create captivating images that showcase the wonders of the underwater world.

Mastering underwater photography editing takes practice and patience, but with the right techniques and tools at your disposal, you can transform your underwater captures into stunning visual narratives that captivate and inspire.

More Details
Jul 3, 2024
Lighting: Natural Light, Artificial Light, Golden Hour, Blue Hour, Light Modifiers

Lighting is a crucial aspect of photography. It influences the mood, tone, and overall quality of an image. Understanding different types of lighting, including natural light, artificial light, golden hour, blue hour, and light modifiers, is essential for creating compelling photographs.

Natural Light

Natural light is one of the most readily available light sources. It comes from the sun and varies in intensity and color throughout the day. Photographers often prefer natural light for its softness and ability to create authentic, warm images. Morning and late afternoon light, in particular, provides a gentle and flattering illumination. Furthermore, natural light is free and can be manipulated by changing locations and angles. However, it can be unpredictable and dependent on weather conditions. Therefore, mastering the use of natural light can significantly enhance your photography.

Lighting

Artificial Light

Artificial light includes any light source that is not natural. Common examples are lamps, flash units, and studio lights. Artificial light provides consistency and control, which is particularly beneficial in studio settings. It allows photographers to shoot at any time and under any conditions. Moreover, artificial light can be modified and shaped using various tools like softboxes, reflectors, and diffusers. This control enables photographers to create specific moods and effects. However, it requires a good understanding of light manipulation and equipment. Thus, learning to use artificial light effectively opens up numerous creative possibilities.

Golden Hour

The golden hour refers to the period shortly after sunrise and before sunset. During this time, the sun is low in the sky, casting a warm, soft light that enhances colors and textures. This light is often considered the most beautiful and is highly sought after by photographers. It creates long shadows and a gentle glow, making subjects appear more vibrant and three-dimensional. Additionally, the golden hour light reduces harsh contrasts, resulting in more balanced exposures. Hence, photographing during the golden hour can elevate the quality and aesthetic appeal of your images.

Blue Hour

The blue hour occurs just before sunrise and after sunset. During this period, the sky takes on a deep blue hue, and the light is soft and diffused. This creates a magical, almost ethereal atmosphere. Photographers use blue hour light to capture stunning landscapes, cityscapes, and twilight scenes. Furthermore, the subtle light during this time adds a sense of calm and tranquility to the images. It also allows for longer exposures, which can create beautiful light trails and reflections. Therefore, shooting during the blue hour offers unique and captivating photographic opportunities.

Light Modifiers

Light modifiers are tools that alter the quality, direction, and color of light. Common modifiers include reflectors, diffusers, softboxes, and grids. Reflectors bounce light onto the subject, filling in shadows and creating a more even illumination. Diffusers soften harsh light, reducing glare and producing a more flattering effect. Softboxes and grids shape the light, controlling its spread and intensity. These tools allow photographers to manipulate light to achieve the desired effect. Moreover, using light modifiers adds versatility and creativity to your lighting setup. Hence, mastering light modifiers is crucial for professional-quality photography.

Interplay of Lighting Techniques

Understanding the interplay between natural light, artificial light, golden hour, blue hour, and light modifiers is essential. These lighting techniques do not exist in isolation but complement each other. For instance, combining natural light with reflectors during the golden hour can create stunning portraits. Similarly, using artificial light with softboxes can mimic the soft, diffused light of the blue hour. Moreover, light modifiers can enhance both natural and artificial lighting setups, adding depth and dimension. Therefore, integrating these techniques allows for more dynamic and compelling photographs.

Practical Application

In practice, experimenting with different lighting techniques helps refine your skills. Start by observing how natural light changes throughout the day. Experiment with shooting during the golden hour and blue hour to understand their unique qualities. Incorporate artificial light and light modifiers to gain control over your lighting environment. Additionally, practice combining different light sources and modifiers to achieve specific effects. Therefore, continuous practice and experimentation with lighting techniques will significantly improve your photography.

Conclusion

In conclusion, mastering lighting techniques such as natural light, artificial light, golden hour, blue hour, and light modifiers is essential for creating captivating photographs. Each type of lighting offers unique qualities and opportunities. Moreover, understanding their interplay allows for creative control and technical precision. Therefore, investing time in learning and practicing these lighting techniques will greatly enhance your photographic skills. Embrace these principles to elevate your photography to new heights.

More Details
Jul 3, 2024
How to Start a Photography Blog

Starting a photography blog can be a rewarding way to showcase your work, share your passion for photography, and connect with a community of fellow photographers and enthusiasts. Here’s a step-by-step guide to help you get started:

Define Your Blog’s Focus

  • Determine the niche or focus of your photography blog. This could be landscape photography, portrait photography, travel photography, or any other specific area of interest.
  • Consider what unique perspective or expertise you can offer to attract and engage your target audience.

Choose a Blogging Platform

  • Select a blogging platform that suits your needs and technical skills. Popular options include WordPress, Blogger, Squarespace, and Wix.
  • WordPress.org offers flexibility and customization options, while platforms like Blogger and Squarespace provide user-friendly interfaces and templates.

Register a Domain Name and Hosting

  • Choose a domain name that reflects your blog’s theme or your photography brand. Use a domain registrar (e.g., GoDaddy, Namecheap) to register your domain.
  • Select a reliable web hosting provider to host your blog. Compare hosting plans based on features, performance, and customer support.

Design Your Blog

  • Select a visually appealing and responsive blog theme or template that showcases your photography effectively.
  • Customize the design to match your branding, including colors, fonts, and layout. Ensure your blog is easy to navigate and provides a seamless user experience.

Create Compelling Content

  • Plan your content strategy. Decide on the types of posts you will publish, such as photo galleries, tutorials, gear reviews, photography tips, or personal stories.
  • Write high-quality, engaging blog posts that provide value to your readers. Include captivating images and descriptive captions to accompany your photography.

Optimize for Search Engines (SEO)

  • Improve your blog’s visibility in search engine results by optimizing your content for relevant keywords and phrases.
  • Use SEO plugins or tools to optimize meta titles, descriptions, alt text for images, and internal linking structure.

Promote Your Blog

  • Share your blog posts on social media platforms (e.g., Instagram, Facebook, Twitter) to reach a wider audience.
  • Engage with other photographers and communities by commenting on their blogs, participating in forums, and networking on photography-related websites.

Build a Community

  • Encourage interaction and feedback from your readers. Respond to comments, questions, and messages to foster a sense of community.
  • Consider featuring guest posts or collaborations with other photographers to diversify your content and reach new audiences.

Monetize Your Blog (Optional)

  • Explore monetization options such as display advertising, affiliate marketing (promoting photography gear or courses), selling prints or digital products, or offering photography services.
  • Ensure any monetization efforts align with your blog’s content and provide value to your audience without compromising their experience.

Analyze and Adapt

Use analytics tools (e.g., Google Analytics) to track visitor behavior, demographics, and popular content on your blog. – Analyze data to identify trends, improve content strategy, and optimize your blog for better performance and growth.

Starting a photography blog requires dedication, creativity, and consistent effort to build an audience and establish your online presence. By focusing on quality content, engaging with your audience, and continuously refining your blog, you can create a success

More Details
Jul 3, 2024
Best Photoshop Actions for Streamlining Editing Workflow

Photoshop actions are pre-recorded steps that can automate and streamline repetitive tasks in your editing workflow. Whether you’re a professional photographer or a hobbyist, using the right Photoshop actions can save you time and effort, allowing you to focus more on creativity and less on manual adjustments.

Photoshop Actions for Streamlining Editing Workflow

What are Photoshop Actions?

Photoshop actions are sets of recorded steps that you can apply to your photos with just a click. They can range from simple adjustments like color correction to complex effects and enhancements. By using actions, you can achieve consistent results across your photos and speed up your editing process significantly.

Benefits of Using Photoshop Actions

  1. Time-Saving: Actions automate repetitive tasks, saving you hours of manual editing time.
  2. Consistency: Ensure a consistent look and feel across your photos.
  3. Efficiency: Focus on creative aspects rather than technical adjustments.
  4. Customization: Actions are customizable, allowing you to tweak settings to suit your style.
  5. Workflow Enhancement: Organize and optimize your workflow for smoother editing sessions.

Choosing the Right Photoshop Actions

When selecting Photoshop actions, consider your specific editing needs and style preferences. Here are some popular types of actions that can streamline your workflow:

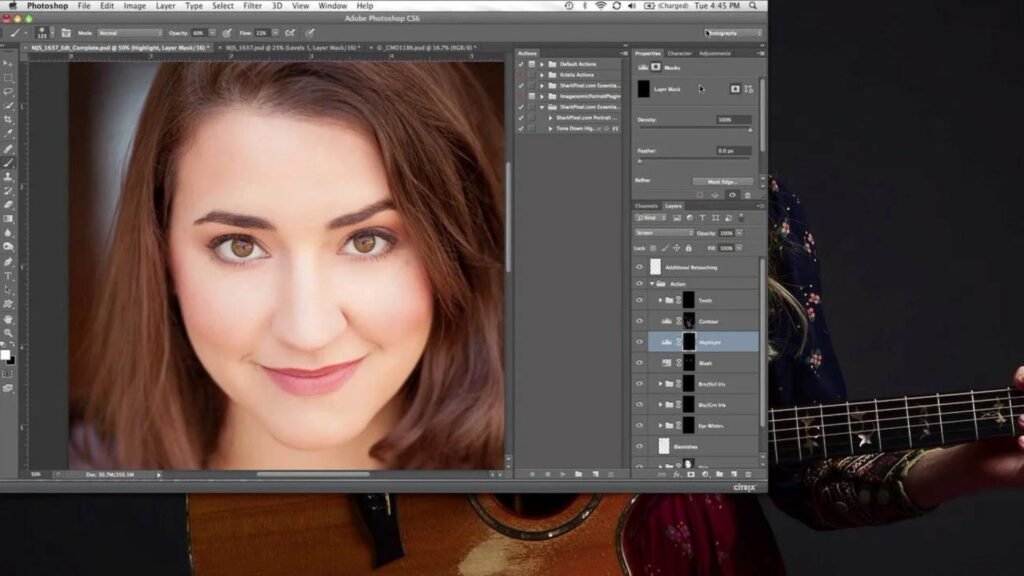
1. Portrait Retouching Actions

Enhance skin tones, smooth skin texture, and add subtle enhancements to portraits with retouching actions. These actions often include adjustments for blemish removal, skin softening, and enhancing facial features.

2. Landscape Enhancement Actions

Adjust colors, contrast, and clarity to bring out the beauty of landscapes. Landscape enhancement actions can include adjustments for enhancing skies, adding depth, and boosting natural colors.

3. Black and White Conversion Actions

Convert your photos to high-quality black and white images with specialized actions. These actions often include adjustments for contrast, tone, and grain simulation to achieve artistic black and white effects.

4. HDR Effects Actions

Create high dynamic range (HDR) effects with actions that merge multiple exposures into one balanced photo. HDR actions help you achieve vibrant colors and details across highlights and shadows.

5. Vintage and Retro Actions

Achieve nostalgic looks with vintage and retro actions that apply classic film effects, light leaks, and grain textures to your photos. These actions add a unique charm and character to your images.

How to Use Photoshop Actions

Using Photoshop actions is straightforward:

  • Download and Install: Download actions from reputable sources and install them in Photoshop.
  • Apply Actions: Open your photo in Photoshop, select the action you want to use, and click ‘Play’ to apply the steps.
  • Adjust Settings: Some actions allow for adjustment of settings like opacity or strength after application.
  • Save and Export: Once satisfied with the result, save your edited photo in your desired format.

Conclusion

In conclusion, integrating the right Photoshop actions into your editing workflow can significantly enhance your efficiency and creativity. Whether you’re editing portraits, landscapes, or experimenting with artistic effects, there’s a wide range of actions available to suit your needs. By leveraging these tools, you can streamline your editing process, achieve consistent results, and elevate the quality of your photography.

Mastering Photoshop actions takes practice, but the benefits of improved workflow and stunning results make it well worth the effort. Explore different actions, experiment with settings, and tailor them to your style to unlock the full potential of your photography editing journey.

More Details