Jul 2, 2024
Tips for Choosing the Best Lens for Landscape Photography

Landscape photography captures the beauty and vastness of nature, from majestic mountains to serene seascapes. Choosing the right lens is crucial for achieving breathtaking landscape images. In this guide, we’ll explore essential tips to help you select the best lens for landscape photography, considering factors like focal length, aperture, and lens type.
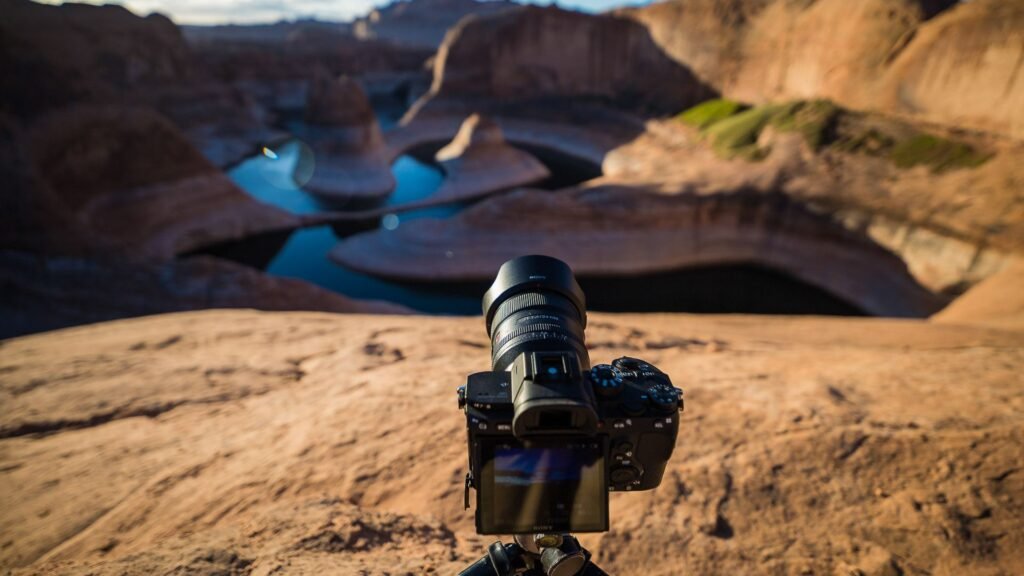
The Best Lens for Landscape Photography

Understanding Landscape Photography Needs

Landscape photography requires lenses that can capture wide angles, details, and depth of field to emphasize the vastness and beauty of natural scenes.


Key Considerations for Choosing a Lens

  1. Focal LengthOpt for wide-angle lenses (typically 14-35mm for full-frame cameras) to capture expansive landscapes. These lenses provide a broad field of view, ideal for including foreground elements and distant scenery in a single frame.
  2. ApertureChoose lenses with a wide maximum aperture (f/2.8 or lower) to maximize light intake, enabling sharper images in low-light conditions and greater control over depth of field. This is crucial for emphasizing subjects against blurred backgrounds.
  3. Lens TypeConsider prime lenses for their sharpness and wider apertures, which are excellent for landscape details. Zoom lenses offer versatility, allowing you to adjust focal length without changing lenses, making them suitable for various landscape compositions.
  4. Image Quality and SharpnessPrioritize lenses known for superior optical quality and sharpness across the frame. Look for lenses with special coatings to reduce flare and ghosting, ensuring clear, high-contrast images.

Best Lenses for Landscape Photography

Canon EF 16-35mm f/2.8L III USM

The Canon EF 16-35mm f/2.8L III USM is renowned for its wide-angle coverage and excellent sharpness, making it a favorite among landscape photographers. Its fast aperture ensures superior low-light performance and beautiful bokeh for foreground-background separation.

Nikon AF-S Nikkor 14-24mm f/2.8G ED

Nikon’s AF-S Nikkor 14-24mm f/2.8G ED is prized for its ultra-wide-angle perspective and exceptional optical quality. With a robust build and fast aperture, it delivers stunning landscape images with minimal distortion and impressive clarity.

Sony FE 16-35mm f/2.8 GM

The Sony FE 16-35mm f/2.8 GM combines a wide focal range with a fast aperture, making it perfect for capturing expansive landscapes with Sony’s mirrorless cameras. It offers outstanding sharpness and corner-to-corner clarity, essential for professional landscape photography.

Tamron 17-28mm f/2.8 Di III RXD

Tamron’s 17-28mm f/2.8 Di III RXD is a versatile and compact lens designed for Sony E-mount cameras. It provides excellent sharpness, fast autofocus, and a wide aperture, making it an excellent choice for landscape photographers looking for quality and affordability.


Conclusion

Choosing the best lens for landscape photography involves considering factors like focal length, aperture, lens type, and image quality. The Canon EF 16-35mm f/2.8L III USM, Nikon AF-S Nikkor 14-24mm f/2.8G ED, Sony FE 16-35mm f/2.8 GM, and Tamron 17-28mm f/2.8 Di III RXD are among the top choices in 2024 for their exceptional features and performance in capturing stunning landscapes. Evaluate your photography style, budget, and specific needs to find the lens that best suits your landscape photography aspirations.


This blog post provides essential guidance on selecting the best lens for landscape photography, focusing on key features and recommended models to enhance your photographic skills and capture the beauty of nature effectively.

More Details
Jul 2, 2024
Best Cameras for Portrait Photography in 2024

Photography enthusiasts know that capturing the perfect portrait requires the right equipment. In 2024, selecting the best camera for portrait photography can make a significant difference in the quality of your images. Whether you’re a professional photographer or an avid hobbyist, having a camera that suits your needs and style can elevate your portrait photography to new heights. This guide explores some of the top cameras available this year, designed to help you capture beautiful portraits with clarity and detail.

Best Cameras for Portrait Photography

Understanding Portrait Photography Needs

Portrait photography focuses on capturing the personality, mood, and essence of the subject. To achieve this, photographers often look for cameras that excel in specific features:


Key Features to Look For

  1. High-Resolution SensorsCameras with high-resolution sensors, such as 24MP or higher, capture intricate details and produce sharp images suitable for large prints.
  2. Lens OptionsVersatile lens options, including prime lenses (like 50mm f/1.8) and zoom lenses (like 24-70mm f/2.8), allow photographers to experiment with different focal lengths and depths of field.
  3. Image StabilizationOptical or sensor-shift image stabilization helps reduce blur caused by camera shake, ensuring sharper images, especially in low-light conditions.
  4. Autofocus SystemA reliable autofocus system with face detection and eye-tracking capabilities ensures that subjects remain in focus, even when shooting at wide apertures.

Best Cameras for Portrait Photography in 2024

Canon EOS R5

The Canon EOS R5 is a powerhouse mirrorless camera known for its high-resolution 45MP sensor, advanced autofocus system, and impressive image quality. It offers 8K video recording capabilities and excellent low-light performance, making it ideal for professional portrait photographers.

Nikon Z7 II

The Nikon Z7 II features a 45.7MP sensor, dual EXPEED 6 image processors, and a robust build quality. With 493 on-sensor phase-detection autofocus points and 5-axis image stabilization, it delivers sharp and detailed portraits with exceptional color accuracy.

Sony Alpha 7R IV

Sony’s Alpha 7R IV boasts a 61MP full-frame sensor, fast hybrid autofocus system, and real-time eye autofocus for humans and animals. It excels in capturing fine details and offers excellent dynamic range, making it a favorite among portrait photographers.

Fujifilm GFX 100S

The Fujifilm GFX 100S combines a large 102MP medium format sensor with in-body image stabilization and Fujifilm’s renowned color science. It delivers unmatched image quality and detail, making it suitable for studio portraits and outdoor shoots alike.


Conclusion

Choosing the best camera for portrait photography involves considering factors like sensor resolution, autofocus performance, and lens compatibility. In 2024, cameras like the Canon EOS R5, Nikon Z7 II, Sony Alpha 7R IV, and Fujifilm GFX 100S stand out for their superior features and capabilities. Whether you’re capturing professional portraits or honing your photography skills as a hobbyist, investing in the right camera can significantly enhance your creative output. Evaluate your photography needs and preferences to find the camera that best suits your style and budget.

More Details
Jul 2, 2024
How to Shoot Professional Product Photography

Professional product photography isn’t just about snapping a quick picture. It’s an art form that transforms ordinary objects into captivating visuals that entice consumers and elevate your brand. So, whether you’re a seasoned product photographer or just starting, this guide equips you with the knowledge and techniques to capture stunning professional product photos that convert.

Essential Equipment for Professional Product Photography

Before diving into lighting and composition, let’s explore the essential equipment needed for professional product photography:

Camera: While a high-end DSLR camera is ideal, you can achieve fantastic results with a mirrorless camera or even a high-resolution smartphone camera.

Lens:  A macro lens allows you to capture close-up shots with incredible detail, perfect for showcasing product textures and features.

Tripod: A sturdy tripod is crucial for ensuring sharp images, especially when using slower shutter speeds or working with low light.

Lighting:  Lighting is king in professional product photography.  Invest in studio lighting setups or utilize natural light with diffusers to create soft, even illumination.

Backdrops:  Solid backdrops in various colors or textures provide a clean canvas to showcase your product. Consider using seamless paper, fabric, or vinyl backdrops.

Reflectors: Reflectors bounce light back onto your product, reducing shadows and creating a more even lighting effect.

Mastering the Light

Lighting plays a pivotal role in professional product photography. Here are some key techniques to create stunning product visuals:

Soft, Diffused Light:  Soft, diffused light minimizes harsh shadows and creates a clean, professional look. Utilize softboxes, light tents, or diffusers to achieve this effect.

Main Light and Fill Light: Set up a main light source to illuminate your product and a fill light to reduce shadows on the opposite side.

Backlight: A backlight adds a subtle glow to your product, creating a more three-dimensional appearance and highlighting certain details.

Side Light:  Side lighting can be used to create dramatic effects, emphasizing product texture and shape.

Experiment with different lighting setups to find what works best for your specific product and desired outcome.

Creating Compelling Product Photos

Composition is the art of arranging elements in your frame to create a visually pleasing and engaging image. Here are some composition tips for professional product photography:

The Rule of Thirds:  Imagine dividing your frame into a 3x3 grid. Place your product at one of the intersecting points to create a more dynamic composition.

Leading Lines: Use lines within the frame to draw the viewer's eye towards your product.

Negative Space:  Don't clutter your frame.  Utilize negative space (empty space) around your product to create a sense of balance and focus attention.

Depth of Field: Control your depth of field (the area in focus) to draw attention to specific product elements.

Styling Props:  For certain products, consider incorporating props to create a lifestyle setting or showcase functionality. However, use props sparingly to avoid distracting from the main focus – the product itself.

Editing and Polishing for Professional Product Photos

While lighting and composition are essential, editing plays a crucial role in achieving that professional polish. Here’s what to consider:

Basic Adjustments: Use editing software like Adobe Photoshop or Lightroom to adjust brightness, contrast, and color balance.

Selective Adjustments: You can further enhance your image by selectively adjusting specific areas, like brightening shadows or sharpening details.

Background Cleanup: Remove any unwanted elements from your background to create a clean and professional look.

Color Correction: Ensure accurate color representation of your product.  Some editing software even offers color correction tools specifically designed for product photography.

Conclusion

In conclusion, by mastering the art of lighting, composition, and editing, you can transform your product photography game. Remember, professional product photography is an investment. High-quality images not only showcase your products in their best light but also elevate your brand perception and ultimately drive sales. So, grab your camera, experiment with these techniques, and embark on your journey to capturing product photos that truly shine!

More Details
Jul 2, 2024
How to Master Low-Light Photography

Low-light photography presents a captivating challenge for photographers aiming to capture compelling images in settings where natural or artificial light is limited. Mastering this skill requires a combination of understanding camera settings, utilizing appropriate equipment, and employing creative techniques. Here’s a detailed exploration to help you elevate your low-light photography game:

Understanding Low-Light Photography

Balancing Light and Settings

In low-light photography, mastering the exposure triangle—comprising aperture, shutter speed, and ISO—is essential. Adjusting these settings allows you to control how much light reaches your camera sensor and achieve well-exposed images without overexposure or underexposure.

Aperture’s Role in Low-Light Conditions

A wider aperture (represented by a lower f-number) is crucial for low-light situations as it allows more light to enter the camera. This setting impacts both exposure and depth of field, offering versatility in capturing sharp subjects against blurred backgrounds.

Managing Shutter Speed for Sharpness

In low light, slower shutter speeds are necessary to compensate for reduced light levels. However, longer exposures increase the risk of camera shake, leading to blurred photos. Using a tripod or stable surface helps maintain sharpness when using slower shutter speeds.

The Importance of ISO Sensitivity

ISO determines the camera sensor’s sensitivity to light. Increasing ISO allows for faster shutter speeds and smaller apertures in low light but may introduce digital noise, impacting image quality. Balancing ISO settings is crucial to minimize noise while achieving adequate exposure.

Essential Equipment for Low-Light Photography

Choosing the Right Camera

Select a camera with excellent low-light performance, typically characterized by a larger sensor size and efficient noise reduction capabilities at high ISO settings. Cameras designed for low-light conditions produce clearer images with less noise, crucial for high-quality photography in challenging environments.

Optimal Lenses for Low-Light Shooting

Invest in fast lenses with wide maximum apertures (e.g., f/1.8 or lower) to maximize light intake. Prime lenses are favoured for their superior light-gathering ability compared to zoom lenses, making them ideal for low-light scenarios where aperture control is paramount.

Stability with Tripods and Remote Shutter Releases

Using a sturdy tripod stabilizes your camera during long exposures, ensuring sharpness and clarity in low-light images. A remote shutter release minimizes camera shake further, essential for achieving crisp shots during extended exposure times.

Mastering Manual Mode

Setting the Aperture for Light Control

Adjust the aperture to its widest setting (lowest f-number) to maximize light intake while considering the desired depth of field. Wide apertures create a shallow depth of field, emphasizing the subject against a soft, blurred background—a technique often used in portrait and close-up photography.

Controlling Shutter Speed for Creative Effects

Experiment with slower shutter speeds to capture movement and light trails in low-light conditions. Adjusting shutter speed enables unique effects like light painting or motion blur, adding dynamism and visual interest to your photographs.

Finding the Ideal ISO Setting

Gradually increase ISO sensitivity to achieve proper exposure in dimly lit environments while monitoring noise levels. Modern cameras offer improved noise reduction algorithms, allowing for higher ISO settings with minimal impact on image quality.

White Balance Adjustments for Natural Colors

Fine-tune white balance settings to maintain natural colour tones in low-light photographs. Different light sources—such as incandescent or fluorescent—require specific white balance adjustments to achieve accurate colour representation and enhance overall image quality.

Creative Techniques for Low-Light Photography

Harnessing Light Painting for Artistic Effects

Experiment with light painting techniques using handheld light sources to create intricate patterns and designs during long exposures. Light painting allows for artistic expression, transforming ordinary scenes into visually captivating compositions.

Capturing Motion and Dynamic Scenes

Use slow shutter speeds to capture motion blur, emphasizing movement and energy in low-light settings. This technique is particularly effective in urban environments or nighttime landscapes where light sources create striking visual contrasts and dynamic compositions.

Creating Dramatic Silhouettes

Utilize backlighting to create dramatic silhouettes against bright backgrounds. Position your subject in front of a strong light source, such as a setting sun or artificial light, to outline their form and convey emotion or narrative within the photograph.

Incorporating Leading Lines and Urban Landscapes

Explore urban environments at night to capture leading lines and architectural details illuminated by streetlights and cityscapes. Leading lines guide the viewer’s eye through the image, emphasizing perspective and depth within the composition.

Conclusion

In conclusion, mastering low-light photography requires technical proficiency, creative vision, and the right equipment. By understanding the principles of exposure, utilizing essential gear, and exploring creative techniques, you can confidently capture stunning images in challenging lighting conditions. Embrace the opportunity to experiment, refine your skills, and tell compelling stories through the art of low-light photography.

More Details
Jul 2, 2024
Top Street Photography Tips

Street photography is a captivating genre that captures candid moments of daily life in public spaces. Here are some top tips to enhance your street photography skills:

Know Your Gear

Familiarize yourself with your camera equipment, whether it’s a DSLR, mirrorless, or even a smartphone. Being comfortable with your gear allows you to focus on capturing moments without distraction.

Master Composition

Composition is key in street photography. Pay attention to elements like framing, leading lines, and the rule of thirds. Look for interesting perspectives and backgrounds that complement your subjects.

Use Natural Light

Utilize natural light to your advantage. Early morning and late afternoon light (golden hour) can add warmth and depth to your photos. Experiment with light and shadows to create mood and drama in your images.

Capture Candid Moments

The essence of street photography lies in capturing authentic, unposed moments. Be observant and patient, waiting for interesting interactions, gestures, or expressions that tell a story.

Respect Privacy and Ethics

Be mindful of people’s privacy and cultural sensitivities. Avoid intrusive or disrespectful photography. When in doubt, seek permission or opt for candid shots that respect the subject’s dignity.

Get Close (But Respectfully)

Don’t be afraid to get physically close to your subjects to capture intimate details and emotions. However, do so respectfully and be aware of personal boundaries.

Focus on Details

Street photography isn’t just about capturing people; it’s also about documenting the details of urban life. Look for interesting textures, patterns, graffiti, signage, or architectural elements that add depth to your narrative.

Experiment with Perspective

Explore different angles and viewpoints. Try shooting from low to the ground or from a higher vantage point. Changing your perspective can provide unique and engaging compositions.

Tell a Story

Aim to create a narrative with your photos. Look for sequences or series of images that convey a theme or capture a moment unfolding over time. Think about how your images connect to tell a broader story.

Edit Mindfully

Post-processing can enhance your street photos, but strive to maintain the authenticity of the moment. Adjust exposure, contrast, and colors subtly to highlight your vision without overshadowing the natural feel of the scene.

Practice and Patience

Street photography is a skill that improves with practice and persistence. Experiment with different techniques, learn from your mistakes, and be patient in capturing the perfect shot.

Study the Masters

Study the work of renowned street photographers for inspiration and insights into their approach. Analyze their compositions, use of light, and storytelling techniques to refine your own style.

By incorporating these tips into your street photography practice, you can elevate your images and capture compelling stories of everyday life with authenticity and creativity.

More Details
Jun 29, 2024
Tips for Framing Your Photos

As a photographer, mastering the art of framing your photos can significantly enhance the visual appeal of your images. Framing is not just about placing your subject in the centre of the frame but involves thoughtful composition to draw the viewer’s eye. In this article, we’ll share some practical tips to help you frame your photos effectively.

Framing Your Photos

1. Understand the Rule of Thirds

The rule of thirds is a fundamental principle in photography. Imagine your frame divided into nine equal parts by two horizontal and two vertical lines. The key elements of your composition, such as the horizon or the subject’s eyes, should align along these lines or at their intersections. This technique creates balance and interest in your photos.

Framed Photos
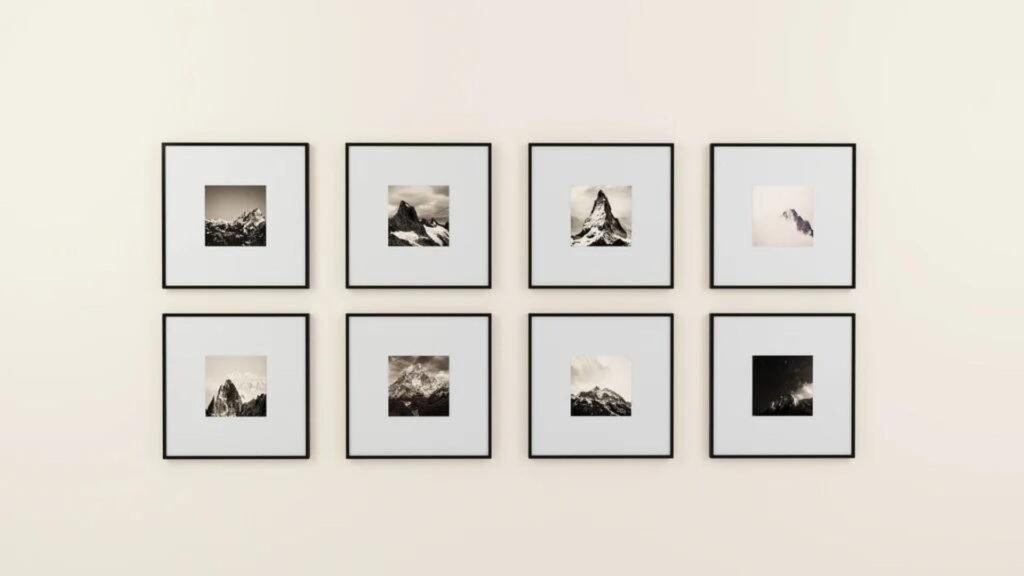
Framing Your Photos

2. Use Leading Lines

Leading lines are lines within the frame that lead the viewer’s eye to the main subject or focal point of the photograph. These lines can be roads, paths, fences, or even natural elements like rivers or tree branches. By incorporating leading lines into your composition, you can create depth and guide the viewer’s gaze through the image.

3. Consider Symmetry and Patterns

Symmetry and patterns can add a sense of harmony and order to your photos. Look for natural or man-made elements that exhibit symmetry, such as reflections in water, architectural structures, or rows of trees. Placing your subject symmetrically within the frame can create a balanced and aesthetically pleasing composition.

4. Frame Within a Frame

Using natural frames within your photograph can draw attention to the main subject and add depth to the image. Examples of natural frames include archways, doorways, windows, or overhanging branches. Positioning your subject strategically within these frames can create a sense of context and emphasize the focal point.

5. Experiment with Perspective

Changing your perspective can drastically alter the composition of your photo. Instead of photographing your subject at eye level, try shooting from a higher or lower angle. This change in perspective can add drama and visual interest to your images. Don’t hesitate to get close to your subject or experiment with different angles to find the most compelling composition.

Conclusion

Mastering the art of framing your photos takes practice and a keen eye for composition. By applying these tips understanding the rule of thirds, using leading lines, considering symmetry, framing within a frame, and experimenting with perspective you can enhance the impact and visual appeal of your photography. Remember, the goal is not just to capture a scene but to tell a story through thoughtful composition and framing.

More Details
Jun 29, 2024
Top Gadgets for Photographers

As a photographer, having the right gadgets can make a significant difference in the quality and ease of your work. In this article, we’ll share some top gadgets for photographers that can enhance your photography experience. These tools range from essential equipment to innovative accessories, all designed to help you capture stunning images.

Gadgets for Photographers

1. High-Quality Camera

At the heart of every photographer’s kit is a high-quality camera. Whether you’re a professional or an enthusiast, investing in a good camera is crucial. Look for cameras with high resolution, good low-light performance, and versatile lens options. Brands like Canon, Nikon, and Sony offer excellent choices. A high-quality camera will provide the foundation for all your photography endeavours.

Versatile Lenses-One of the Gadgets for Photographers
Gadgets for Photographers

2. Versatile Lenses

Lenses are essential gadgets for photographers. Different lenses serve different purposes, so having a variety can greatly enhance your creativity. A standard zoom lens is versatile for everyday shooting, while a prime lens offers sharpness and a wide aperture for low-light conditions. Additionally, consider a macro lens for close-up shots and a telephoto lens for capturing distant subjects. Versatile lenses expand your photographic possibilities.

3. Tripod

A tripod is a must-have gadget for photographers. It provides stability, allowing you to take sharp images, especially in low light or when using long exposures. Tripods are also useful for landscape photography, macro shots, and self-portraits. Look for a sturdy yet lightweight tripod that is easy to carry around. A good tripod ensures you never miss a steady shot.

4. External Flash

An external flash is another valuable tool for photographers. Built-in camera flashes can be limiting, often producing harsh and unflattering light. An external flash allows you to control the direction and intensity of the light, resulting in more natural and pleasing photos. Some flashes also offer wireless capabilities, giving you more flexibility in your lighting setups. An external flash can greatly improve your indoor and low-light photography.

5. Camera Bag

A reliable camera bag is essential for photographers who are always on the go. It protects your equipment and keeps it organized. Look for a bag with adjustable compartments to fit your camera, lenses, and accessories. A good camera bag is comfortable to carry and has enough space for all your essentials. A well-designed camera bag ensures your gear is safe and accessible.

6. Memory Cards and Storage

Having ample memory is crucial for photographers. High-capacity memory cards allow you to shoot without worrying about running out of space. Additionally, consider using fast memory cards to speed up your workflow, especially when shooting in burst mode or recording videos. Don’t forget about storage solutions for your photos. External hard drives and cloud storage provide secure backups for your valuable images. Reliable memory cards and storage options keep your photos safe.

7. Remote Shutter Release

A remote shutter release is a handy gadget for photographers. It allows you to take photos without physically touching the camera, reducing the risk of camera shaking. This is particularly useful for long exposures, macro photography, and self-portraits. Some remote shutters come with additional features like interval shooting for time-lapse photography. A remote shutter release provides more control over your shots.

8. Cleaning Kit

Keeping your camera and lenses clean is essential for maintaining image quality. A good cleaning kit includes a lens brush, microfiber cloth, air blower, and cleaning solution. Regular cleaning prevents dust and smudges from affecting your photos. A well-maintained camera ensures your images are always sharp and clear.

9. Portable Reflectors

Portable reflectors are useful gadgets for photographers who work with natural light. They help control and manipulate light, reducing harsh shadows and adding fill light to your subjects. Reflectors come in various sizes and colours, such as silver, gold, and white, each offering different lighting effects. Lightweight and foldable, portable reflectors are easy to carry and use on location. They enhance your lighting options in outdoor shoots.

10. Smartphone Lens Attachments

For those who enjoy mobile photography, smartphone lens attachments are great gadgets for photographers. These lenses attach to your phone’s camera, offering different perspectives like wide-angle, macro, and fisheye. They are compact, easy to use, and can significantly improve the quality of your smartphone photos. Smartphone lens attachments add versatility to your mobile photography.

Conclusion

Having the right gadgets for photographers can transform your photography experience. From high-quality cameras and versatile lenses to essential accessories like tripods and external flashes, these tools help you capture stunning images. Don’t forget about practical items like camera bags, memory cards, and cleaning kits to keep your gear safe and well-maintained. Experiment with gadgets like portable reflectors and smartphone lens attachments to expand your creative possibilities. Investing in these gadgets ensures you are well-equipped to take your photography to the next level. Happy shooting!

More Details
Jun 29, 2024
How to Take Beautiful Macro Photos

Taking beautiful macro photos can be incredibly rewarding. Capturing the intricate details of tiny subjects opens up a whole new world of photography. In this article, we’ll share tips and techniques to help you take stunning macro photos. Let’s get into the details and explore how to improve your macro photography skills.

Taking Beautiful Macro Photos

Choose the Right Equipment

Having the right equipment is crucial for taking beautiful macro photos. A macro lens is essential as it allows you to focus on subjects very close to the lens. Look for a lens with a 1:1 magnification ratio for true macro photography. Additionally, consider using extension tubes or close-up filters if you don’t have a dedicated macro lens. These accessories can help you get closer to your subject and capture more detail.

A Macro Photo
Macro Photos

Understand Lighting

Good lighting is key to capturing beautiful macro photos. Natural light is often the best choice, but you can also use artificial lighting. When shooting outdoors, try to photograph your subjects in the early morning or late afternoon when the light is soft and diffused. If you’re shooting indoors, use a ring light or a diffused flash to avoid harsh shadows and highlights. Proper lighting enhances the details and textures in your macro shots.

Use a Tripod

Using a tripod is essential for macro photography. When you’re shooting close-ups, even the slightest movement can cause blurriness. A sturdy tripod stabilizes your camera, ensuring sharp and clear images. Additionally, use a remote shutter release or the camera’s self-timer to eliminate the camera shake caused by pressing the shutter button. A tripod is a valuable tool for capturing sharp macro photos.

Experiment with Aperture

Experimenting with aperture settings is important for macro photography. A smaller aperture (higher f-stop number) increases the depth of field, keeping more of your subject in focus. However, a larger aperture (lower f-stop number) creates a shallow depth of field, which can make your subject stand out against a blurred background. Try different aperture settings to see what works best for your specific subject and desired effect.

Focus Manually

Manual focus is often more precise for macro photos. Autofocus can struggle with the shallow depth of field in macro photography, leading to missed focus. Switch your camera to manual focus mode and use the live view feature to zoom in and fine-tune your focus. This ensures that the most critical part of your subject is sharp and detailed.

Pay Attention to Composition

Composition is vital in creating beautiful macro photos. Consider the rule of thirds, leading lines, and framing to create visually appealing images. Fill the frame with your subject, but leave enough space around it to give context. Experiment with different angles and perspectives to find the most interesting and engaging composition. Good composition enhances the overall impact of your macro shots.

Use a Low ISO

Using a low ISO setting is important for macro photography. A low ISO reduces noise and ensures high image quality. Since macro photos often require a smaller aperture and slower shutter speed, you might need to compensate with additional lighting or a longer exposure time. Keeping the ISO low helps maintain the clarity and detail in your images.

Capture the Details

Macro photography is all about capturing the tiny details that are often missed by the naked eye. Look for interesting textures, patterns, and colours in your subjects. Pay attention to the smallest details, like the veins on a leaf or the intricate design of an insect’s wings. Capturing these details makes your macro photos more compelling and unique.

Practice Patience

Patience is key to successful macro photography. Tiny subjects can be elusive and difficult to photograph. Take your time to observe your subject and wait for the perfect moment to capture it. Experiment with different settings, angles, and lighting conditions. With practice and patience, you’ll improve your skills and take stunning macro photos.

Post-Processing Tips

Post-processing can enhance your macro photos. Use photo editing software to adjust exposure, contrast, and sharpness. Be careful not to over-edit, as this can make your photos look unnatural. Subtle adjustments can bring out the best in your images and highlight the intricate details you’ve captured.

Use a Macro Rail

A macro rail can help you achieve precise focus. This tool allows you to make tiny adjustments to your camera’s position without moving the tripod. It’s especially useful when dealing with very small subjects and helps in stacking multiple shots for increased depth of field.

Work with Live Subjects

Photographing live subjects, like insects, adds a dynamic element to your macro photos. Be patient and move slowly to avoid startling your subject. Learn about the behaviour of the insects you want to photograph. Early mornings can be ideal because insects are less active and easier to approach.

Conclusion

Taking beautiful macro photos requires the right equipment, good lighting, a tripod, manual focus, careful composition, low ISO, and patience. By experimenting with these techniques and practising regularly, you can capture stunning macro shots that showcase the intricate details of your subjects. Happy shooting!

More Details
Jun 29, 2024
Ways of Capturing the Perfect Sunset

Capturing the perfect sunset is a goal for many photographers, whether you’re a beginner or an experienced pro. The vibrant colours and serene atmosphere make sunsets a favourite subject. In this article, we’ll share tips on capturing the perfect sunset that will help you get stunning shots every time. Let’s explain these tips to elevate your sunset photography.

Capturing the Perfect Sunset

Choose the Right Location

The first step in capturing the perfect sunset is choosing the right location. Find a spot with an unobstructed view of the horizon. Beaches, hilltops, and open fields are great options. Consider elements that can enhance your composition, such as water reflections, silhouettes, or interesting foreground objects. The right location sets the stage for a beautiful sunset shot.

A man Capturing the Perfect Sunset
Capturing the Perfect Sunset

Plan Ahead

Planning is crucial for sunset photography. Check the local sunset times and arrive at least 30 minutes early. This gives you time to find the best spot and set up your equipment. Use weather apps to ensure clear skies or light clouds, which can add texture to your photos. Planning ensures you’re ready to capture the perfect moment.

Use a Tripod

Using a tripod is essential for capturing the perfect sunset. It stabilizes your camera, allowing for sharp images even in low light. A tripod also enables you to use slower shutter speeds without blurring your shots. Invest in a sturdy, portable tripod that you can easily carry to your shooting location. A tripod is a valuable tool for sunset photography.

Experiment with Camera Settings

Experimenting with your camera settings is key to capturing the perfect sunset. Use a low ISO to reduce noise and enhance image quality. Adjust your aperture to control the depth of field, and try different shutter speeds to capture various effects. For example, a slower shutter speed can create smooth water reflections, while a faster speed can freeze motion. Experimenting with settings helps you find the best combination for stunning sunset shots.

Include Foreground Elements

Including foreground elements can add depth and interest to your sunset photos. Look for objects like rocks, trees, or people to include in your composition. These elements can create a sense of scale and lead the viewer’s eye to the image. Incorporating foreground elements makes your sunset photos more dynamic and engaging.

Play with Silhouettes

Silhouettes are a powerful technique for capturing the perfect sunset. Position your subject between the camera and the sun to create a dark outline against the colourful sky. Silhouettes work well with recognizable shapes like trees, people, or buildings. This technique adds drama and focus to your sunset photos.

Capture the Golden Hour

The golden hour, which occurs shortly before sunset, offers soft, warm light that is perfect for photography. During this time, the light is diffused and creates a magical glow. Capture the moments leading up to the sunset to take advantage of this beautiful light. The golden hour provides a unique opportunity for stunning sunset photos.

Use HDR Mode

Using HDR (High Dynamic Range) mode can help you capture the perfect sunset. HDR mode combines multiple exposures to create a balanced image with rich details in both the highlights and shadows. This technique is especially useful for sunset photography, where the contrast between the bright sky and darker foreground can be challenging. HDR mode enhances the overall quality of your sunset shots.

Adjust White Balance

Adjusting the white balance can significantly impact the mood of your sunset photos. Experiment with different white balance settings, such as cloudy or shade, to enhance the warm tones of the sunset. Customizing the white balance helps you achieve the desired colour effect and make your sunset photos more vibrant.

Be Patient and Observant

Patience and observation are essential for capturing the perfect sunset. Sunsets change rapidly, and the colours can shift dramatically within minutes. Stay focused and ready to capture different stages of the sunset. Observing the changing light and being patient allows you to capture the perfect moment.

Post-Processing Tips

Post-processing can enhance your sunset photos. Use editing software to adjust exposure, contrast, and colour balance. Be careful not to over-edit, as this can make your photos look unnatural. Subtle adjustments can bring out the best in your sunset shots and highlight the natural beauty of the scene.

Conclusion

Capturing the perfect sunset requires planning, the right equipment, and an understanding of photography techniques. By choosing the right location, planning, using a tripod, experimenting with settings, including foreground elements, playing with silhouettes, capturing the golden hour, using HDR mode, adjusting white balance, and being patient and observant, you can take stunning sunset photos. Implement these tips and watch your sunset photography improve.

More Details
Jun 29, 2024
Tips for Travel Photography

Travel photography is an exciting and rewarding way to capture the essence of your adventures. Whether you’re exploring new cities or immersing yourself in nature, mastering travel photography can enhance your travel experience. In this article, we’ll share tips for travel photography that will help you take stunning photos on your journeys. Let’s get into these tips and elevate your travel photography skills.

Travel Photography

Plan Ahead

Planning is crucial for successful travel photography. Research your destination beforehand to identify key locations, best times for lighting, and local customs. Make a list of must-visit spots and events you want to capture. Planning ensures you don’t miss out on unique photo opportunities and helps you make the most of your time.

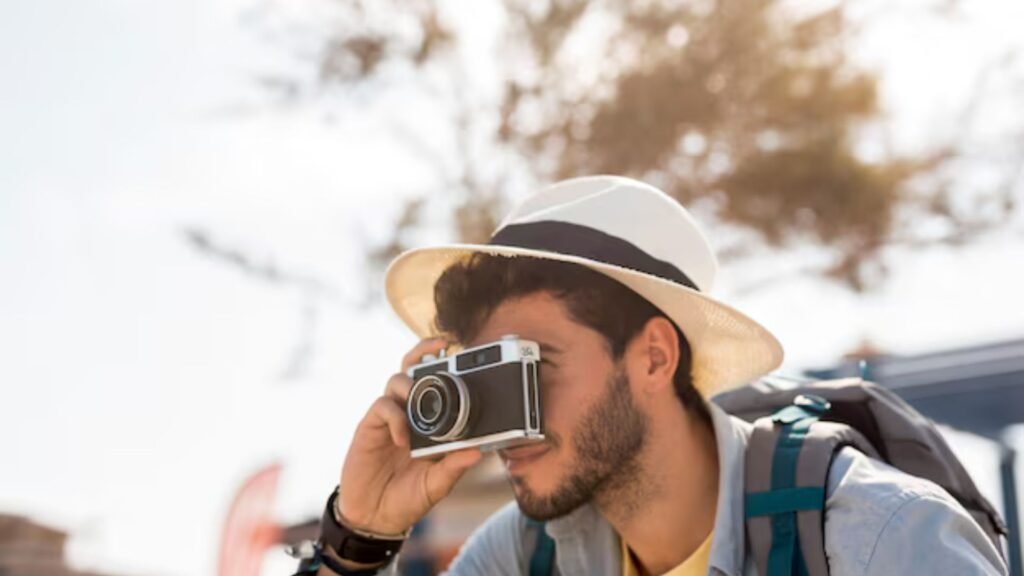
A man taking Travel Photographs
Travel Photography

Pack the Right Gear

Having the right gear is essential for travel photography. Depending on your needs, pack a versatile camera, lenses, a tripod, and extra batteries. A lightweight and durable camera bag will protect your equipment while on the move. Don’t forget to bring memory cards and a portable hard drive for backing up your photos. Packing the right gear ensures you are prepared for various shooting conditions.

Focus on Composition

Composition plays a significant role in travel photography. Use the rule of thirds to create balanced and visually appealing images. Pay attention to leading lines, symmetry, and framing to add depth and interest to your photos. Experiment with different angles and perspectives to capture unique shots. Focusing on composition will help you create compelling and memorable images.

Capture Local Culture

One of the joys of travel photography is capturing the local culture. Photograph people, traditions, architecture, and everyday scenes to tell a story of the place you’re visiting. Approach locals respectfully and ask for their permission before taking their photos. Engaging with the culture around you adds authenticity and depth to your travel photography.

Utilize Natural Light

Natural light can dramatically enhance your travel photography. The golden hours—shortly after sunrise and before sunset—provide a soft, warm glow that is perfect for photography. Avoid harsh midday sunlight, which can create unflattering shadows. When shooting indoors, use windows and doorways to bring in natural light. Utilizing natural light will give your photos a professional and polished look.

Be Patient and Observant

Patience and observation are key to capturing great travel photos. Take your time to observe your surroundings and wait for the perfect moment. Sometimes the best shots come from being in the right place at the right time. Whether it’s waiting for the perfect light or anticipating a candid moment, patience and observation will pay off in your travel photography.

Experiment with Settings

Experimenting with your camera settings can lead to creative and unique travel photos. Learn how to use manual mode to control exposure, shutter speed, and aperture. Play with different settings to achieve various effects, such as long exposures for smooth water or fast shutter speeds for freezing action. Understanding and experimenting with your camera settings will help you take full control of your photography.

Keep Your Equipment Safe

Keeping your equipment safe is vital during your travels. Use padded bags and cases to protect your gear from bumps and weather. Be mindful of your surroundings and avoid leaving your equipment unattended. Investing in a good insurance policy for your camera gear can also provide peace of mind. Keeping your equipment safe ensures you can continue capturing beautiful images throughout your trip.

Edit and Share Your Photos

Editing is an important part of travel photography. Use editing software to enhance images, adjust exposure, and correct colours. Be mindful not to over-edit, as this can detract from the natural beauty of your photos. Once edited, share your pictures on social media, blogs, or photo-sharing platforms to inspire others and showcase your work. Editing and sharing your photos completes the travel photography process.

Use a Lightweight Travel Tripod

A lightweight travel tripod can make a big difference in your travel photography. It provides stability for long exposures, low-light conditions, and self-portraits. Choose a compact tripod that fits in your bag and is easy to carry. Using a tripod ensures your photos are sharp and well-composed, even in challenging shooting situations.

Master the Art of Candid Shots

Candid shots can capture the true essence of a place and its people. Keep your camera ready and observe your surroundings for spontaneous moments. Avoid drawing attention to yourself to get natural and unposed photos. Mastering the art of candid shots will add authenticity and emotion to your travel photography.

Learn Basic Phrases in the Local Language

Learning basic phrases in the local language can enhance your travel photography experience. Simple greetings and polite requests can help you connect with locals and gain their trust. This can lead to more natural and relaxed portraits. Knowing a few phrases shows respect and can open doors to unique photo opportunities.

Conclusion

Travel photography is a rewarding way to document your adventures and share your experiences with others. By planning, packing the right gear, focusing on composition, capturing local culture, utilizing natural light, being patient and observant, experimenting with settings, keeping your equipment safe, and editing your photos, you can take your travel photography to the next level. Implement these tips and watch your travel photos transform into stunning visual stories.

More Details