Jul 3, 2024
How to Use Filters in Photography

Filters in photography are essential tools that can transform your images in various ways, enhancing both creativity and technical quality. Whether you’re a seasoned photographer or a beginner, understanding how to effectively use filters can elevate your photography to the next level. This guide will explore the different types of filters and how to use them to achieve stunning results.

Understanding the Basics of Filters in Photography

Filters in photography are pieces of glass or resin that attach to the front of your camera lens. They modify the light entering the lens, allowing you to achieve specific effects. Knowing the different types of filters and their purposes is the first step in mastering their use.

The Versatility of UV Filters

UV filters are among the most common filters in photography. Originally designed to block ultraviolet light and reduce haze, they are now primarily used to protect the lens from dust, scratches, and moisture. While they don’t significantly alter the image, they are a worthwhile investment for lens protection.

Enhancing Colors with Polarizing Filters

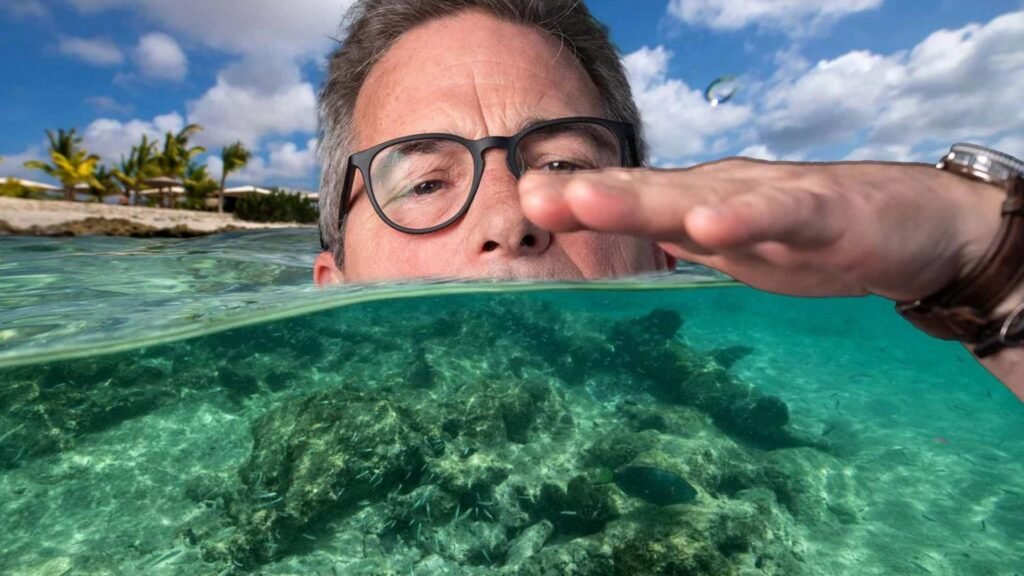
Polarizing filters are fantastic for reducing glare and reflections, especially in water or glass. They also enhance the colours in your images, making skies appear bluer and foliage greener. To use a polarizing filter, simply rotate it until you achieve the desired effect. This ability to manipulate reflections and colour saturation makes polarizing filters invaluable for landscape photography.

Creating Drama with Neutral Density Filters

Neutral density (ND) filters reduce the amount of light entering the lens without affecting color balance. This reduction allows for longer exposure times, which can create dramatic effects like silky-smooth waterfalls or blurred motion in clouds. ND filters are essential for photographers who want to experiment with exposure and motion.

Capturing Details with Macro Filters

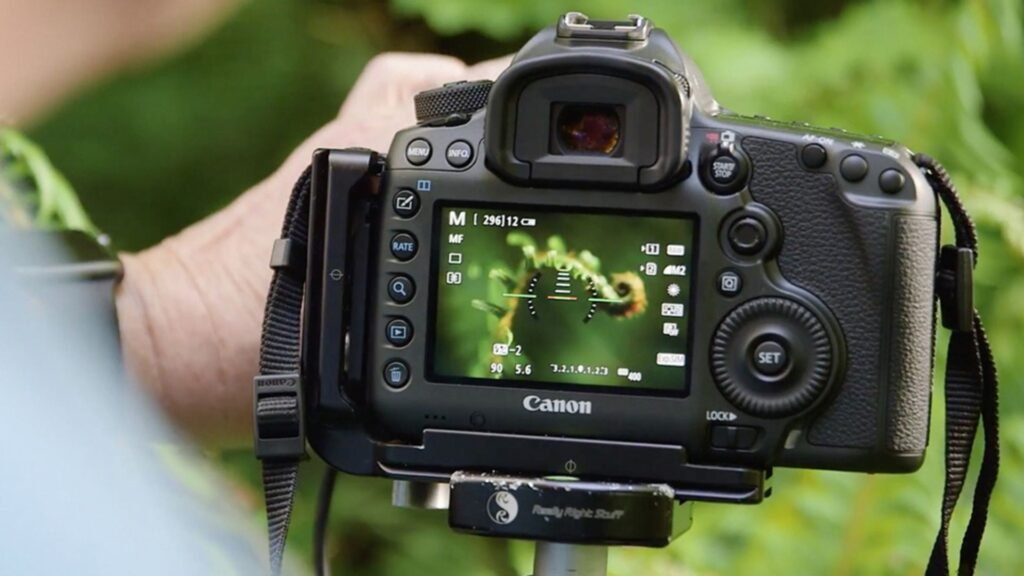
Macro filters, also known as close-up filters, allow you to focus on subjects at very close distances. These filters are perfect for capturing fine details in small objects, such as flowers, insects, or intricate textures. By using macro filters in photography, you can explore the tiny world around you with incredible clarity.

Balancing Light with Graduated ND Filters

Graduated neutral density (GND) filters are designed to balance the exposure between the sky and the ground in landscape photography. They are darker at the top and gradually transition to clear at the bottom. This gradient helps prevent overexposed skies while maintaining detail in the foreground, resulting in a well-balanced image.

Enhancing Creativity with Special Effect Filters

Special effect filters, such as star filters or soft-focus filters, can add unique touches to your images. Star filters create starburst patterns around light sources, while soft-focus filters give a dreamy, ethereal quality to portraits. Using these filters in photography can inspire creativity and help you develop a distinctive style.

Practical Tips for Using Filters in Photography

To get the best results with filters in photography, keep a few practical tips in mind. First, always ensure your filters are clean to avoid unwanted spots or streaks in your images. Second, consider using a filter holder system if you frequently switch between different filters. This system makes it easier and quicker to change filters on the go.

Conclusion

In conclusion, mastering the use of filters in photography can significantly enhance your creative possibilities and technical proficiency. From UV and polarizing filters to ND and special effect filters, each type serves a unique purpose and can help you achieve specific photographic goals. By experimenting with different filters and techniques, you’ll be able to capture stunning, professional-quality images that stand out. So, grab your camera, attach a filter, and start exploring the endless possibilities that filters in photography offer.

More Details
Jul 3, 2024
Best Photo Printers for Home Use

Having a reliable photo printer at home can make all the difference for photo enthusiasts, hobbyists, and professionals alike. Instead of relying on third-party printing services, you can produce high-quality prints right from your home. Here are some of the best photo printers for home use that combine quality, convenience, and affordability.

Photo Printers for Home Use

1. Canon PIXMA Pro-100

Firstly, the Canon PIXMA Pro-100 is a favorite among photographers for its stunning print quality and ease of use.

Features:

  • 8 Dye-Based Inks: Provides vibrant colors and a wide color gamut.
  • ChromaLife100+ System: Ensures your photos will last a long time without fading.
  • Wireless Printing: Print from anywhere in your home with Wi-Fi connectivity.
  • Wide Paper Compatibility: Supports various paper sizes and types, making it versatile for different printing needs.

2. Epson SureColor P600

Another top choice is the Epson SureColor P600, known for its professional-grade prints and advanced features.

Features:

  • 9 UltraChrome HD Inks: Produces deep blacks and vivid colors.
  • Advanced Black-and-White Printing: Excellent for monochrome prints.
  • Large Color Touchscreen: Easy navigation and control of printer settings.
  • Wi-Fi Direct: Allows you to print directly from your smartphone or tablet without a router.

3. HP Envy 6055e

For those on a budget, the HP Envy 6055e offers great photo printing capabilities without breaking the bank.

Features:

  • Affordable Printing: Cost-effective for home use with Instant Ink subscription plans.
  • Dual-Band Wi-Fi: Reliable wireless connections for easy printing.
  • All-in-One Functionality: Prints, scans, and copies, making it versatile for home use.
  • Smart App: HP Smart app allows you to print from your mobile devices effortlessly.

4. Canon SELPHY CP1300

Next, the Canon SELPHY CP1300 is perfect for quick and easy photo prints on the go.

Features:

  • Compact and Portable: Ideal for small spaces and travel.
  • Dye-Sublimation Technology: Produces water-resistant and fade-resistant prints.
  • Wireless Printing: Print directly from your smartphone or camera.
  • Various Print Sizes: Offers different size options, including postcard and square prints.

5. Epson Expression Photo XP-8600

The Epson Expression Photo XP-8600 is another excellent option for high-quality photo prints.

Features:

  • 6-Color Claria Photo HD Inks: Ensures detailed and vibrant photos.
  • Compact Design: Fits easily into any home office or workspace.
  • Touchscreen Control: Easy to use with a 4.3-inch color touchscreen.
  • Versatile Printing Options: Prints on various media, including CDs/DVDs.

6. Canon imagePROGRAF PRO-300

For serious photographers, the Canon imagePROGRAF PRO-300 offers professional-grade photo printing at home.

Features:

  • 10 LUCIA PRO Inks: Exceptional color accuracy and longevity.
  • Nozzle Recovery System: Reduces the risk of clogged nozzles.
  • Wi-Fi and Ethernet Connectivity: Multiple connection options for ease of use.
  • Borderless Printing: Prints up to 13×19 inches with no borders for a professional finish.

7. HP Tango X

Lastly, the HP Tango X is a sleek and modern printer that fits seamlessly into any home environment.

Features:

  • Smart Home Integration: Works with Amazon Alexa and Google Assistant for voice-activated printing.
  • Compact Design: Stylish and space-saving with a wraparound cover.
  • High-Quality Prints: Great for photos and everyday documents.
  • Mobile Printing: Print from your smartphone with the HP Smart app.

Conclusion

In conclusion, having the best photo printer for home use can make a significant difference in the quality and convenience of your photo printing experience. Whether you are looking for professional-grade prints or budget-friendly options, there’s a printer that meets your needs. From the vibrant prints of the Canon PIXMA Pro-100 to the portable convenience of the Canon SELPHY CP1300, these printers offer a range of features to suit different preferences and budgets. Investing in a good photo printer ensures that you can preserve your precious memories with high-quality prints from the comfort of your home.

More Details
Jul 3, 2024
Tips for Event Photography

Event photography requires a unique set of skills to capture the essence and energy of various occasions, from corporate events and weddings to concerts and parties. Whether you’re an experienced photographer or just starting out, these tips will help you excel in event photography.

Understand the Event

Before the event, gather as much information as possible about the schedule, key moments, and important people. Understanding the event’s purpose and flow will help you anticipate important shots and be in the right place at the right time. Communicate with the event organizer to clarify expectations and any specific shots they need.

Prepare Your Gear

Ensure you have the right equipment for the event. A DSLR or mirrorless camera with interchangeable lenses is ideal. Bring a versatile zoom lens, such as a 24-70mm, for capturing wide shots and close-ups. A fast prime lens, like a 50mm f/1.8, is great for low-light situations. Don’t forget extra batteries, memory cards, and a flash with a diffuser.

Arrive Early

Arrive at the venue early to familiarize yourself with the layout and identify good vantage points. This also gives you time to take some establishing shots before guests arrive, capturing the decor and setup. Arriving early ensures you’re ready to start shooting as soon as the event begins.

Use Natural Light When Possible

Whenever possible, use natural light to your advantage. Position subjects near windows or other light sources to create soft, flattering light. If the event is indoors with low lighting, increase your camera’s ISO, use a fast lens, and consider using a flash with a diffuser to avoid harsh shadows.

Capture Candid Moments

Candid shots often capture the true essence and emotions of an event. Look for genuine interactions, laughter, and moments of joy. Use a longer focal length to shoot from a distance, allowing you to capture candid moments without being intrusive. Be discreet and blend in with the crowd to capture natural, unposed shots.

Pay Attention to Composition

Good composition is key to compelling event photos. Use the rule of thirds, leading lines, and framing to create visually appealing images. Experiment with different angles and perspectives to add variety to your shots. Don’t be afraid to get close to your subjects to capture detailed, intimate moments.

Be Mindful of Backgrounds

Pay attention to the backgrounds in your shots to avoid distractions. Look for clean, uncluttered backgrounds that highlight your subjects. If the background is busy, use a wide aperture to create a shallow depth of field, blurring the background and keeping the focus on the subject.

Use Continuous Shooting Mode

Events are dynamic and fast-paced, so use your camera’s continuous shooting mode to capture multiple frames per second. This increases your chances of capturing the perfect moment, especially during key activities like speeches, performances, or other action-packed moments.

Engage with People

Engage with event attendees to make them feel comfortable being photographed. A friendly approach can lead to more relaxed and natural expressions. Ask for permission before taking close-up shots, especially if you’re capturing candid moments of strangers.

Capture Key Details

Don’t forget to capture the details that make the event unique, such as decorations, food, signage, and other elements that reflect the event’s theme. These shots add context and depth to the overall story of the event.

Be Ready for Low-Light Situations

Many events, especially evening ones, have challenging lighting conditions. Use a fast lens with a wide aperture to allow more light into the camera. Increase your ISO settings to brighten the scene, but be mindful of noise. Use a flash sparingly, as it can be disruptive; instead, use a diffuser or bounce the flash off the ceiling for softer light.

Edit Thoughtfully

Post-processing is essential to enhance your event photos. Adjust exposure, contrast, and color balance to bring out the best in your images. Crop and straighten shots to improve composition. Use noise reduction techniques for low-light images. However, keep edits natural and consistent with the event’s atmosphere.

Deliver Photos Promptly

After the event, deliver the edited photos promptly. Quick turnaround time is appreciated by clients and attendees who are eager to see and share the images. Provide a selection of highlights first, followed by the full set of edited photos.

In conclusion, event photography is about capturing the atmosphere, emotions, and key moments of an event. By being prepared, engaging with attendees, and mastering your technical skills, you can create a memorable and impactful visual record of any event

More Details
Jul 3, 2024
How to Shoot Candid Photography

Candid photography captures genuine moments, emotions, and expressions, often resulting in more authentic and compelling images. Unlike posed photos, candid shots provide a real glimpse into people’s lives. In this guide, we’ll explore how to shoot candid photography effectively, offering tips and techniques to help you master this art form.

Understanding Candid Photography

More so, Candid photography is all about capturing spontaneous moments. The key is to photograph subjects without them being aware of the camera, allowing for natural and unposed shots. This style is popular in street photography, events, and everyday life. To succeed in candid photography, you need to be observant, quick, and discreet.

Choosing the Right Equipment

While candid photography doesn’t require the most advanced gear, having the right equipment can make a difference. A small, unobtrusive camera is ideal. Mirrorless cameras or compact DSLRs work well as they are less intimidating to subjects. A versatile zoom lens allows you to shoot from a distance without drawing attention to yourself. Additionally, a prime lens with a wide aperture is great for low-light conditions and achieving a shallow depth of field.

Blending In

One of the most crucial aspects of candid photography is blending in with your surroundings. Dress appropriately for the environment and avoid flashy or attention-grabbing clothing. Act naturally and try not to draw attention to yourself. The more you blend in, the more likely you are to capture genuine moments.

Using Natural Light

Natural light is your best friend in candid photography. It creates soft, flattering illumination and adds to the authenticity of your shots. Pay attention to the direction and quality of light. Shooting during the golden hour, just after sunrise or before sunset, provides warm and beautiful lighting. If you’re indoors, position yourself near windows to take advantage of available light.

Capturing Moments

To excel in candid photography, you need to be patient and observant. Look for interesting interactions, emotions, and expressions. Anticipate moments before they happen and be ready to press the shutter at the right time. Practice makes perfect, so the more you shoot, the better you’ll become at recognizing and capturing candid moments.

Composition Tips

Good composition enhances the impact of your candid photos. The rule of thirds is a helpful guideline. Imagine dividing your frame into a 3×3 grid and placing your subject along these lines or at their intersections. Leading lines, such as pathways or architectural elements, can also draw the viewer’s eye to your subject. Experiment with different angles and perspectives to add variety to your shots.

Staying Discreet

Being discreet is essential in candid photography. Avoid using flash, as it can startle your subjects and ruin the candid nature of the shot. Instead, increase your ISO to accommodate low-light situations. Use a quiet or silent shutter mode if your camera has one, and avoid making sudden movements that could draw attention.

Editing Your Photos

Post-processing is an important step in candid photography. Use editing software like Adobe Lightroom or Photoshop to enhance your images. Adjust exposure, contrast, and colour balance to make your photos pop. Be mindful not to over-edit, as the goal is to maintain the natural and authentic feel of the candid shots.

Conclusion

In conclusion, candid photography is a rewarding and fulfilling genre that allows you to capture the essence of life in its purest form. By understanding the fundamentals, blending in, using natural light, and mastering composition, you can create stunning candid photos that tell a story. Remember, the key to great candid photography is patience, observation, and practice. So grab your camera, hit the streets, and start capturing those beautiful, unposed moments that make candid photography so special.

More Details
Jul 3, 2024
Tips for Taking Great Family Portrait Photography

Family portraits are cherished keepsakes that capture the essence of togetherness and love. Whether you’re a professional photographer or an amateur with a passion for capturing special moments, taking great family portraits requires a blend of technical skills and creative vision. Here are some tips to help you create stunning family portrait photography that everyone will treasure.

Taking Great Family Portrait Photography

Choose the Right Location

Firstly, selecting the right location sets the tone for the portrait.

Outdoor Settings: Parks, gardens, and beaches provide natural light and scenic backgrounds that can enhance the photo’s appeal. Natural settings help families feel more relaxed and engaged, making for more genuine expressions.

Indoor Settings: For a more intimate feel, consider taking photos in the family’s home. This setting can add a personal touch and comfort, especially for young children.

Plan the Outfits

Next, coordinating outfits can greatly impact the overall look of the family portrait.

Color Coordination: Choose colors that complement each other without being too matchy-matchy. Soft, neutral tones often work well and keep the focus on the faces rather than the clothes.

Comfort is Key: Make sure everyone is comfortable in their outfits. Uncomfortable clothing can lead to fidgeting and unhappy expressions, which can ruin the shot.

Use Natural Light

Lighting is crucial in photography, and natural light often yields the best results.

Golden Hour: Shooting during the golden hour, which is the first hour after sunrise and the last hour before sunset, provides soft, warm light that is very flattering.

Avoid Harsh Sunlight: Midday sun can create harsh shadows and squinting. If you have to shoot during this time, look for shaded areas or use diffusers to soften the light.

Engage with the Family

Furthermore, building a rapport with the family can help capture more natural and relaxed photos.

Break the Ice: Spend some time talking to the family before the shoot. This helps everyone feel more comfortable and at ease.

Involve the Kids: Engage children by playing games or asking them to show their favorite toys. This can lead to genuine smiles and joyful expressions.

Poses and Composition

Posing can make or break a family portrait. It’s important to find poses that feel natural and comfortable.

Natural Poses: Encourage the family to interact with each other, such as hugging, walking together, or laughing. These candid moments often make the best photos.

Levels and Angles: Create visual interest by varying the levels and angles. Have some family members sit while others stand or kneel, and shoot from different angles to find the most flattering perspectives.

Use Props Wisely

Props can add a fun element to family portraits if used appropriately.

Personal Items: Incorporate items that are meaningful to the family, such as a blanket they use for picnics or a toy that a child loves.

Seasonal Props: Depending on the time of year, you can use seasonal props like pumpkins in the fall or beach accessories in the summer to add a thematic touch.

Focus on the Details

Sometimes, it’s the small details that make a portrait special.

Close-Ups: Take close-up shots of the family holding hands, a child’s smile, or a loving glance between parents. These details add depth and emotion to the photo collection.

Background Check: Pay attention to the background and make sure there are no distractions or unwanted objects that could take focus away from the family.

Edit Thoughtfully

Finally, post-processing is an essential step in creating beautiful family portraits.

Basic Adjustments: Adjust brightness, contrast, and color balance to enhance the photo. Be careful not to over-edit, as this can make the photo look unnatural.

Retouching: Use retouching tools to remove blemishes or stray hairs, but keep it subtle to maintain the authenticity of the photo.

Conclusion

In conclusion, taking great family portrait photography involves careful planning, creative vision, and technical skills. By choosing the right location, planning outfits, using natural light, engaging with the family, and focusing on details, you can create beautiful and memorable family portraits. Don’t forget the importance of thoughtful editing to polish your final images. With these tips, you’ll be well on your way to capturing the love and connection that make family portraits so special.

More Details
Jul 3, 2024
Best Photography Apps for Editing on the Go

In today’s digital age, capturing stunning photos is easier than ever with the help of smartphones. However, taking a great photo is just the first step. To make your images truly stand out, you need the right tools to edit them. Here are the best photography apps for editing on the go. These apps offer powerful features and easy-to-use tools that can transform your photos into masterpieces.

Photography Apps for Editing on the Go

Adobe Lightroom

Firstly, Adobe Lightroom is a favorite among photographers. It offers a wide range of editing tools that are both powerful and easy to use.

Features: Lightroom provides advanced features like RAW photo editing, exposure adjustments, and color correction. It also offers presets that can quickly enhance your photos.

Ease of Use: The interface is user-friendly, making it easy for beginners to start editing. Additionally, it syncs across devices, so you can edit on your phone and continue on your computer.

Why Choose Lightroom?: If you want professional-grade editing tools in a mobile app, Lightroom is an excellent choice.

Snapseed

Next, Snapseed, developed by Google, is another fantastic app for mobile photo editing. It is free to use and offers a variety of powerful tools.

Features: Snapseed includes features like selective adjustments, healing tools, and filters. One standout feature is the ability to edit specific areas of a photo.

Ease of Use: The app is intuitive and easy to navigate. It also provides tutorial cards that guide you through using its various tools.

Why Choose Snapseed?: For a free app with professional-level editing capabilities, Snapseed is hard to beat.

VSCO

Moreover, VSCO is popular not only for its editing tools but also for its community of photographers.

Features: VSCO offers a wide range of filters that can give your photos a unique look. It also includes basic editing tools like exposure, contrast, and saturation adjustments.

Ease of Use: The app is simple to use, and its filters are easy to apply. VSCO’s social platform allows you to share your edits and see what others are creating.

Why Choose VSCO?: If you love experimenting with filters and want to connect with a community of photographers, VSCO is a great option.

Afterlight

Additionally, Afterlight provides a robust set of editing tools and creative options for photo enhancement.

Features: Afterlight offers over 130 filters, textures, and frames. It also includes advanced tools like curves, selective color, and gradient overlays.

Ease of Use: The app is designed to be straightforward, making it easy to apply effects and adjustments to your photos.

Why Choose Afterlight?: For those who enjoy adding creative touches to their photos, Afterlight offers plenty of options.

PicsArt

Furthermore, PicsArt is an all-in-one photo and video editing app that offers a variety of creative tools.

Features: PicsArt includes filters, text overlays, stickers, and collage-making tools. It also has drawing tools and double exposure effects.

Ease of Use: The app is user-friendly and provides many templates and tutorials to help you get started.

Why Choose PicsArt?: If you like to get creative with your edits, PicsArt offers a wide range of tools to help you do just that.

Prisma

Another notable app is Prisma, which turns your photos into artwork using various artistic filters.

Features: Prisma offers filters that mimic famous art styles, transforming your photos into works of art. It also includes basic editing tools like brightness and contrast adjustments.

Ease of Use: The app is very easy to use, and applying filters is straightforward.

Why Choose Prisma?: If you want to give your photos an artistic touch, Prisma is the perfect app for you.

Adobe Photoshop Express

Lastly, Adobe Photoshop Express brings some of the powerful features of Photoshop to your mobile device.

Features: The app includes tools for cropping, straightening, rotating, and flipping your photos. It also offers filters, text overlays, and blemish removal tools.

Ease of Use: The interface is simple and intuitive, making it easy for users of all levels to edit their photos.

Why Choose Photoshop Express?: For those who want a taste of Photoshop’s capabilities in a mobile-friendly format, Photoshop Express is a great choice.

Conclusion

In conclusion, having the right editing app on your phone can make a significant difference in the quality of your photos. Whether you are a professional photographer or just love taking pictures, these best photography apps for editing on the go offer the tools you need to enhance your images. From Adobe Lightroom’s professional features to Prisma’s artistic filters, there is an app for every style and preference. So, download a few of these apps, start experimenting, and watch your photos transform into stunning works of art.

More Details
Jul 3, 2024
Top Photography Documentaries to Watch

Photography documentaries provide valuable insights into the art, history, and techniques of photography, as well as the lives of renowned photographers. Whether you’re a seasoned photographer or an enthusiast, these documentaries offer inspiration and education. Here are some of the top photography documentaries to add to your watchlist:

Finding Vivian Maier

“Finding Vivian Maier” explores the life and work of Vivian Maier, a nanny who took over 100,000 photographs during her lifetime but remained unknown as a photographer until after her death. The documentary reveals Maier’s incredible street photography and delves into the mystery of her life, offering a fascinating look at her hidden talent.

The Salt of the Earth

Directed by Wim Wenders and Juliano Ribeiro Salgado, “The Salt of the Earth” chronicles the life and career of renowned photographer Sebastião Salgado. The film showcases Salgado’s powerful black-and-white images and follows his journey from documenting human suffering to capturing the beauty of nature. It’s a profound exploration of the impact of photography and the resilience of the human spirit.

Annie Leibovitz: Life Through a Lens

This documentary provides an intimate look at the life and work of Annie Leibovitz, one of the most famous portrait photographers of our time. Directed by her sister Barbara Leibovitz, the film covers Annie’s early career, her time at Rolling Stone and Vanity Fair, and her iconic images of celebrities. It also delves into her personal life and the challenges she has faced.

War Photographer

“War Photographer” is a gripping documentary about James Nachtwey, one of the most respected conflict photographers in the world. The film offers a behind-the-scenes look at Nachtwey’s work in war zones and areas of crisis, highlighting the risks and ethical dilemmas faced by photojournalists. It’s a powerful exploration of the role of photography in documenting human suffering and raising awareness.

Bill Cunningham New York

“Bill Cunningham New York” celebrates the life and work of Bill Cunningham, a fashion photographer for The New York Times known for his candid street style photography. The documentary follows Cunningham as he captures the ever-changing fashion trends on the streets of New York City. It’s a charming and inspiring portrait of a man dedicated to his craft.

Gregory Crewdson: Brief Encounters

This documentary follows the elaborate and meticulous process of creating the cinematic photographs of Gregory Crewdson. Known for his large-scale, surreal images of American suburbia, Crewdson’s work blurs the line between photography and film. The film provides an in-depth look at his creative process, from concept to execution, and explores the themes and inspirations behind his work.

The Genius of Photography

“The Genius of Photography” is a comprehensive six-part series produced by the BBC that traces the history of photography from its invention to the digital age. The series covers significant movements, influential photographers, and iconic images, offering a broad understanding of photography’s evolution and its impact on society. It’s an essential watch for anyone interested in the history and development of the medium.

Visual Acoustics: The Modernism of Julius Shulman

“Visual Acoustics” explores the life and work of Julius Shulman, a photographer known for his stunning images of modernist architecture. The documentary highlights Shulman’s contributions to architectural photography and his collaborations with famous architects like Frank Lloyd Wright and Richard Neutra. It’s a visually captivating film that showcases the intersection of photography and architecture.

Everybody Street

“Everybody Street” is a tribute to the street photographers of New York City, featuring interviews and footage of legendary photographers like Bruce Davidson, Mary Ellen Mark, and Joel Meyerowitz. The documentary captures the essence of street photography and the diverse personalities of those who have dedicated their lives to documenting the city’s streets. It’s an inspiring and insightful film for anyone interested in urban photography.

Henri Cartier-Bresson: The Impassioned Eye

This documentary offers a rare glimpse into the life and work of Henri Cartier-Bresson, often considered the father of modern photojournalism. Featuring interviews with Cartier-Bresson and commentary from his contemporaries, the film explores his philosophy of capturing the “decisive moment” and his contributions to the world of photography. It’s a must-watch for fans of classic photojournalism.

These documentaries provide a wealth of knowledge and inspiration for photographers and photography enthusiasts alike. By watching these films, you can gain a deeper understanding of the art and craft of photography, as well as the lives and works of some of the most influential photographers in history.

More Details
Jul 3, 2024
Tips for Finding Unique Photography Locations

Photography is an art that thrives on creativity and fresh perspectives. One of the best ways to make your photos stand out is by finding unique locations to shoot. Unique spots can turn an ordinary photo into something extraordinary. In this article, we will explore tips for finding unique photography locations. These tips will help you discover new places, add variety to your portfolio, and inspire your creativity.

Finding Unique Photography Locations

Research Online

Firstly, the internet is a treasure trove of information. Websites, blogs, and social media platforms like Instagram, Pinterest, and Flickr are excellent resources for discovering unique photography locations.

Search Hashtags and Geotags: Use hashtags and geotags to find popular spots and hidden gems. For instance, searching #hiddenlocations or #secretspots can lead you to lesser-known places.

Photography Blogs and Websites: Many photographers share their favorite locations on blogs and websites. Reading these can give you ideas and insights about new places to explore.

Google Earth and Maps: Google Earth and Maps are powerful tools for virtual scouting. You can explore landscapes and even read reviews from people who have visited these spots.

Explore Local Areas

Next, don’t overlook the beauty in your own backyard. Sometimes, the most unique photography locations are just around the corner.

Walk or Drive Around: Spend some time walking or driving around your local area. Look for interesting architecture, parks, or natural landscapes.

Talk to Locals: Local residents can be a great source of information. They might know about secret spots or places that are not well-known to tourists.

Visit Local Parks and Reserves: Local parks, nature reserves, and public gardens often have beautiful and unique features perfect for photography.

Use Photography Apps

Moreover, there are several apps designed to help photographers find unique locations.

ShotHotspot: This app allows you to search for popular photography locations based on the type of photography you are interested in, such as landscape, urban, or wildlife.

Really Good Photo Spots (RGPS): RGPS helps you find and share great photo locations. It provides information on the best times to visit and what equipment to bring.

Instagram: Instagram can also be a useful app for finding locations. Follow local photographers and see where they shoot their photos.

Join Photography Groups and Communities

In addition, joining photography groups and communities can lead to discovering unique locations.

Online Communities: Websites like Reddit have photography communities where members share their favorite spots. Subreddits like r/photography and r/earthporn can be helpful.

Local Photography Clubs: Joining a local photography club can connect you with other photographers who may share their favorite locations with you.

Workshops and Meetups: Attend photography workshops and meetups. These events often take place in interesting locations and can provide you with new ideas.

Be Adventurous and Spontaneous

Sometimes, the best locations are found when you least expect them. Being adventurous and spontaneous can lead to discovering unique spots.

Take Unplanned Trips: Go on unplanned trips or take a different route when traveling. This can lead you to stumble upon unexpected and interesting locations.

Explore Off the Beaten Path: Don’t be afraid to venture off the beaten path. Sometimes, the most beautiful and unique places are those that are less traveled.

Follow Your Curiosity: If you see something interesting in the distance, follow your curiosity and check it out. It might lead to a great photo opportunity.

Use Historical and Cultural Sites

Historical and cultural sites often offer unique and interesting backdrops for photography.

Visit Museums and Historical Buildings: Museums, old buildings, and historical landmarks can provide unique settings for your photos.

Explore Cultural Festivals and Events: Cultural festivals and events are vibrant and colorful, offering plenty of unique photo opportunities.

Check Out Old Towns and Villages: Old towns and villages often have charming architecture and interesting history that can make for great photos.

Pay Attention to Seasons and Times of Day

Finally, the same location can look completely different depending on the season or time of day.

Golden Hour and Blue Hour: The light during the golden hour (shortly after sunrise and before sunset) and the blue hour (just before sunrise and after sunset) can transform a location.

Different Seasons: Visit the same location in different seasons. A place that looks ordinary in summer might be breathtaking in winter or autumn.

Weather Conditions: Fog, rain, snow, and other weather conditions can add a unique touch to your photos. Don’t be afraid to shoot in less-than-perfect weather.

Conclusion

In conclusion, finding unique photography locations involves a mix of research, exploration, and creativity. By using online resources, exploring local areas, joining photography communities, being adventurous, and considering historical and cultural sites, you can discover amazing places to shoot. Remember, the world is full of hidden gems waiting to be captured. So, grab your camera and start exploring!

More Details
Jul 3, 2024
Tips for Underwater Photography

Underwater photography presents unique challenges and opportunities, offering a chance to capture the mesmerizing beauty of the underwater world. Whether you’re photographing marine life, landscapes, or divers, these tips will help you achieve stunning underwater shots.

Use the Right Gear

Investing in good quality underwater photography gear is essential. Use a camera that performs well in low-light conditions and can shoot in RAW format for better post-processing. Waterproof housings are a must to protect your camera from water damage. Consider using a wide-angle lens for capturing expansive scenes and a macro lens for close-ups of small subjects.

Master Buoyancy Control

Good buoyancy control is crucial for underwater photographers. It allows you to stay steady and maintain the perfect shooting position without disturbing the environment or scaring away marine life. Practice your buoyancy skills to ensure you can hold still and move smoothly while taking photos.

Get Close to Your Subject

Water reduces clarity and light, so it’s important to get as close to your subject as possible. This minimizes the amount of water between your camera and the subject, resulting in sharper, more vibrant images. Approach slowly and calmly to avoid startling marine life.

Use Natural Light Effectively

Natural light diminishes quickly underwater, especially at depths beyond 10 meters (33 feet). Shoot in shallow waters or during midday when the sun is overhead to maximize natural light. Position yourself with the sun behind you to illuminate your subject. Remember that red, orange, and yellow colors fade with depth, so staying shallow helps retain color.

Incorporate Artificial Lighting

Strobes or underwater flash units are essential for adding light and bringing out the true colors of your subjects. Use diffusers to soften the light and reduce harsh shadows. Position your strobes at a 45-degree angle to the subject to create natural-looking lighting and avoid backscatter (particles in the water that reflect light back to the camera).

Practice Proper Composition

Apply traditional photography composition techniques, such as the rule of thirds, leading lines, and symmetry, to your underwater shots. Look for interesting foreground elements to add depth to your images. Experiment with different angles and perspectives to create dynamic and engaging compositions.

Adjust Your White Balance

The underwater environment has a different color temperature than on land, often resulting in a blue or green cast. Adjusting the white balance on your camera helps correct these color shifts. If your camera allows, set a custom white balance using a white or grey slate at the depth you’re shooting.

Shoot in Manual Mode

Shooting in manual mode gives you full control over your exposure settings. Adjust your ISO, aperture, and shutter speed to achieve the desired exposure. Higher ISO settings can help in low-light conditions, but be mindful of noise. A wider aperture (lower f-stop) allows more light to enter, and a faster shutter speed can freeze motion.

Use a Focus Light

A focus light helps your camera achieve accurate focus in low-light conditions. Mount a small, constant light source near your lens to illuminate your subject and assist with focusing. Some underwater strobes have built-in focus lights, which can be very convenient.

Be Patient and Observant

Underwater photography often requires patience and keen observation. Spend time watching your subjects to understand their behavior and anticipate their movements. This increases your chances of capturing the perfect moment. Be respectful of marine life and avoid disturbing their natural habitat.

Post-Process Your Images

Editing your underwater photos is an important step to enhance their quality. Use software like Adobe Lightroom or Photoshop to adjust exposure, contrast, white balance, and colors. Remove any backscatter or unwanted particles to achieve a clean, polished look.

Prioritize Safety

Always prioritize your safety and the safety of your dive buddy. Be aware of your surroundings, keep an eye on your air supply, and follow proper diving protocols. Don’t risk your safety for the sake of a photo.

Protect the Marine Environment

Respect the underwater environment and marine life. Avoid touching or disturbing corals, plants, and animals. Practice responsible diving and photography to ensure you’re not causing harm to the ecosystem.

In conclusion, underwater photography is a rewarding yet challenging field that requires specialized skills and equipment. By mastering these tips, you can capture the enchanting beauty of the underwater world and create stunning, memorable images.

More Details
Jul 3, 2024
Best Cameras for Macro Photography

Macro photography opens up a world of tiny details and fascinating close-up shots. Whether you are capturing the intricate patterns on a butterfly’s wings or the delicate textures of a flower petal, having the right camera is essential. In this article, we will explore the best cameras for macro photography in 2024. We will discuss key features, tips for choosing the right camera, and some top recommendations to help you capture stunning macro shots.

Cameras for Macro Photography

Understanding Macro Photography

Firstly, let’s understand what macro photography is. Macro photography involves taking close-up pictures of small subjects, capturing their details in high magnification. Typically, macro photography requires a lens that can focus very closely on the subject, often at a 1:1 ratio or higher.

Key Features to Look For

When choosing a camera for macro photography, there are several important features to consider:

  • High Resolution: A camera with high resolution allows you to capture detailed images. Look for cameras with at least 20 megapixels.
  • Good ISO Performance: Good ISO performance ensures you can take clear shots in various lighting conditions. This is crucial for macro photography, where light can sometimes be limited.
  • Image Stabilization: Image stabilization helps reduce blurriness caused by camera shake, especially important when shooting close-ups.
  • Articulating Screen: An articulating screen helps you compose shots from different angles, making it easier to capture those hard-to-reach subjects.
  • Fast Autofocus: Fast and accurate autofocus ensures you can quickly lock onto your subject, essential for capturing moving insects or other small creatures.

Best Cameras for Macro Photography

Now, let’s look at some of the best cameras for macro photography in 2024:

1. Canon EOS R5

The Canon EOS R5 is an excellent choice for macro photography. With its 45-megapixel sensor, it captures incredible detail. Additionally, its impressive ISO range and in-body image stabilization make it perfect for low-light conditions. The camera’s fast autofocus and flip-out screen are added bonuses for macro enthusiasts.

2. Nikon Z7 II

The Nikon Z7 II offers a 45.7-megapixel sensor, ensuring high-resolution images. Its advanced autofocus system is perfect for capturing tiny details. Moreover, the camera’s weather-sealed body is ideal for outdoor macro photography. The Z7 II’s excellent dynamic range also allows for stunning detail in both shadows and highlights.

3. Sony Alpha A7R IV

Sony’s Alpha A7R IV boasts a 61-megapixel sensor, making it one of the highest-resolution cameras available. Its fast autofocus and excellent image stabilization are perfect for macro photography. Additionally, the A7R IV’s high ISO performance ensures clear images even in challenging lighting conditions.

4. Fujifilm GFX 100S

For those looking for a medium format option, the Fujifilm GFX 100S is a top contender. With a 102-megapixel sensor, it captures unparalleled detail. The camera’s in-body image stabilization and high dynamic range make it ideal for macro photography. Furthermore, its compact design makes it easier to handle than other medium format cameras.

5. Olympus OM-D E-M1 Mark III

The Olympus OM-D E-M1 Mark III is a fantastic micro four-thirds option for macro photography. Its 20-megapixel sensor delivers sharp images, while the in-body image stabilization ensures clear shots. The camera’s compact size and weather-sealed body make it a great choice for outdoor macro photography. Additionally, its focus stacking feature is perfect for achieving greater depth of field in macro shots.

Tips for Choosing the Right Camera

Choosing the right camera for macro photography can be overwhelming. Here are some tips to help you make the best decision:

  • Consider Your Budget: High-end cameras offer more features but come at a higher price. Determine your budget and look for the best option within that range.
  • Think About Lenses: The camera body is important, but lenses are equally crucial. Ensure the camera you choose has compatible macro lenses available.
  • Check Reviews: Read reviews from other macro photographers to get insights into the camera’s performance in real-world conditions.
  • Try Before You Buy: If possible, try the camera in a store or rent it for a few days. This hands-on experience can help you decide if it’s the right fit for you.

Conclusion

In conclusion, the best cameras for macro photography in 2024 offer a range of features to help you capture stunning close-up shots. Whether you choose the high-resolution Canon EOS R5, the versatile Nikon Z7 II, or the compact Olympus OM-D E-M1 Mark III, each camera has unique strengths. Remember to consider your budget, lens compatibility, and personal preferences when making your choice. Happy macro shooting!

More Details