Jul 3, 2024
Strategies for Photographing Silhouettes

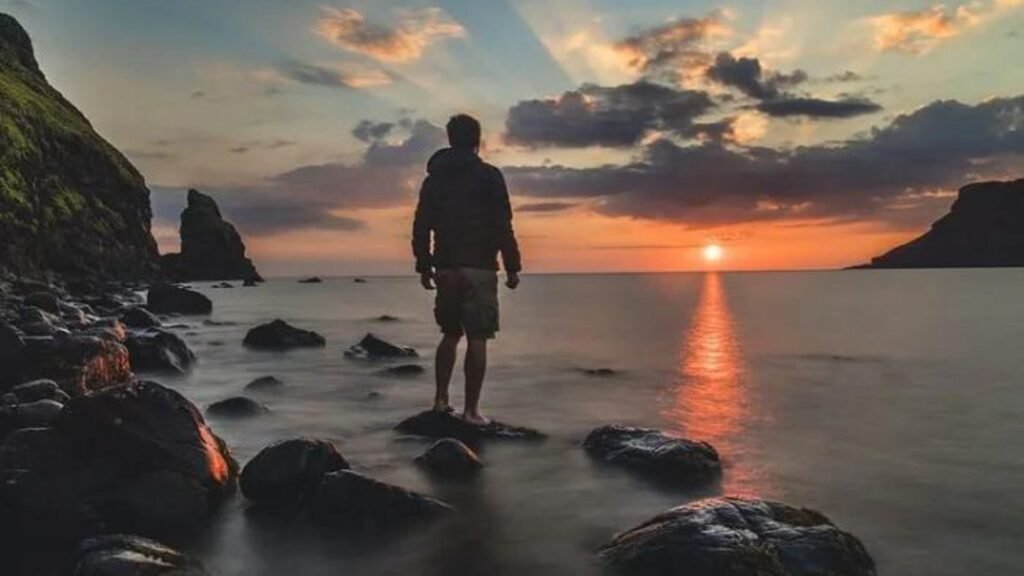
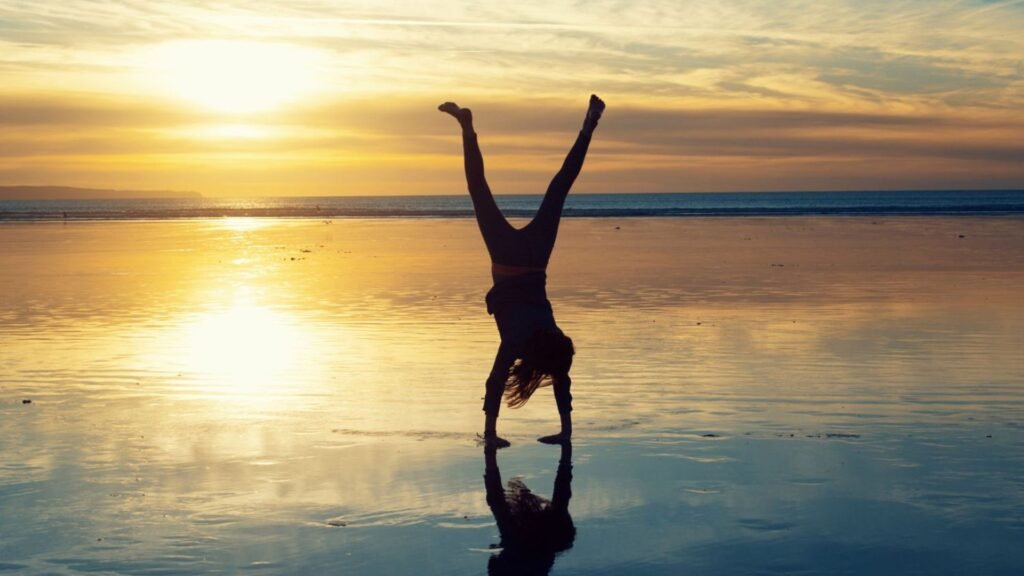
Silhouette photography can create striking and dramatic images by emphasizing shapes and outlines against a bright background. Capturing silhouettes can be a fun and creative way to highlight the subject’s form and create a powerful visual impact. In this article, we will explore the best strategies for photographing silhouettes, ensuring you achieve stunning results.
Photographing Silhouettes

Choose the Right Lighting

  • Backlighting: Place your subject in front of a strong light source, such as the setting sun, to create a clear silhouette.
  • Golden Hour: Shoot during the golden hour (early morning or late afternoon) for softer, warmer light that enhances the silhouette effect.

Select the Right Subject

  • Strong Shapes: Choose subjects with distinctive and recognizable shapes, like trees, people, or buildings.
  • Simple Outlines: Ensure your subject has a clear and simple outline to create a strong silhouette.

Use Manual Mode

  • Expose for the Background: Set your camera to manual mode and adjust the exposure settings to capture the brightness of the background, rendering the subject as a dark shape.
  • Lower ISO: Use a low ISO setting to maintain the background’s vibrant colors and avoid noise.

Position Your Subject

  • Clear Separation: Make sure there is clear separation between your subject and the background to avoid merging shapes.
  • Interesting Angles: Experiment with different angles and positions to create dynamic and engaging silhouettes.

Focus on Composition

  • Rule of Thirds: Use the rule of thirds to place your subject off-center, creating a balanced and visually appealing composition.
  • Leading Lines: Incorporate leading lines in your composition to draw the viewer’s eye toward the silhouette.

Experiment with Different Perspectives

  • Low Angle: Shoot from a low angle to emphasize the subject against the sky, creating a more dramatic silhouette.
  • High Angle: Try shooting from a higher angle to capture the silhouette from a different perspective.

Pay Attention to the Background

  • Clean Background: Ensure the background is uncluttered and free from distractions to keep the focus on the silhouette.
  • Contrast: Look for backgrounds with strong contrast, like a bright sky or a colorful sunset, to make the silhouette stand out.

Use Post-Processing Techniques

  • Adjust Contrast: Increase the contrast in post-processing to enhance the silhouette’s outline and make it more defined.
  • Enhance Colors: Boost the colors of the background to create a more vibrant and eye-catching image.
  • Remove Distractions: Use editing tools to remove any distractions or elements that detract from the silhouette.

Experiment with Silhouette Effects

  • Reflection Silhouettes: Capture silhouettes reflected in water or other reflective surfaces to add depth and interest to your images.
  • Multiple Silhouettes: Experiment with multiple subjects to create complex and intriguing silhouette compositions.

Conclusion

Silhouette photography is a powerful technique that can transform ordinary scenes into extraordinary images. By understanding the importance of lighting, selecting the right subjects, and focusing on composition, you can capture stunning silhouettes. Experiment with different angles, perspectives, and post-processing techniques to enhance your silhouette photography. With practice and creativity, you’ll master the art of photographing silhouettes and create captivating images that stand out.

More Details
Jul 3, 2024
Strategies to Photograph Reflections

Photographing reflections can add depth, symmetry, and a unique perspective to your images. Reflections can be found in water, glass, mirrors, and other shiny surfaces, providing endless creative possibilities. In this post, we will explore the best strategies to master photographing reflections, ensuring you capture stunning and intriguing images.

 Photograph Reflections

Understand the Basics

  • Reflections occur when light bounces off a surface and creates a mirrored image.
  • The clarity and quality of the reflection depend on the surface’s smoothness and the light conditions.

Choose the Right Time of Day

  • Early morning and late afternoon, known as the golden hours, offer soft, warm light that enhances reflections.
  • Calm weather conditions, particularly with minimal wind, help maintain undisturbed reflective surfaces, especially in water.

Use a Polarizing Filter

  • A polarizing filter helps reduce glare and unwanted reflections from non-metallic surfaces like water and glass.
  • Adjust the polarizing filter to control the intensity of the reflection, making it more or less prominent in your composition.

Find Interesting Subjects

  • Look for scenes with strong visual elements such as buildings, trees, mountains, or people.
  • Reflections of colorful subjects can produce vibrant and eye-catching results.

Experiment with Angles

  • Try shooting from a low angle close to the reflective surface to emphasize the reflection.
  • Alternatively, shoot from a higher angle to capture both the subject and its reflection in the same frame.

Use Symmetry

  • Symmetry is a powerful compositional tool in reflection photography.
  • Place the horizon line in the center of the frame to create a mirror-like effect, or use other elements in the scene to achieve balance and symmetry.

Pay Attention to Composition

  • Use the rule of thirds to create a balanced and dynamic image.
  • Place your main subject off-center, and use leading lines to draw the viewer’s eye towards the reflection.
  • Consider the background and other elements in the scene to avoid distractions and keep the focus on the reflection.

Focus on Sharpness

  • Use a tripod to stabilize your camera and avoid any movement that can cause blur.
  • Use a small aperture (high f-stop number) to achieve a greater depth of field, keeping both the subject and reflection in focus.

Incorporate Movement

  • Capturing ripples in water or reflections of moving clouds can create interesting and unique effects.
  • Experiment with long exposures to blur the motion and create a dreamy, surreal atmosphere in your reflection shots.

Post-Processing Tips

  • Use editing software to adjust the contrast, brightness, and saturation to make the reflection stand out.
  • Remove any unwanted distractions or imperfections to create a cleaner and more polished image.
  • Avoid over-editing to maintain a natural and realistic look.

Conclusion

Photographing reflections can transform ordinary scenes into extraordinary images. By understanding the basics, choosing the right time of day, and using tools like polarizing filters, you can capture stunning reflections. Experiment with angles, composition, and movement to add creativity to your photos. With practice and attention to detail, you’ll master the art of reflection photography and create captivating images that showcase the beauty and symmetry of the world around us.

More Details
Jul 3, 2024
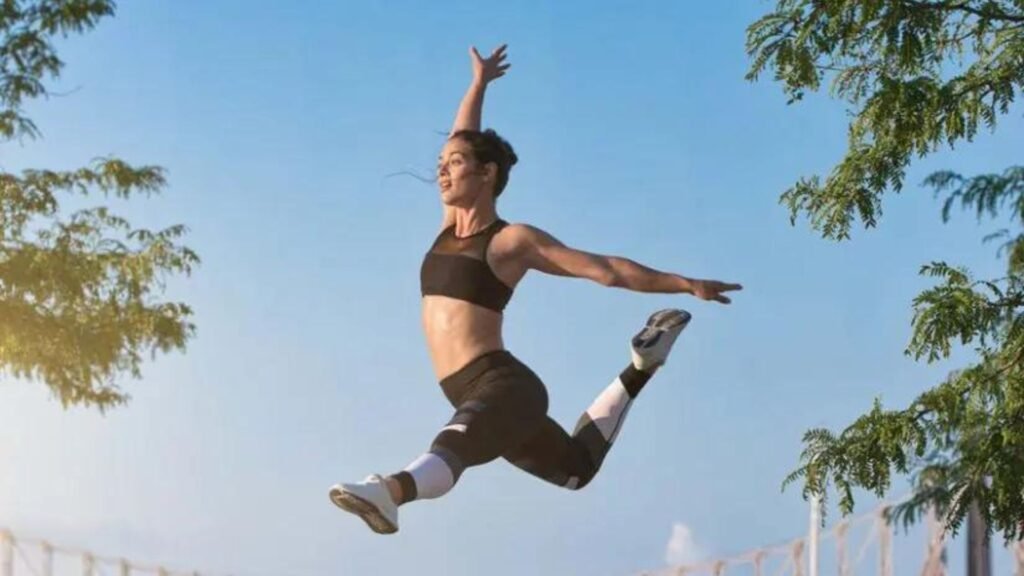
Strategies for Capturing Action Photograph

Action photography is all about capturing fast-moving subjects in sharp detail. Whether you’re photographing sports events, wildlife, or everyday life, capturing action requires skill, timing, and the right equipment. In this post, we will explore the best strategies for capturing action photography, ensuring you can freeze those exciting moments in time.

Capturing Action Photograph

Understand Your Camera Settings

To capture great action photos, it’s essential to understand your camera settings. Use the manual mode or shutter priority mode to have control over your shutter speed. A fast shutter speed is crucial to freeze motion. Start with 1/500th of a second or faster, depending on the speed of your subject. Additionally, set your camera to continuous shooting mode to capture multiple frames per second, increasing your chances of getting the perfect shot.

Use the Right Autofocus Mode

Switch your camera to continuous autofocus mode (AI Servo for Canon, AF-C for Nikon). This mode allows your camera to track moving subjects and keep them in focus. Combine this with selecting a single focus point or a small group of focus points to ensure accuracy. This technique is particularly useful for sports and wildlife photography.

Choose the Appropriate Lens

Using the right lens can make a significant difference in action photography. Telephoto lenses are great for capturing distant subjects, while wide-angle lenses can be used for capturing more of the scene. A lens with a wide maximum aperture (low f-stop number) is ideal because it allows more light into the camera and enables faster shutter speeds.

Master Panning Technique

Panning is a technique where you move the camera along with the moving subject. This creates a sharp subject against a blurred background, conveying a sense of motion. To pan successfully, set a slower shutter speed, such as 1/30th of a second, and move the camera smoothly with the subject’s motion. Practice is key to mastering this technique.

Timing is Everything

In action photography, timing is crucial. Anticipate the movement of your subject and be ready to press the shutter at the right moment. This may require familiarizing yourself with the sport or activity you’re photographing. For example, in sports, understanding the game’s flow can help you predict when and where the action will happen.

Use Burst Mode

Burst mode allows you to take a rapid series of shots by holding down the shutter button. This is useful for capturing fast action sequences and increases your chances of getting the perfect shot. Review your camera’s burst mode settings and select the highest frame rate available to you.

Consider Your Composition

Composition is as important in action photography as it is in any other type of photography. Use the rule of thirds to create balanced and dynamic images. Leave space in the direction the subject is moving to convey motion and allow the viewer’s eye to follow the action. Experiment with different angles and perspectives to add variety to your shots.

Pay Attention to Lighting

Good lighting is essential for capturing sharp action photos. Natural light is often the best choice, but if you’re shooting indoors or in low light conditions, you may need to use artificial lighting. Fast lenses with wide apertures can help you make the most of available light. Additionally, increase the ISO setting to make the camera sensor more sensitive to light, but be cautious of noise.

Use a Fast Memory Card

A fast memory card is essential for action photography, especially when shooting in burst mode. A high-speed card will allow your camera to write data quickly, preventing buffer issues and ensuring you don’t miss critical moments. Look for cards with high write speeds and large capacities to handle the demands of action photography.

Practice and Patience

Capturing stunning action photos takes practice and patience. Don’t get discouraged if your first attempts aren’t perfect. Experiment with different settings, angles, and techniques. Analyze your shots to see what worked and what didn’t. Over time, you’ll develop a better understanding of how to capture the action effectively.

Conclusion

Action photography is an exciting and challenging genre that requires a combination of skill, timing, and the right equipment. By understanding your camera settings, using the appropriate autofocus mode, and mastering techniques like panning, you can capture stunning action shots. Remember to pay attention to composition and lighting, and always be prepared to anticipate the action. With practice and patience, you’ll be able to freeze those fast-moving moments in sharp detail and create compelling images that tell a story.

More Details
Jul 3, 2024
Tips for Winter Photography

Winter photography can be both challenging and rewarding. The season offers unique opportunities to capture the beauty of snow-covered landscapes, frosty details, and the subtle interplay of light and shadow. Here are some tips to help you make the most of your winter photography.

Dress Warmly

Staying warm is essential when photographing in cold conditions. Dress in layers, wear insulated gloves that allow you to operate your camera, and use a hat and scarf to protect against the cold. Proper clothing will keep you comfortable and allow you to focus on your photography.

Protect Your Gear

Cold weather can be tough on your camera and equipment. Keep your camera warm by using an insulated camera bag. Use lens hoods to prevent snow and ice from accumulating on your lens. Consider using a weather-sealed camera if you frequently shoot in harsh conditions.

Use the Right Exposure Settings

Snow can be tricky to photograph because it reflects a lot of light, often leading to overexposed images. To get the correct exposure, you may need to adjust your camera settings. Use exposure compensation to increase the exposure by +1 or +2 stops to ensure the snow appears white rather than gray.

Shoot in RAW Format

Shooting in RAW format gives you more flexibility in post-processing. RAW files retain more detail and dynamic range, which is especially useful when adjusting exposure and white balance for winter scenes. This will help you achieve the best possible results when editing your photos.

Pay Attention to the Light

Winter light can be magical, especially during the golden hours (shortly after sunrise and before sunset). The low angle of the sun creates long shadows and a warm, golden glow. Overcast days can also provide soft, diffused light that is perfect for capturing the subtle textures and details of snow.

Use a Tripod

A tripod is essential for winter photography, especially if you’re shooting in low light conditions or using slow shutter speeds. It helps keep your camera steady and ensures sharp images. A tripod is also useful for composing your shots and taking multiple exposures for HDR photography.

Look for Contrasts

Winter landscapes often feature stark contrasts between light and dark, and between colors and monochrome. Look for these contrasts to create striking compositions. For example, the dark trunks of trees against a blanket of snow, or a colorful subject set against a white background, can make for compelling images.

Capture Snowflakes and Frost

Close-up shots of snowflakes and frost can reveal intricate and beautiful details. Use a macro lens to get close to your subject and capture these tiny wonders. Pay attention to the light and background, ensuring that your subject stands out clearly.

Experiment with Shutter Speeds

Different shutter speeds can produce various effects in winter photography. Use a fast shutter speed to freeze falling snowflakes in mid-air, or a slow shutter speed to create a sense of motion. Experiment with different settings to achieve the desired effect.

Keep an Eye on Your Battery Life

Cold weather can drain your camera batteries quickly. Keep spare batteries in a warm pocket and switch them out as needed. When not in use, store your camera and batteries in a warm place to prolong their life.

Conclusion

By following these tips, you can enhance your winter photography skills and capture the breathtaking beauty of winter landscapes and scenes. Whether you’re photographing snowy forests, frosty details, or winter activities, a thoughtful approach to composition and technique will help you create stunning images.

More Details
Jul 3, 2024
Strategies to Master Night Photograph Techniques

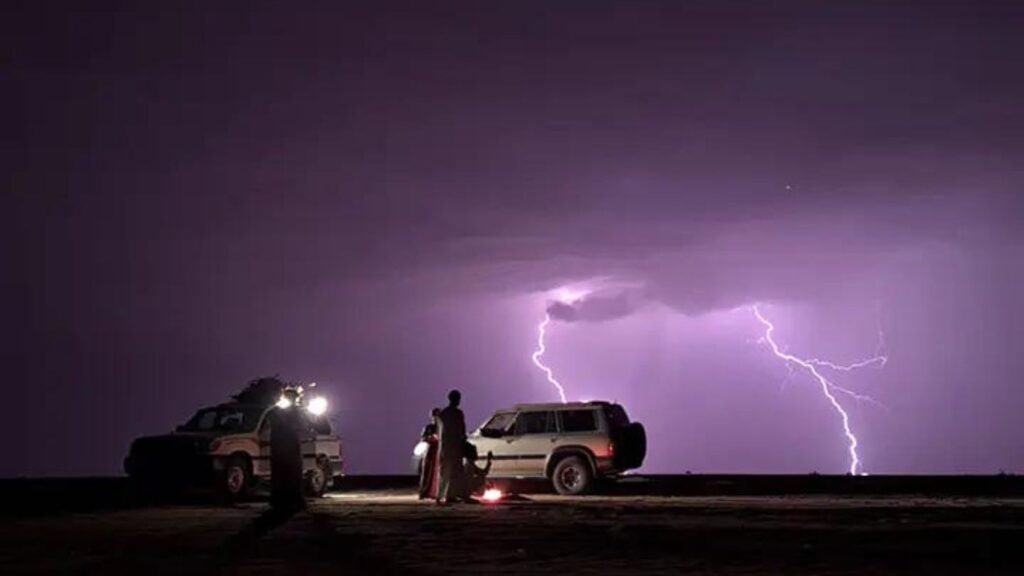
Night photography offers a unique and captivating way to capture the world. The darkness, combined with artificial lights, creates a magical atmosphere that daytime photos can’t replicate. However, mastering night photography requires specific techniques and skills. In this post, we will explore the best strategies to master night photography techniques, ensuring you can capture stunning photos after the sun goes down.

Night Photograph Techniques

Understand Your Equipment

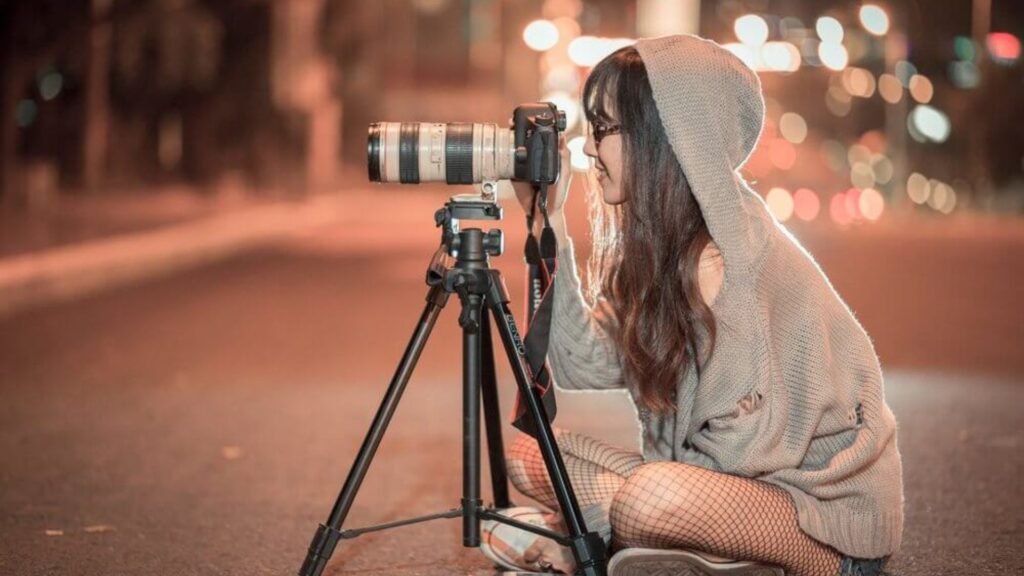
To master night photography techniques, it’s crucial to understand your camera and its settings. A camera with manual mode is essential, allowing you to control the shutter speed, aperture, and ISO. Additionally, using a tripod is vital to keep your camera steady during long exposures, which are common in night photography. Knowing how to use these tools effectively is the first step in capturing beautiful night photos.

Use the Right Settings

Setting your camera correctly is key to night photography. Start with a low ISO to reduce noise in your photos. Although this means you need longer exposure times, it will result in cleaner images. Set a small aperture (high f-stop number) to keep more of the scene in focus. Lastly, experiment with shutter speed. Longer exposures will capture more light and create stunning effects with moving lights, like car trails.

Focus Manually

Autofocus can struggle in low light, so switching to manual focus is often necessary. Use your camera’s live view and zoom in to fine-tune your focus. Look for a bright point in the scene to set your focus accurately. This step ensures that your night photos are sharp and clear.

Use Long Exposures

Long exposures are a hallmark of night photography. By keeping the shutter open for several seconds, you can capture more light and create unique effects. For example, moving lights become beautiful light trails, and water surfaces can appear smooth and glass-like. Experiment with different exposure times to see what works best for your scene.

Pay Attention to Composition

Composition is just as important in night photography as it is during the day. Use the rule of thirds to create balanced and interesting photos. Look for leading lines that guide the viewer’s eye through the image. Additionally, consider the placement of light sources in your scene. They can serve as focal points or add depth and interest to your photos.

Experiment with Light Sources

Night photography allows you to play with various light sources. Streetlights, car headlights, and neon signs can add vibrant colors and patterns to your photos. Additionally, you can use artificial lights, like flashlights or LED lights, to light up specific parts of your scene. Experimenting with these light sources helps you create unique and compelling images.

Use a Remote Shutter Release

A remote shutter release is a valuable tool in night photography. It prevents camera shake when pressing the shutter button, ensuring your long-exposure shots remain sharp. If you don’t have a remote, use your camera’s timer function to achieve the same effect.

Post-Processing Techniques

Post-processing can enhance your night photos significantly. Use software like Adobe Lightroom or Photoshop to adjust the brightness, contrast, and color balance. Noise reduction tools can help clean up your images, especially those taken at higher ISOs. However, be careful not to over-edit. The goal is to enhance your photos while keeping them natural and true to the scene.

Practice Patience and Experimentation

Mastering night photography techniques requires patience and experimentation. Conditions can change quickly, and it may take several attempts to get the perfect shot. Don’t be afraid to try different settings, angles, and compositions. The more you practice, the better you’ll become at capturing stunning night photos.

Conclusion

Night photography opens up a world of creative possibilities. By understanding your equipment, using the right settings, and experimenting with light sources, you can master the techniques needed to capture breathtaking night photos. Remember to focus manually, use long exposures, and pay attention to composition. With patience and practice, you’ll be able to create stunning images that showcase the beauty of the night.

More Details
Jul 3, 2024
Tips for Architecture Photography Composition

Architecture photography requires a keen eye for detail, an understanding of structure and design, and a thoughtful approach to composition. Capturing the essence and beauty of buildings involves more than just pointing and shooting. Here are some essential tips for achieving compelling architecture photography composition.

Understand the Building

Before you start shooting, take time to understand the building you’re photographing. Learn about its history, architectural style, and purpose. This knowledge will help you appreciate the building’s unique features and determine the best angles and compositions to highlight its design.

Use Leading Lines

Leading lines guide the viewer’s eye through the photograph, drawing attention to key elements of the composition. In architecture photography, look for lines created by walls, pathways, staircases, and other structural elements. Position these lines to lead the viewer towards the main subject or focal point of the image.

Experiment with Angles and Perspectives

Don’t be afraid to experiment with different angles and perspectives. Shoot from high and low angles, and try capturing the building from unusual viewpoints. Changing your perspective can reveal unique aspects of the architecture and create more dynamic and engaging compositions.

Incorporate Symmetry and Patterns

Architecture often features symmetry and repetitive patterns, which can create visually pleasing compositions. Look for symmetrical elements and patterns within the building’s design, and position your camera to emphasize these features. Centering symmetrical subjects can create a sense of balance and harmony in your photos.

Frame the Subject

Use natural or architectural elements to frame your subject. Framing can add depth to your composition and draw attention to the building. Look for archways, windows, doorways, or trees that can serve as frames within your shot. Position the frame to highlight the main architectural features.

Highlight Details

Architectural photography isn’t just about capturing the entire building. Pay attention to the details that make the structure unique. Focus on intricate designs, textures, and materials. Close-up shots of these elements can add variety to your portfolio and provide a deeper understanding of the architecture.

Play with Light and Shadows

Light and shadows play a crucial role in architecture photography. Shoot during different times of the day to capture how light interacts with the building. Early morning and late afternoon light, known as the golden hour, can create warm, soft tones and long shadows. Experiment with backlighting, side lighting, and front lighting to see how they affect the composition.

Consider the Background

The background of your photograph can either enhance or distract from the main subject. Be mindful of what’s behind the building. A cluttered or busy background can take attention away from the architecture. Look for clean, unobstructed backgrounds that complement the building and contribute to a cohesive composition.

Use Reflections

Reflections can add a unique and interesting element to your architecture photography. Look for reflective surfaces like water, glass, or polished floors. Capture the building’s reflection to create symmetry and add an extra dimension to your photos. Reflections can also help highlight the building’s surroundings and context.

Include Human Elements

Incorporating people into your architecture photographs can provide a sense of scale and bring the building to life. Human elements can also add a narrative aspect to your photos, showing how the architecture interacts with its inhabitants or visitors. Be mindful of composition when including people, ensuring they complement rather than dominate the scene.

Focus on Composition Rules

Familiarize yourself with classic composition rules like the rule of thirds, the golden ratio, and leading lines. These guidelines can help you create balanced and aesthetically pleasing images. However, don’t be afraid to break these rules when appropriate to achieve a more creative or striking composition.

Use a Wide-Angle Lens

A wide-angle lens is often essential for capturing architecture, especially in tight spaces or when photographing large buildings. A wide-angle lens allows you to fit more of the building into the frame and can emphasize the scale and grandeur of the architecture. Be cautious of distortion, and correct it in post-processing if necessary.

More Details
Jul 3, 2024
Strategies to Capture the Best Candid Photograph

Candid photograph captures genuine emotions and moments. It’s about seizing those natural, unplanned instances that tell a story. Whether it’s a child’s laughter, a friend’s surprise, or a stranger’s joy, candid photographs bring authenticity to your collection. In this post, we will explore the best strategies to capture the best candid photograph, making sure you don’t miss those precious moments.

Capture the Best Candid Photograph

Understand Your Subject

To capture the best candid photograph, it’s essential to understand your subject. Whether it’s people, pets, or events, knowing what to expect helps in anticipating moments worth capturing. For example, if you’re photographing a family gathering, observe how people interact. Pay attention to their habits and expressions. This helps in predicting when a candid moment might occur.

Use the Right Equipment

Using the right equipment can significantly enhance your candid photography. A camera with a fast shutter speed is crucial for freezing moments as they happen. Additionally, a lens with a good zoom allows you to capture subjects from a distance without them noticing. This keeps the scene natural and unposed. Remember, the best candid photograph often happens when the subject is unaware of the camera.

Be Invisible

Blending into the background is key to candid photography. The less your subjects are aware of you, the more natural their actions will be. Try to move quietly and avoid making sudden movements that might draw attention. Sometimes, using a smaller camera can help you be less conspicuous. This way, you can capture the best candid photograph without disrupting the moment.

Stay Ready

Always be prepared to capture a moment. Keep your camera settings adjusted for the lighting and environment. For instance, in bright sunlight, you might need a faster shutter speed. In low light, adjust the ISO to prevent blurriness. Having your camera ready at all times ensures you don’t miss the perfect shot. The best candid photograph often happens in the blink of an eye.

Focus on the Story

Every candid photograph should tell a story. Look for moments that convey emotions or relationships. A child hugging a parent, friends sharing a laugh, or a couple holding hands are all examples of moments that tell a story. The best candid photograph captures not just the subject, but the emotions and context around them.

Use Continuous Shooting Mode

Continuous shooting mode, or burst mode, is a great feature for candid photography. It allows you to take multiple shots in quick succession, increasing the chance of getting the perfect moment. Since candid moments are fleeting, having several shots to choose from can make a big difference. This way, you can pick the best candid photograph from a series of images.

Pay Attention to Composition

Good composition enhances any photograph, including candids. Use the rule of thirds to place your subject off-center, creating a more interesting and dynamic image. Leading lines can also draw the viewer’s eye to the focal point. Even in candid photography, thinking about composition helps in capturing the best candid photograph.

Capture the Details

Details add depth to your candid photographs. Focus on small, significant details like a hand gesture, a facial expression, or an object that adds context to the moment. These details can make your photo more engaging and tell a more complete story. The best candid photograph often includes these small, meaningful elements.

Edit Wisely

Post-processing can enhance your candid photos. Adjusting the brightness, contrast, and saturation can make your photos pop. However, don’t overdo it. The goal is to enhance the natural feel of the candid moment, not to create an artificial look. Simple edits can help bring out the best in your candid photograph.

Practice Patience

Patience is crucial in candid photography. Sometimes, you might need to wait for the perfect moment. Don’t rush; let the scene unfold naturally. Be ready to capture it when it does. With patience, you’ll be able to capture the best candid photograph that truly represents the moment.

Conclusion

Capturing the best candid photograph requires a mix of preparation, observation, and quick reflexes. By understanding your subject, using the right equipment, blending into the background, and paying attention to details, you can capture genuine, heartfelt moments. Remember, the best candid photograph tells a story and evokes emotions. Keep practicing these tips, and you’ll become better at seizing those beautiful, unplanned moments.

More Details
Jul 3, 2024
Top Photography Exhibitions to Visit

Photography exhibitions offer a unique opportunity to experience the art of photography up close, gain inspiration, and see the world through the lens of talented photographers. Here are some of the top photography exhibitions around the world that are worth visiting.

The International Center of Photography (ICP) – New York City, USA

The ICP is one of the most prestigious photography museums in the world, dedicated to the art and craft of photography and visual culture. It hosts numerous exhibitions throughout the year, featuring works by contemporary photographers, historical collections, and thematic shows that explore social and cultural issues through photography.

The Photographers’ Gallery – London, UK

The Photographers’ Gallery in London is the largest public gallery in the UK dedicated to photography. It showcases a diverse range of photographic practices, from fine art to documentary photography. The gallery hosts several exhibitions annually, highlighting both emerging and established photographers from around the globe.

Foam Fotografiemuseum – Amsterdam, Netherlands

Foam is a renowned photography museum located in the heart of Amsterdam. It features a wide range of exhibitions, from historical retrospectives to cutting-edge contemporary photography. Foam also organizes Foam Talent, an annual competition and exhibition that showcases the work of young, emerging photographers.

The Museum of Modern Art (MoMA) – New York City, USA

MoMA is one of the most influential art museums in the world, and its photography collection is no exception. The museum regularly features photography exhibitions that span the history of the medium, including works by iconic photographers as well as contemporary artists pushing the boundaries of photography.

Fotografiska – Stockholm, Sweden

Fotografiska is an international center for contemporary photography with locations in Stockholm, New York, and Tallinn. It hosts a wide range of exhibitions that focus on contemporary issues and storytelling through photography. Fotografiska is known for its immersive and thought-provoking exhibitions.

The Getty Center – Los Angeles, USA

The Getty Center in Los Angeles is home to an extensive collection of photographs, ranging from early daguerreotypes to contemporary works. The Getty Museum frequently features photography exhibitions that highlight different genres, time periods, and techniques, providing a comprehensive look at the history and evolution of photography.

The National Gallery of Victoria (NGV) – Melbourne, Australia

The NGV in Melbourne is one of Australia’s leading art museums, and its photography exhibitions are renowned for their quality and diversity. The museum showcases works by Australian and international photographers, covering a wide range of styles and subjects. The NGV also hosts the Melbourne Art Fair, which often features significant photographic works.

The Tate Modern – London, UK

Tate Modern is one of the most visited art museums in the world, and its photography exhibitions are a major draw. The museum regularly features solo exhibitions by influential photographers, as well as thematic shows that explore the role of photography in contemporary art and society. Tate Modern’s exhibitions are known for their innovative and interdisciplinary approach.

The Centre Pompidou – Paris, France

The Centre Pompidou in Paris is a hub for contemporary art, including photography. Its exhibitions often focus on the intersection of photography with other media, such as video and installation art. The museum’s photography exhibitions are curated with a focus on innovation, experimentation, and critical perspectives on contemporary culture.

The San Francisco Museum of Modern Art (SFMOMA) – San Francisco, USA

SFMOMA has a significant collection of photography and regularly features exhibitions that highlight the diversity and depth of the medium. The museum’s exhibitions often include works by both established and emerging photographers, exploring themes such as identity, technology, and the environment.

The Annenberg Space for Photography – Los Angeles, USA

The Annenberg Space for Photography is a cultural destination dedicated to the art of photography. It hosts exhibitions that cover a wide range of subjects, from photojournalism to fine art photography. The space also offers documentary films, lectures, and workshops that complement its exhibitions.

Conclusion

Visiting these photography exhibitions offers a chance to see inspiring works, learn about different photographic techniques, and appreciate the artistry and impact of photography. Whether you’re a photographer, an art lover, or simply curious, these exhibitions provide a rich and rewarding experience.

More Details
Jul 3, 2024
Strategies for Capturing the Perfect Sunset Photograph

Sunset photography is a favorite among many photographers due to the stunning colors and the serene atmosphere that sunsets create. To help you capture the perfect sunset photograph, here are some essential strategies:

Capturing the Perfect Sunset Photograph

1. Timing is Key

When it comes to sunset photography, timing is everything. Arrive at your location at least 30 minutes before the sun starts to set. This will give you ample time to set up your equipment and find the best spot. Additionally, stay for a while after the sun has set, as the sky often becomes even more vibrant during the “golden hour” and “blue hour.”

2. Use a Tripod

A tripod is essential for capturing sharp sunset photos, especially in low light conditions. Using a tripod will allow you to use slower shutter speeds without the risk of camera shake. This is particularly important if you are using a longer exposure to capture the movement of clouds or water.

3. Choose the Right Lens

The choice of lens can greatly impact your sunset photos. Wide-angle lenses are great for capturing the vastness of the sky and the landscape. On the other hand, a telephoto lens can help you zoom in on the sun or distant elements, adding a different perspective to your photograph.

4. Adjust Your Settings

To capture the perfect sunset photograph, you need to get your camera settings right. Here are some recommendations:

  • Aperture: Use a small aperture (high f-number) to keep most of the scene in focus. An aperture of f/8 to f/16 works well.
  • Shutter Speed: Adjust your shutter speed according to the lighting conditions. If you want to capture the movement of clouds or water, use a slower shutter speed.
  • ISO: Keep your ISO as low as possible to reduce noise in your photos. Start with an ISO of 100 and increase it only if necessary.

5. Use the Rule of Thirds

The rule of thirds is a basic photography principle that can help you create well-balanced and interesting photos. Imagine your frame is divided into nine equal parts by two horizontal and two vertical lines. Place the horizon along the top or bottom third line, rather than in the middle, to create a more dynamic composition.

6. Incorporate Foreground Interest

Adding elements in the foreground can make your sunset photos more compelling. Look for interesting silhouettes, such as trees, rocks, or people, to include in your shot. These elements can provide a sense of scale and depth to your photograph.

7. Experiment with Exposure Bracketing

Exposure bracketing involves taking multiple shots at different exposure levels. This technique is useful for capturing the wide range of light during a sunset. You can later merge these shots in post-processing to create a high dynamic range (HDR) image, which retains detail in both the highlights and shadows.

8. Play with Reflections

Reflections can add a magical touch to your sunset photos. Look for bodies of water, such as lakes, rivers, or even puddles, to capture the reflection of the colorful sky. Position yourself at an angle where the reflection is clearly visible and includes both the sky and the foreground elements.

9. Use Filters

Filters can enhance your sunset photography. A graduated neutral density (ND) filter can help balance the exposure between the bright sky and the darker foreground. Additionally, a polarizing filter can reduce glare and enhance the colors of the sunset.

10. Post-Processing

Post-processing is the final step in creating the perfect sunset photograph. Use editing software to enhance the colors, adjust the contrast, and bring out the details in your photo. Be careful not to overdo it, as subtle adjustments often yield the best results.

Conclusion

Capturing the perfect sunset photograph requires a combination of preparation, technique, and creativity. By following these strategies, you’ll be well on your way to creating stunning sunset photos that capture the beauty of this magical time of day. Remember to practice, experiment, and most importantly, enjoy the process. Happy shooting!

More Details
Jul 3, 2024
How to Use Leading Lines in Photography

Leading lines in photography are powerful tools that can transform a simple image into a captivating visual story. These lines guide the viewer’s eye through the photograph, creating a sense of depth, movement, and focus. Understanding how to effectively use leading lines in photography can elevate your work and make your images more engaging. Let’s explore the techniques and tips for mastering this compositional element.

Understanding Leading Lines

Leading lines are natural or man-made elements within a scene that draw the viewer’s eye along a path, leading them toward a focal point. These lines can be straight, curved, diagonal, or even zigzag, and they can be found in various forms such as roads, rivers, fences, or shadows. The key to using leading lines in photography is to identify these elements and position them strategically within your composition to enhance the overall impact of the image.

Identifying Leading Lines in Your Environment

The first step to incorporating leading lines in photography is to become aware of your surroundings and identify potential lines in your environment. This requires a keen eye and a bit of creativity. Look for natural lines like rivers, shorelines, and tree branches, or man-made lines such as pathways, bridges, and architectural elements. Once you start noticing these lines, you’ll begin to see opportunities for dynamic compositions everywhere.

Using Leading Lines to Create Depth

One of the most effective ways to use leading lines in photography is to create a sense of depth in your images. By positioning the lines in the foreground and leading them into the background, you can draw the viewer’s eye through the scene, giving a three-dimensional feel to a two-dimensional photograph. This technique works particularly well in landscape photography, where roads, trails, and rivers can guide the viewer through the expansive scene.

Guiding the Viewer’s Eye to the Subject

Leading lines in photography are also great for directing attention to your main subject. By placing your subject at the point where the lines converge or intersect, you naturally draw the viewer’s eye to that focal point. This can be especially powerful in portrait photography, where lines like stair railings, fences, or pathways can lead directly to the person’s face, making them the undisputed star of the image.

Creating Movement and Energy

In addition to guiding the viewer’s eye and creating depth, leading lines can introduce a sense of movement and energy to your photographs. Diagonal and curved lines, in particular, are effective at conveying motion and dynamism. For instance, the sweeping curve of a winding road or the diagonal lines of a staircase can add a sense of flow and direction, making your images feel more alive and engaging.

Balancing Composition with Leading Lines

While leading lines in photography are powerful, it’s important to use them thoughtfully to maintain balance in your composition. Avoid overcrowding your image with too many lines, as this can create visual chaos and distract from the main subject. Instead, focus on one or two strong lines that effectively lead the viewer’s eye and complement the overall composition. Experiment with different angles and perspectives to find the most harmonious arrangement.

Experimenting with Different Perspectives

Don’t be afraid to experiment with various perspectives to make the most of leading lines in photography. Changing your viewpoint can dramatically alter the impact of the lines in your image. Try shooting from a low angle to make the lines appear more dominant and imposing, or from a high angle to create a different sense of depth and direction. By exploring different perspectives, you can discover unique and compelling ways to incorporate leading lines into your compositions.

Conclusion

Incorporating leading lines in photography is a technique that can greatly enhance the visual appeal of your images. By understanding how to identify and use these lines, you can guide the viewer’s eye, create depth, and add a sense of movement to your photographs. Remember to experiment with different environments, perspectives, and compositions to fully harness the power of leading lines. With practice and creativity, you’ll be able to create stunning photographs that captivate and engage your audience. So, grab your camera and start exploring the world of leading lines in photography – your images will thank you for it!

More Details