Jul 3, 2024
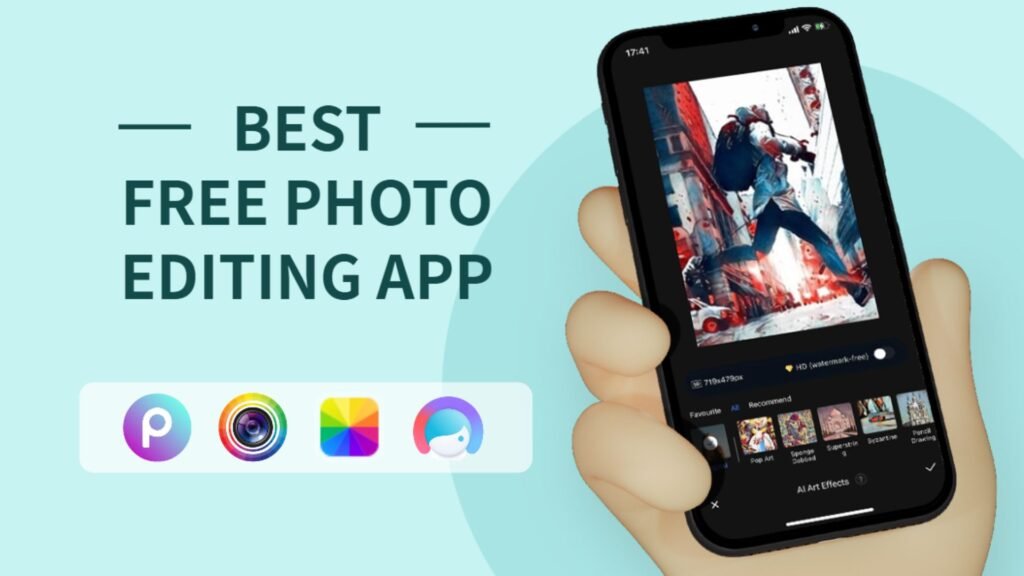
Best Free Photography Editing Apps for Mobile

In today’s digital age, your smartphone can be a powerful tool for photography, offering convenience and versatility. With the right editing app, you can transform your mobile snapshots into stunning images worthy of sharing. Here’s a roundup of some of the best free photography editing apps available for mobile devices:

Free Photography Editing Apps for Mobile

Introduction to Mobile Photography Editing Apps

Mobile photography has revolutionized how we capture and edit photos on the go. Whether you’re an amateur photographer looking to enhance your Instagram feed or a professional capturing moments on your smartphone, these free editing apps provide essential tools and features to elevate your images.

Snapseed

Snapseed is a versatile photo editing app developed by Google. It offers a wide range of tools, including basic adjustments like brightness and contrast, as well as advanced features such as selective editing and curves. Snapseed’s user-friendly interface makes it easy to apply filters, crop images, and enhance details with precision.

Adobe Lightroom Mobile

Adobe Lightroom Mobile is a powerhouse for mobile photo editing, offering professional-grade tools in a streamlined interface. It syncs seamlessly with Adobe Creative Cloud, allowing you to edit photos across devices. Lightroom Mobile features presets, selective editing brushes, and advanced color and tone adjustments to enhance your photos effortlessly.

VSCO

VSCO (Visual Supply Company) is known for its minimalist interface and artistic presets. It offers a variety of filters inspired by film photography, allowing you to create unique visual styles. VSCO also provides editing tools for adjusting exposure, temperature, and grain, making it a favorite among creative photographers looking to achieve a cohesive aesthetic.

Adobe Photoshop Express

Adobe Photoshop Express brings the power of Photoshop to your mobile device with essential editing tools. It includes features like cropping, resizing, and automatic fixes for quick edits. Photoshop Express also offers filters, overlays, and blemish removal tools to perfect your photos directly on your smartphone.

Canva

Canva is not just for graphic design; it also offers robust photo editing capabilities on mobile. With Canva, you can resize images, add text overlays, apply filters, and create collages with ease. It’s ideal for social media enthusiasts and business owners looking to create eye-catching visuals on the go.

Pixlr

Pixlr is a user-friendly photo editing app with a variety of effects, overlays, and filters. It features tools for adjusting colors, sharpening details, and adding creative elements to your photos. Pixlr’s intuitive interface and extensive editing options make it suitable for both casual users and photography enthusiasts.

PhotoDirector

PhotoDirector by CyberLink is another powerful editing app that offers a range of tools for enhancing your photos. It includes features like object removal, HDR effects, and blending modes. PhotoDirector’s user-friendly interface and comprehensive editing tools make it a great choice for editing professional-quality photos on your mobile device.

Google Photos

Google Photos isn’t just a storage app; it also offers basic editing tools for enhancing your photos. It allows you to adjust lighting, color, and apply filters directly within the app. Google Photos automatically backs up your edited photos to the cloud, making it convenient for accessing and sharing them across devices.

Conclusion

Choosing the best free photography editing app for your mobile device depends on your editing needs and preferences. Whether you prefer simple adjustments or advanced editing features, these apps provide the tools to enhance your photos and unleash your creativity. Experiment with different apps to find the one that suits your style and helps you create compelling images that stand out.

With these top free photography editing apps, you can transform ordinary snapshots into extraordinary visual stories, all from the convenience of your mobile device. Start editing and see the difference in your photography today!

More Details
Jul 3, 2024
How to Use Lightroom Presets

Using Lightroom presets can significantly streamline your photo editing process and achieve consistent looks across your images. Here’s a guide on how to effectively use Lightroom presets:

Understand What Lightroom Presets Are

Lightroom presets are pre-defined settings that adjust various aspects of your photo, such as exposure, white balance, contrast, and colors. They allow you to apply complex edits with a single click, saving time and maintaining a consistent style.

Install Lightroom Presets

  • Desktop (Lightroom Classic CC):
    • Download the preset files (usually in .lrtemplate or .xmp format) from your source.
    • Open Lightroom and go to the Develop module.
    • In the Presets panel, right-click on “User Presets” or “Presets” (depending on your version) and choose “Import.”
    • Locate and select the preset files you downloaded. Lightroom will import them into your Presets panel.
  • Mobile (Lightroom CC App):
    • Open the Lightroom CC app on your mobile device.
    • Go to the Presets tab at the bottom of the screen.
    • Tap on the three dots (…) and choose “Import Presets.”
    • Select the preset files (DNG or .xmp format) you want to import from your device.

Apply Presets to Your Photos

  • Desktop:
    • Open the photo you want to edit in Lightroom.
    • Go to the Develop module and locate the Presets panel on the left.
    • Click on the preset you want to apply. Lightroom will instantly apply the preset’s adjustments to your photo.
    • Adjust specific settings (exposure, white balance, etc.) if needed to fine-tune the preset’s effects.
  • Mobile:
    • Open the Lightroom CC app and select the photo you want to edit.
    • Tap on the Presets button (three dots) at the bottom of the screen.
    • Choose the preset you want to apply. Lightroom will automatically apply the preset’s settings to your photo.
    • Fine-tune adjustments like exposure, contrast, and color temperature using the sliders if necessary.

Customize and Adjust Presets

  • Presets are a starting point. After applying a preset, you can still adjust individual settings to suit your specific photo.
  • Use the Basic panel (exposure, contrast, highlights, shadows, etc.) and other adjustment tools in Lightroom to fine-tune your image after applying a preset.
  • Experiment with different presets to find the one that best fits your style or the mood you want to convey.

Create Your Own Presets

  • If you frequently apply similar edits to your photos, consider creating your own presets.
  • Develop an editing style by adjusting settings like exposure, contrast, and color temperature to create a custom look.
  • Once satisfied with your adjustments, save them as a preset in Lightroom for future use.

Organize and Manage Presets

  • Keep your presets organized by creating folders within the Presets panel.
  • Rename presets or folders to easily identify their effects or purposes (e.g., landscape presets, portrait presets, black and white presets).
  • Remove or delete presets you no longer use to keep your workspace clutter-free.

Experiment and Learn

  • Don’t hesitate to experiment with different presets and combinations of adjustments.
  • Learn how each preset affects your photos and understand the adjustments it applies (e.g., warmer tones, faded look, high contrast).
  • Over time, you’ll develop a better understanding of how to use presets effectively and creatively in your photo editing workflow.

By following these steps, you can effectively use Lightroom presets to enhance your photos, achieve consistent editing styles, and streamline your workflow, whether you’re editing on desktop or mobile devices.

More Details
Jul 3, 2024
Tips for Enhancing Colors in Photography Editing

In the world of photography, color enhancement plays a crucial role in transforming ordinary images into stunning visual narratives. Whether you’re a professional photographer or an enthusiast, mastering the art of enhancing colors through editing can significantly elevate the impact of your photos. Here are some valuable tips to help you bring out the best in your images:

Enhancing Colors in Photography Editing

Understanding Color Theory

Before diving into editing techniques, it’s essential to grasp the basics of color theory. Understanding concepts like hue, saturation, and contrast will guide you in making informed decisions during the editing process. This knowledge forms the foundation for creating harmonious and visually appealing color schemes.

Start with a Quality Image

The first step to achieving vibrant colors in editing begins with capturing a high-quality image. Ensure proper exposure and white balance when shooting to avoid color casts and inconsistencies. A well-exposed photograph provides a solid canvas for enhancing colors without compromising image integrity.

Use RAW Format for Flexibility

If your camera supports it, shoot in RAW format rather than JPEG. RAW files retain more color information and offer greater flexibility during editing. They allow you to adjust colors more precisely without sacrificing image quality, especially in challenging lighting conditions.

Adjust White Balance

Correcting white balance is fundamental to achieving natural-looking colors. Use tools in your editing software to adjust temperature (warmth) and tint. Aim for neutral tones that reflect how the scene appeared in real life. This step lays the groundwork for accurate color enhancement.

Enhance Saturation and Vibrancy

Carefully adjust the saturation and vibrancy settings to intensify colors without oversaturating them. Moderation is key here; subtle enhancements often yield more pleasing results than drastic changes. Focus on enhancing specific colors that contribute to the mood and atmosphere of your photograph.

Utilize Selective Color Editing

Most editing software allows for selective color adjustments. Use this feature to target and enhance individual colors within your image. For example, you can make greens in landscapes appear richer or enhance skin tones in portraits while preserving the natural look of other elements.

Experiment with Filters and Presets

Experiment with filters and presets in your editing software to achieve different color effects quickly. However, exercise caution not to rely solely on presets; customize them to suit the unique characteristics of each photograph. This approach can save time while adding a creative touch to your editing process.

Dodge and Burn for Depth

Dodge and burn tools are powerful for adding depth and dimension to your photographs. Use these tools selectively to lighten (dodge) or darken (burn) specific areas. This technique enhances contrasts and emphasizes colors, creating a more dynamic visual impact.

Maintain a Balanced Workflow

Maintaining a balanced workflow throughout the editing process is essential. Avoid making excessive adjustments that may lead to unnatural-looking colors or artifacts. Regularly step back and review your edits to ensure they enhance the overall aesthetic without overpowering the original image.

Finalize with Precision

Before finalizing your edits, zoom in to inspect details and check for any inconsistencies in color or tone. Pay attention to small nuances that may affect the overall quality of your photograph. Take the time to refine your adjustments until you achieve a cohesive and polished result.

Conclusion

Enhancing colors in photography editing is both a skill and an art form. By understanding color theory, starting with a quality image, and utilizing advanced editing techniques, you can transform your photographs into captivating visual masterpieces. Experimentation, patience, and attention to detail are key as you develop your editing style and create images that resonate with viewers.

Mastering the art of enhancing colors in photography editing takes practice and a keen eye for detail. With these tips, you’re equipped to elevate your photography skills and create images that leave a lasting impression.

More Details
Jul 3, 2024
How to Edit Travel Photos

Editing travel photos is essential to enhance colors, correct exposure, and highlight the beauty of the places you’ve visited. Here’s a step-by-step guide to help you edit your travel photos effectively:

Organize Your Photos

Start by organizing your photos into folders based on location, date, or theme. This makes it easier to find and work on specific images during the editing process.

Choose Your Editing Software

Use editing software like Adobe Lightroom, Photoshop, or free alternatives like GIMP or Snapseed. Lightroom is particularly popular for its efficient workflow and non-destructive editing capabilities.

Import and Select Photos

Import your photos into your chosen editing software. Review and select the best images from your collection. Focus on shots that tell a story or capture memorable moments.

Adjust White Balance

Correct white balance to ensure accurate colors in your photos. Use the eyedropper tool or manually adjust temperature and tint sliders to remove any color casts caused by different lighting conditions.

Adjust Exposure and Contrast

Start with basic adjustments like exposure and contrast. Increase exposure to brighten shadows or decrease it to recover blown-out highlights. Adjust contrast to enhance the overall tonal range and make your photo pop.

Enhance Colors and Saturation

Use the vibrance and saturation sliders to boost colors selectively. Increase vibrance for subtle enhancements to muted colors, and use saturation sparingly to avoid unnatural-looking results.

Fine-Tune Highlights and Shadows

Use the highlights and shadows sliders to recover details in bright and dark areas of your photos. Adjust these sliders to balance the exposure and improve overall image contrast.

Crop and Straighten

Crop your photos to improve composition and remove distracting elements. Straighten horizons and lines to ensure a balanced and well-aligned image.

Sharpen and Reduce Noise

Apply sharpening to enhance details in your photos, particularly in landscapes and architectural shots. Adjust noise reduction settings to reduce graininess, especially in low-light or high-ISO photos.

Add Creative Effects (Optional)

Experiment with creative effects like vignettes, split toning, or selective adjustments (e.g., using brushes or gradients) to enhance specific areas of your photo. Be subtle to maintain a natural look.

By following these steps and practicing regularly, you’ll improve your editing skills and create stunning travel photos that capture the essence of your adventures. Remember, editing should enhance your photos while preserving their authenticity and the unique atmosphere of each location.

More Details
Jul 3, 2024
How to Find Inspiration in Photography

Finding inspiration in photography can be a challenging yet rewarding journey. Whether you’re a seasoned professional or a budding enthusiast, hitting a creative block is natural. However, reigniting that spark doesn’t have to be daunting. With the right approach and mindset, you can uncover endless sources of inspiration in photography. In this guide, we’ll explore various techniques to help you rediscover your passion and creativity behind the lens.

Explore Different Genres

One effective way to find inspiration in photography is to explore different genres. If you’re used to shooting landscapes, try your hand at street photography or portraits. Each genre presents unique challenges and perspectives, which can reignite your creative energy. By stepping out of your comfort zone, you expose yourself to new techniques and subjects, broadening your photographic skills and vision.

Engage with Photography Communities

Engaging with online and local photography communities is a fantastic way to find inspiration in photography. These communities offer a platform to share your work, receive feedback, and discover the work of others. Websites like Flickr, 500px, and Instagram are teeming with talented photographers who share their experiences and ideas. Joining local photography clubs or attending meetups can also provide opportunities to connect with like-minded individuals and gain fresh perspectives.

Study the Masters

Another powerful method to find inspiration in photography is to study the work of master photographers. Delving into the portfolios of legends like Ansel Adams, Henri Cartier-Bresson, or Annie Leibovitz can provide invaluable insights into composition, lighting, and storytelling. Analyze their techniques, understand their thought processes, and try to incorporate elements of their style into your own work. This exercise can help you develop a deeper appreciation for the art and inspire you to experiment with new approaches.

Embrace the Seasons

Nature is a boundless source of inspiration in photography, and the changing seasons offer diverse opportunities to capture its beauty. Embrace the vibrant colours of autumn, the stark contrasts of winter, the fresh blooms of spring, and the golden hours of summer. Each season presents unique lighting conditions and subjects that can inspire new ideas and compositions. By regularly venturing outdoors and immersing yourself in nature, you can keep your creativity flowing.

Challenge Yourself with Projects

Setting up personal photography projects is an excellent way to find inspiration in photography. These projects provide structure and purpose, helping you stay motivated and focused. Choose a theme or subject that interests you and commit to capturing it over a specific period. Whether it’s a 365-day photo challenge, a series on urban architecture, or documenting everyday life, having a project can push you to explore new ideas and refine your skills.

Travel and Explore New Places

Travelling and exploring new places can be a profound source of inspiration in photography. Visiting unfamiliar locations exposes you to different cultures, landscapes, and people, offering fresh perspectives and subjects to capture. Whether you’re travelling to a far-off country or simply exploring a nearby town, new environments can stimulate your creativity and provide endless photographic opportunities.

Experiment with Techniques

Experimenting with different photographic techniques can reignite your passion and help you find inspiration in photography. Play with long exposures, double exposures, macro photography, or black-and-white processing. Trying out new techniques forces you to think creatively and approach subjects in novel ways. The process of experimentation itself can be incredibly rewarding and lead to unexpected discoveries.

Reflect on Your Work

Taking time to reflect on your work is essential for finding inspiration in photography. Review your portfolio, analyze your favourite shots, and identify patterns or themes that resonate with you. Understanding what draws you to certain images can help you pinpoint your artistic voice and guide your future work. Additionally, revisiting old photos with fresh eyes can reveal new editing possibilities or inspire you to reshoot subjects with a different approach.

Draw Inspiration from Other Art Forms

Inspiration in photography doesn’t have to come solely from other photographs. Drawing inspiration from other art forms like painting, literature, music, and film can provide a fresh perspective and fuel your creativity. Pay attention to how different artists use colour, light, composition, and storytelling in their work. Incorporating elements from these art forms into your photography can lead to unique and compelling images.

Stay Curious and Open-Minded

Ultimately, the key to finding inspiration in photography is to stay curious and open-minded. Embrace the world around you with a sense of wonder and curiosity. Be open to new experiences, ideas, and perspectives. Inspiration can come from the most unexpected places – a fleeting moment, a conversation, or a random encounter. By maintaining an open mind and a curious spirit, you’ll be more receptive to the beauty and stories that surround you, ready to capture them through your lens.

Conclusion

Finding inspiration in photography is a continuous journey, fueled by curiosity, exploration, and passion. By exploring different genres, engaging with communities, studying the masters, embracing nature, challenging yourself with projects, travelling, experimenting with techniques, reflecting on your work, drawing from other art forms, and staying open-minded, you can rediscover your creative spark. Remember, inspiration is everywhere – you just need to look for it. So, grab your camera, venture out, and let your creativity flow!

More Details
Jul 3, 2024
How to Photograph Fashion

Photographing fashion involves capturing clothing, accessories, and models in a way that highlights style, creativity, and often a narrative. Whether you’re shooting for a fashion magazine, a designer’s lookbook, or personal projects, here are essential tips to help you achieve professional results:

Plan Your Shoot

Before the shoot, collaborate with stylists, makeup artists, and models to discuss themes, outfits, and overall vision. Create a mood board to organize ideas and inspirations, ensuring everyone is on the same page.

Choose the Right Location

Select locations that complement the clothing and enhance the mood of your fashion story. Urban environments, natural settings, and studios with versatile backdrops are common choices. Ensure the location doesn’t overshadow the fashion but instead enhances the overall aesthetic.

Lighting is Key

Use natural light or artificial lighting setups to create the desired atmosphere. Soft, diffused light is often flattering for fashion photography, reducing harsh shadows and emphasizing textures and details. Experiment with lighting angles and intensity to achieve the desired look.

Focus on Composition

Composition plays a crucial role in fashion photography. Utilize the rule of thirds, leading lines, symmetry, and negative space to create visually compelling images. Consider how the lines and shapes of the clothing interact with the overall frame.

Direct Your Model

Communication with your model is essential to capture the right poses and expressions. Guide them to convey the mood and narrative of the fashion story. Encourage movement and fluidity in their poses to bring life to the garments.

Pay Attention to Details

Fashion photography requires attention to detail. Ensure clothing is properly styled, accessories are positioned correctly, and hair and makeup complement the overall look. Small details can make a significant difference in the final image.

Experiment with Angles and Perspectives

Explore different angles and perspectives to capture unique and dynamic shots. Shoot from various heights—eye level, high above, or low to the ground—to add variety and interest to your photos.

Use Props and Accessories

Props can enhance the narrative and context of your fashion photos. Incorporate relevant accessories or objects that complement the clothing and tell a story. Be mindful not to overcrowd the frame; the focus should remain on the fashion.

Post-Processing and Editing

Edit your photos to enhance colors, contrast, and overall visual impact. Adjust exposure, white balance, and sharpening to refine the image while maintaining a natural look. Use editing software like Adobe Lightroom or Photoshop to fine-tune your photos.

Develop Your Style

Develop a signature style that sets your fashion photography apart. Experiment with different techniques, colors, and themes to find what resonates with your vision. Consistency in style will help establish your brand as a fashion photographer.

By applying these tips and practicing regularly, you can elevate your fashion photography skills and create compelling images that showcase clothing and accessories in their best light. Experimentation, creativity, and attention to detail will help you capture the essence of fashion and tell captivating visual stories.

More Details
Jul 3, 2024
How to Create Depth in Your Photography

Creating depth in your photography can transform flat, uninspiring images into dynamic and engaging works of art. Depth adds dimension, drawing viewers into the scene and guiding their eyes through the composition. Whether you’re capturing landscapes, portraits, or street scenes, understanding how to create depth in your photography is essential for elevating your work. In this guide, we’ll explore various techniques to help you achieve this effect.

Understanding Depth: The Basics

Before diving into specific techniques, let’s grasp the concept of depth in photography. Depth refers to the perceived distance between objects in an image, creating a sense of three-dimensionality on a two-dimensional plane. By manipulating elements like perspective, lighting, and composition, you can enhance this sense of depth in your photography.

Utilize Leading Lines

Leading lines are a powerful tool for creating depth in your photography. These lines guide the viewer’s eye from the foreground to the background, adding a sense of distance and dimension. Roads, rivers, fences, or even architectural features can serve as leading lines. Positioning these elements strategically in your composition will naturally draw viewers into the scene, making them feel like they’re part of the journey.

Incorporate Foreground Elements

Including elements in the foreground is another effective way to create depth in your photography. Foreground objects add layers to your composition, making the background appear farther away. This technique is particularly useful in landscape photography, where rocks, plants, or other natural features can frame the scene and provide a sense of scale. Experiment with different focal points and apertures to keep the foreground sharp while maintaining a pleasing background blur.

Use Aperture to Control Depth of Field

Aperture settings play a crucial role in controlling depth of field, which directly affects the perception of depth in your photography. A wide aperture (low f-number) creates a shallow depth of field, blurring the background and isolating the subject. Conversely, a narrow aperture (high f-number) increases the depth of field, keeping more elements in focus. Adjusting the aperture allows you to manipulate the sharpness and blur in your image, enhancing the sense of depth.

Experiment with Perspective and Angles

Changing your perspective and shooting from different angles can significantly impact the depth in your photography. Shooting from a low angle can make the foreground elements appear larger and more imposing, while a high angle can provide a bird’s-eye view, emphasizing the distance between objects. Moving closer to or farther from your subject also alters the perspective, adding variety and interest to your compositions.

Layer Your Composition

Layering involves placing objects at different distances from the camera, creating multiple planes within the image. This technique adds complexity and depth in your photography, making the scene feel more three-dimensional. For example, in a landscape shot, you might include a tree in the foreground, a mountain in the midground, and the sky in the background. Each layer contributes to the overall depth, guiding the viewer’s eye through the scene.

Use Light and Shadow

Lighting is a fundamental aspect of photography that can enhance depth in your photography. By using light and shadow creatively, you can add dimension and texture to your images. Side lighting, where the light source is positioned to the side of the subject, creates long shadows and highlights, emphasizing the contours and details. Backlighting, on the other hand, can create silhouettes and halos, adding a dramatic effect that enhances the sense of depth.

Employ Overlapping Elements

Overlapping elements naturally create depth in your photography by suggesting that some objects are closer to the camera than others. This technique works well in various genres, from portraits to street photography. By positioning one subject partially in front of another, you can create a sense of layering and distance, making the scene more dynamic and engaging.

Use Color and Contrast

Colour and contrast can also contribute to the depth of your photography. Warm colours (reds, oranges, yellows) tend to advance towards the viewer, while cool colours (blues, greens, purples) recede. By incorporating a mix of warm and cool tones, you can create a visual separation between the foreground and background. Additionally, increasing contrast in certain areas of the image can draw attention to specific elements, enhancing the overall sense of depth.

Post-Processing Techniques

Finally, post-processing offers several tools to enhance the depth in your photography. Techniques like dodging and burning can selectively lighten or darken areas of the image, adding dimension and guiding the viewer’s eye. Adjusting clarity and sharpness can emphasize details, while blurry effects can create a sense of movement and distance. Experiment with these tools to refine your images and achieve the desired depth.

Conclusion

Creating depth in your photography is a powerful way to bring your images to life. By utilizing techniques such as leading lines, foreground elements, perspective, and lighting, you can transform flat compositions into dynamic visual stories. Remember, practice and experimentation are key. The more you explore these methods, the more you’ll develop your unique style and ability to capture depth in your photography. So, grab your camera, head out, and start creating images that truly draw viewers in.

More Details
Jul 3, 2024
Photography Hacks for Beginners

Starting out in photography can be both exciting and overwhelming. With so many techniques, settings, and gear options, it’s easy to feel lost. Here are some photography hacks for beginners to help you get the most out of your camera and start capturing stunning images right away.

Use the Rule of Thirds

The rule of thirds is a simple yet powerful composition technique. Imagine dividing your frame into a grid of nine equal parts with two horizontal and two vertical lines. Place your subject along these lines or at their intersections to create a more balanced and visually appealing image. Most cameras and smartphones have a grid overlay option to help you practice this technique.

Shoot During the Golden Hour

Lighting can make or break a photograph. The golden hour—shortly after sunrise and before sunset—provides soft, warm, and diffused light that is perfect for photography. This natural lighting minimizes harsh shadows and highlights, giving your photos a beautiful, ethereal quality. Plan your shoots around these times to make the most of this magical light.

Keep Your Camera Steady

Blurry photos are often the result of camera shake. To avoid this, hold your camera with both hands, keeping your elbows close to your body. If you’re shooting with a smartphone, use both hands and stabilize yourself against a solid object if possible. For even greater stability, invest in a tripod. This is especially useful for low-light situations and long exposure shots.

Experiment with Angles and Perspectives

Don’t just shoot from eye level. Experiment with different angles and perspectives to add interest to your photos. Get down low to capture a subject from a ground-level view or climb higher for a bird’s-eye perspective. Changing your viewpoint can reveal unique compositions and make your photos stand out.

Use Simple Backgrounds

A cluttered background can distract from your subject. Look for clean, simple backgrounds that make your subject stand out. If you’re shooting portraits, try to find a background with minimal distractions or use a wide aperture to blur the background and create a bokeh effect. This will help draw attention to your subject and create a more professional-looking photo.

Learn to Use Natural Light

Natural light is a beginner photographer’s best friend. It’s free, abundant, and versatile. When shooting indoors, position your subject near a window to take advantage of natural light. Avoid using the built-in flash on your camera or smartphone as it can produce harsh, unflattering light. Instead, use reflectors or white surfaces to bounce light onto your subject and soften shadows.

Master Basic Editing

Post-processing is an essential part of photography. Learning basic editing techniques can significantly improve your photos. Use free or affordable software like Adobe Lightroom, Photoshop, or mobile apps like Snapseed. Start with basic adjustments such as exposure, contrast, saturation, and cropping. Editing allows you to enhance your images and bring out their full potential.

Shoot in RAW Format

If your camera allows it, shoot in RAW format instead of JPEG. RAW files contain all the data captured by the camera’s sensor, providing greater flexibility in post-processing. You can recover more details from shadows and highlights, adjust white balance more accurately, and make finer adjustments without degrading the image quality. Keep in mind that RAW files are larger, so ensure you have enough storage space.

By incorporating these hacks into your photography practice, you’ll be well on your way to capturing stunning images and developing your skills. Remember, the key to improving is consistent practice and a willingness to experiment and learn. Enjoy the process and have fun exploring the world through your lens!

More Details
Jul 3, 2024
Strategies for Mastering Underwater Photograph

Underwater photography presents unique challenges and opportunities for photographers. Capturing compelling images beneath the water’s surface requires specific skills and techniques. Whether you’re a beginner or looking to improve your underwater photography skills, these strategies will help you achieve stunning results.

Underwater Photograph

Understanding Equipment

Before diving into the depths, it’s crucial to have the right equipment. Start with a quality underwater camera that suits your skill level and budget. Look for models that offer manual control over settings like aperture, shutter speed, and ISO to have greater control over your shots. Invest in a sturdy underwater housing that keeps your camera safe and allows access to essential controls.

Mastering Lighting Techniques

Light behaves differently underwater compared to on land. Understanding how light interacts with water is crucial for capturing vibrant and well-exposed images. Use natural light to your advantage, especially during daytime dives. Position yourself correctly in relation to the light source to minimize backscatter, which can obscure your subjects.

Perfecting Composition

Composition plays a vital role in underwater photography. Pay attention to the positioning of your subject within the frame, taking into account the background and foreground elements. Experiment with different angles and perspectives to create visually dynamic images. Rule of thirds, leading lines, and symmetry can all enhance the impact of your underwater photographs.

Overcoming Challenges

Underwater photography comes with its challenges, such as limited visibility, buoyancy control, and water currents. Practice good diving techniques to maintain stability underwater and minimize camera shake. Use a dive light or strobes to illuminate subjects in darker environments and maintain sharp focus.

Capturing Marine Life

One of the most captivating aspects of underwater photography is capturing marine life in its natural habitat. Approach marine creatures with caution and respect, avoiding disturbing their behavior or environment. Use a zoom lens or macro lens to capture intricate details and textures of underwater flora and fauna.

Post-Processing and Editing

Post-processing can enhance the visual impact of your underwater photographs. Adjust white balance to correct colors affected by underwater conditions, such as blue or green casts. Fine-tune exposure, contrast, and sharpness to bring out details and create a balanced composition. Use specialized software like Adobe Lightroom or Capture One for professional-grade editing.

Conclusion

Mastering underwater photography requires dedication, practice, and a solid understanding of both technical and creative aspects. By investing in the right equipment, mastering lighting techniques, perfecting composition, and overcoming challenges, you can capture stunning images beneath the water’s surface. Remember to respect marine life and the underwater environment while striving to improve your skills.

In conclusion, underwater photography offers a unique opportunity to explore and capture the beauty of the underwater world. With these strategies and techniques, you can take your underwater photography skills to the next level and create compelling images that tell captivating stories.

More Details
Jul 3, 2024
Best Editing Software for Photography

In the realm of photography, capturing the perfect shot is only half the battle. The other half involves post-processing, where you can transform your images into stunning works of art. To achieve this, you need the right tools at your disposal. In this article, we’ll explore the best editing software for photography, helping you elevate your photos to new heights.

Adobe Photoshop: The Industry Standard

When it comes to editing software for photography, Adobe Photoshop is undoubtedly the industry standard. Known for its extensive range of features, Photoshop offers powerful tools for everything from basic adjustments to complex manipulations. With layers, masks, and an array of filters, you can retouch photos, create composites, and achieve professional-level results. Photoshop’s versatility makes it suitable for photographers of all skill levels, allowing you to bring your creative visions to life.

Adobe Lightroom: Seamless Workflow and Organization

Adobe Lightroom is another favorite among photographers. Unlike Photoshop, Lightroom is designed specifically for photo editing and management. Its user-friendly interface and non-destructive editing capabilities make it an excellent choice for both beginners and professionals. Lightroom excels in organizing your photo library, making it easy to catalog, search, and sort your images. Additionally, its powerful editing tools allow you to enhance colors, adjust exposure, and fine-tune details with precision. For those looking for a seamless workflow, Lightroom is a top contender.

Capture One: Superior Color Grading

Capture One is a high-end editing software for photography that is particularly renowned for its superior color grading capabilities. Developed by Phase One, this software offers exceptional color accuracy and control, making it a favorite among professional photographers. Capture One provides a robust set of tools for tethered shooting, RAW processing, and image editing. Its advanced color editor allows you to fine-tune hues and tones with precision, resulting in stunning, true-to-life images. If color grading is a priority for you, Capture One is a worthy investment.

Affinity Photo: Budget-Friendly Powerhouse

For photographers seeking a cost-effective alternative to Adobe products, Affinity Photo is an excellent choice. This editing software for photography packs a punch with its comprehensive set of features and tools. Affinity Photo offers advanced photo editing capabilities, including layers, masks, and a wide range of filters and effects. It also supports RAW editing, ensuring that you can work with high-quality image files. With its one-time purchase model, Affinity Photo provides excellent value for money without compromising on functionality.

GIMP: Open Source Flexibility

GIMP, which stands for GNU Image Manipulation Program, is an open-source editing software for photography that offers a powerful set of tools. While it may not have the same level of polish as some commercial software, GIMP is highly customizable and free to use. It provides features such as layers, masks, and filters, allowing you to perform a wide range of editing tasks. GIMP’s active community continually develops plugins and scripts to extend its functionality, making it a versatile option for photographers who enjoy tinkering with their tools.

Luminar AI: AI-Powered Enhancements

Luminar AI is a relatively new player in the world of editing software for photography, but it has quickly gained popularity for its AI-powered enhancements. This software leverages artificial intelligence to simplify complex editing tasks, making it accessible to photographers of all levels. Luminar AI offers features like sky replacement, portrait retouching, and automatic enhancements, allowing you to achieve impressive results with minimal effort. Its intuitive interface and innovative tools make it a great choice for those who want to streamline their editing process.

DxO PhotoLab: Advanced Noise Reduction

DxO PhotoLab is known for its exceptional noise reduction and optical correction capabilities. This editing software for photography excels at processing RAW files, offering advanced algorithms that produce stunning results. DxO PhotoLab’s DeepPRIME technology reduces noise while preserving details, making it ideal for low-light and high-ISO photography. Additionally, its optical correction tools automatically fix lens distortions, chromatic aberrations, and vignetting, ensuring that your images are sharp and clear. For photographers who prioritize image quality, DxO PhotoLab is a top-tier option.

Conclusion: Choosing the Right Tool

Selecting the best editing software for photography depends on your specific needs and preferences. Adobe Photoshop and Lightroom remain industry favorites for their comprehensive feature sets and seamless workflows. Capture One stands out for its superior color grading, while Affinity Photo offers a budget-friendly alternative with robust capabilities. GIMP provides open-source flexibility, Luminar AI leverages AI for easy enhancements, and DxO PhotoLab excels in noise reduction and optical corrections. Each of these tools has its strengths, so consider what aspects of photo editing are most important to you. With the right software, you can elevate your photography and bring your creative visions to life.

More Details