Jul 3, 2024
Lighting: Natural Light, Artificial Light, Golden Hour, Blue Hour, Light Modifiers

Lighting is a crucial aspect of photography. It influences the mood, tone, and overall quality of an image. Understanding different types of lighting, including natural light, artificial light, golden hour, blue hour, and light modifiers, is essential for creating compelling photographs.

Natural Light

Natural light is one of the most readily available light sources. It comes from the sun and varies in intensity and color throughout the day. Photographers often prefer natural light for its softness and ability to create authentic, warm images. Morning and late afternoon light, in particular, provides a gentle and flattering illumination. Furthermore, natural light is free and can be manipulated by changing locations and angles. However, it can be unpredictable and dependent on weather conditions. Therefore, mastering the use of natural light can significantly enhance your photography.

Lighting

Artificial Light

Artificial light includes any light source that is not natural. Common examples are lamps, flash units, and studio lights. Artificial light provides consistency and control, which is particularly beneficial in studio settings. It allows photographers to shoot at any time and under any conditions. Moreover, artificial light can be modified and shaped using various tools like softboxes, reflectors, and diffusers. This control enables photographers to create specific moods and effects. However, it requires a good understanding of light manipulation and equipment. Thus, learning to use artificial light effectively opens up numerous creative possibilities.

Golden Hour

The golden hour refers to the period shortly after sunrise and before sunset. During this time, the sun is low in the sky, casting a warm, soft light that enhances colors and textures. This light is often considered the most beautiful and is highly sought after by photographers. It creates long shadows and a gentle glow, making subjects appear more vibrant and three-dimensional. Additionally, the golden hour light reduces harsh contrasts, resulting in more balanced exposures. Hence, photographing during the golden hour can elevate the quality and aesthetic appeal of your images.

Blue Hour

The blue hour occurs just before sunrise and after sunset. During this period, the sky takes on a deep blue hue, and the light is soft and diffused. This creates a magical, almost ethereal atmosphere. Photographers use blue hour light to capture stunning landscapes, cityscapes, and twilight scenes. Furthermore, the subtle light during this time adds a sense of calm and tranquility to the images. It also allows for longer exposures, which can create beautiful light trails and reflections. Therefore, shooting during the blue hour offers unique and captivating photographic opportunities.

Light Modifiers

Light modifiers are tools that alter the quality, direction, and color of light. Common modifiers include reflectors, diffusers, softboxes, and grids. Reflectors bounce light onto the subject, filling in shadows and creating a more even illumination. Diffusers soften harsh light, reducing glare and producing a more flattering effect. Softboxes and grids shape the light, controlling its spread and intensity. These tools allow photographers to manipulate light to achieve the desired effect. Moreover, using light modifiers adds versatility and creativity to your lighting setup. Hence, mastering light modifiers is crucial for professional-quality photography.

Interplay of Lighting Techniques

Understanding the interplay between natural light, artificial light, golden hour, blue hour, and light modifiers is essential. These lighting techniques do not exist in isolation but complement each other. For instance, combining natural light with reflectors during the golden hour can create stunning portraits. Similarly, using artificial light with softboxes can mimic the soft, diffused light of the blue hour. Moreover, light modifiers can enhance both natural and artificial lighting setups, adding depth and dimension. Therefore, integrating these techniques allows for more dynamic and compelling photographs.

Practical Application

In practice, experimenting with different lighting techniques helps refine your skills. Start by observing how natural light changes throughout the day. Experiment with shooting during the golden hour and blue hour to understand their unique qualities. Incorporate artificial light and light modifiers to gain control over your lighting environment. Additionally, practice combining different light sources and modifiers to achieve specific effects. Therefore, continuous practice and experimentation with lighting techniques will significantly improve your photography.

Conclusion

In conclusion, mastering lighting techniques such as natural light, artificial light, golden hour, blue hour, and light modifiers is essential for creating captivating photographs. Each type of lighting offers unique qualities and opportunities. Moreover, understanding their interplay allows for creative control and technical precision. Therefore, investing time in learning and practicing these lighting techniques will greatly enhance your photographic skills. Embrace these principles to elevate your photography to new heights.

More Details
Jul 3, 2024
How to Start a Photography Blog

Starting a photography blog can be a rewarding way to showcase your work, share your passion for photography, and connect with a community of fellow photographers and enthusiasts. Here’s a step-by-step guide to help you get started:

Define Your Blog’s Focus

  • Determine the niche or focus of your photography blog. This could be landscape photography, portrait photography, travel photography, or any other specific area of interest.
  • Consider what unique perspective or expertise you can offer to attract and engage your target audience.

Choose a Blogging Platform

  • Select a blogging platform that suits your needs and technical skills. Popular options include WordPress, Blogger, Squarespace, and Wix.
  • WordPress.org offers flexibility and customization options, while platforms like Blogger and Squarespace provide user-friendly interfaces and templates.

Register a Domain Name and Hosting

  • Choose a domain name that reflects your blog’s theme or your photography brand. Use a domain registrar (e.g., GoDaddy, Namecheap) to register your domain.
  • Select a reliable web hosting provider to host your blog. Compare hosting plans based on features, performance, and customer support.

Design Your Blog

  • Select a visually appealing and responsive blog theme or template that showcases your photography effectively.
  • Customize the design to match your branding, including colors, fonts, and layout. Ensure your blog is easy to navigate and provides a seamless user experience.

Create Compelling Content

  • Plan your content strategy. Decide on the types of posts you will publish, such as photo galleries, tutorials, gear reviews, photography tips, or personal stories.
  • Write high-quality, engaging blog posts that provide value to your readers. Include captivating images and descriptive captions to accompany your photography.

Optimize for Search Engines (SEO)

  • Improve your blog’s visibility in search engine results by optimizing your content for relevant keywords and phrases.
  • Use SEO plugins or tools to optimize meta titles, descriptions, alt text for images, and internal linking structure.

Promote Your Blog

  • Share your blog posts on social media platforms (e.g., Instagram, Facebook, Twitter) to reach a wider audience.
  • Engage with other photographers and communities by commenting on their blogs, participating in forums, and networking on photography-related websites.

Build a Community

  • Encourage interaction and feedback from your readers. Respond to comments, questions, and messages to foster a sense of community.
  • Consider featuring guest posts or collaborations with other photographers to diversify your content and reach new audiences.

Monetize Your Blog (Optional)

  • Explore monetization options such as display advertising, affiliate marketing (promoting photography gear or courses), selling prints or digital products, or offering photography services.
  • Ensure any monetization efforts align with your blog’s content and provide value to your audience without compromising their experience.

Analyze and Adapt

Use analytics tools (e.g., Google Analytics) to track visitor behavior, demographics, and popular content on your blog. – Analyze data to identify trends, improve content strategy, and optimize your blog for better performance and growth.

Starting a photography blog requires dedication, creativity, and consistent effort to build an audience and establish your online presence. By focusing on quality content, engaging with your audience, and continuously refining your blog, you can create a success

More Details
Jul 3, 2024
Best Photoshop Actions for Streamlining Editing Workflow

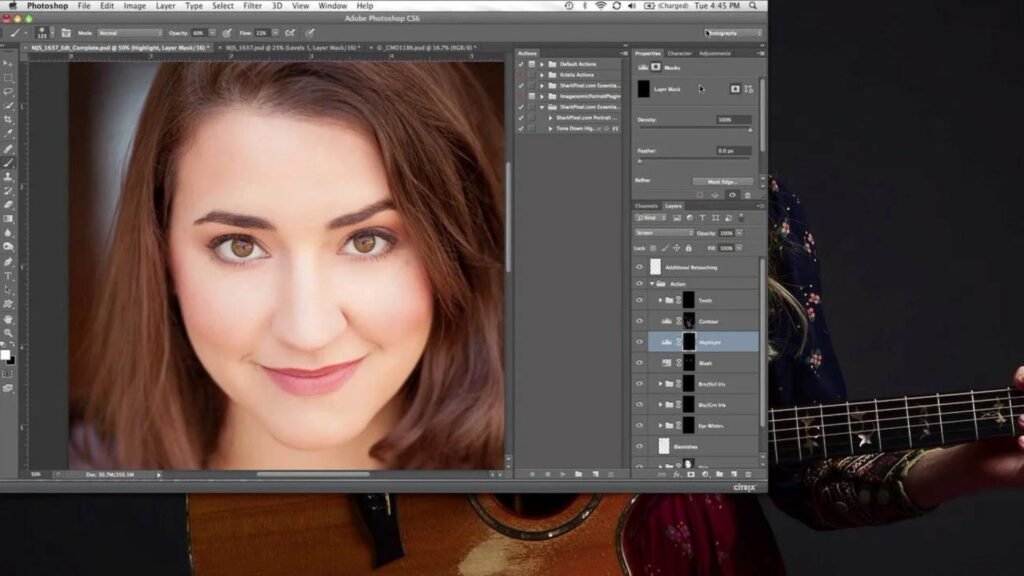
Photoshop actions are pre-recorded steps that can automate and streamline repetitive tasks in your editing workflow. Whether you’re a professional photographer or a hobbyist, using the right Photoshop actions can save you time and effort, allowing you to focus more on creativity and less on manual adjustments.

Photoshop Actions for Streamlining Editing Workflow

What are Photoshop Actions?

Photoshop actions are sets of recorded steps that you can apply to your photos with just a click. They can range from simple adjustments like color correction to complex effects and enhancements. By using actions, you can achieve consistent results across your photos and speed up your editing process significantly.

Benefits of Using Photoshop Actions

  1. Time-Saving: Actions automate repetitive tasks, saving you hours of manual editing time.
  2. Consistency: Ensure a consistent look and feel across your photos.
  3. Efficiency: Focus on creative aspects rather than technical adjustments.
  4. Customization: Actions are customizable, allowing you to tweak settings to suit your style.
  5. Workflow Enhancement: Organize and optimize your workflow for smoother editing sessions.

Choosing the Right Photoshop Actions

When selecting Photoshop actions, consider your specific editing needs and style preferences. Here are some popular types of actions that can streamline your workflow:

1. Portrait Retouching Actions

Enhance skin tones, smooth skin texture, and add subtle enhancements to portraits with retouching actions. These actions often include adjustments for blemish removal, skin softening, and enhancing facial features.

2. Landscape Enhancement Actions

Adjust colors, contrast, and clarity to bring out the beauty of landscapes. Landscape enhancement actions can include adjustments for enhancing skies, adding depth, and boosting natural colors.

3. Black and White Conversion Actions

Convert your photos to high-quality black and white images with specialized actions. These actions often include adjustments for contrast, tone, and grain simulation to achieve artistic black and white effects.

4. HDR Effects Actions

Create high dynamic range (HDR) effects with actions that merge multiple exposures into one balanced photo. HDR actions help you achieve vibrant colors and details across highlights and shadows.

5. Vintage and Retro Actions

Achieve nostalgic looks with vintage and retro actions that apply classic film effects, light leaks, and grain textures to your photos. These actions add a unique charm and character to your images.

How to Use Photoshop Actions

Using Photoshop actions is straightforward:

  • Download and Install: Download actions from reputable sources and install them in Photoshop.
  • Apply Actions: Open your photo in Photoshop, select the action you want to use, and click ‘Play’ to apply the steps.
  • Adjust Settings: Some actions allow for adjustment of settings like opacity or strength after application.
  • Save and Export: Once satisfied with the result, save your edited photo in your desired format.

Conclusion

In conclusion, integrating the right Photoshop actions into your editing workflow can significantly enhance your efficiency and creativity. Whether you’re editing portraits, landscapes, or experimenting with artistic effects, there’s a wide range of actions available to suit your needs. By leveraging these tools, you can streamline your editing process, achieve consistent results, and elevate the quality of your photography.

Mastering Photoshop actions takes practice, but the benefits of improved workflow and stunning results make it well worth the effort. Explore different actions, experiment with settings, and tailor them to your style to unlock the full potential of your photography editing journey.

More Details
Jul 3, 2024
How to Master Long-Exposure Photography

Long-exposure photography presents a captivating way to capture images that convey motion, drama, and surreal effects. Whether you’re photographing smooth waterfalls, streaking car lights, or dreamy star trails, mastering this technique requires both technical proficiency and creative vision. This comprehensive guide delves into essential techniques, tips, and considerations to help you excel in long-exposure photography.

Understanding Long Exposure Photography

Long exposure photography involves using a slow shutter speed to capture stationary elements sharply while blurring moving elements in the scene. This technique is fundamental for creating effects like motion blur in waterfalls, light trails from vehicles, or streaking stars across the night sky. Achieving the desired effect relies heavily on controlling exposure settings effectively.

Essential Equipment for Long-Exposure Photography

To achieve high-quality long-exposure images, having the right equipment is crucial. Start with a DSLR or mirrorless camera with manual control over settings for precise adjustments. A sturdy tripod stabilizes your camera during long exposures, preventing blur caused by camera shake. Minimize camera shake further by using a remote shutter release or timer to trigger the shutter. Neutral Density (ND) Filters are essential as they reduce the amount of light entering the lens, allowing for longer exposures even in bright conditions. Additionally, a lens hood helps prevent lens flare, particularly useful when shooting long exposures during daylight hours.

Mastering Exposure Settings

Achieving proper exposure is critical for successful long-exposure photography. Use a slow shutter speed (typically 1 second or longer) to capture motion blur or light trails effectively. Choose a smaller aperture (higher f-number) to increase the depth of field and control the amount of light entering the lens. Keep ISO low (typically between 100-400) to minimize noise and maintain image quality, especially in low-light conditions.

Choosing Suitable Subjects for Long Exposure

Certain subjects lend themselves well to long-exposure photography, enhancing their visual impact. Capture smooth, flowing water of waterfalls and rivers to create a serene and ethereal effect. Use long exposures to capture streaking lights from moving vehicles, adding a dynamic element to cityscapes. Create mesmerizing star trails by using long exposures to track the movement of stars across the night sky.

Techniques and Creative Tips

Explore various techniques to elevate your long-exposure photography. Capture the trails of moving lights, such as cars or boats, by using a slow shutter speed and a stable shooting position. Introduce motion blur into crowded scenes to convey a sense of movement and activity. Experiment with long exposures to capture the motion of stars or create circular star trails around the celestial pole.

Post-Processing Long-Exposure Images

After capturing your long exposure shots, post-processing can enhance their visual impact. Use noise reduction tools to minimize digital noise, which can be more pronounced in long-exposure images. Fine-tune exposure levels to correct any overexposed or underexposed areas in your image. Adjust the colour balance and saturation to achieve the desired mood and aesthetic in your photographs.

Experimentation and Practice

Becoming proficient in long-exposure photography requires experimentation and practice. Explore different settings, techniques, and subjects to develop your unique style and creative voice. Embrace both successes and challenges as opportunities to refine your skills and expand your artistic horizons.

Conclusion

Long-exposure photography offers a rich canvas for artistic expression and storytelling. By mastering exposure settings, using essential equipment effectively, choosing suitable subjects, exploring creative techniques, and refining your post-processing skills, you can unlock the full creative potential of long-exposure photography. Patience, persistence, and a willingness to experiment will ultimately lead to capturing stunning images that resonate with viewers and showcase your talent as a photographer.

More Details
Jul 3, 2024
Composition Techniques: Rule of Thirds, Leading Lines, Framing, Symmetry, Depth

Mastering composition techniques is vital for creating captivating photographs. Key techniques include the rule of thirds, leading lines, framing, symmetry, and depth. These methods enhance visual interest and guide the viewer’s eye through the image.

Rule of Thirds

The rule of thirds is a fundamental composition principle. It involves dividing the frame into nine equal parts using two horizontal and two vertical lines. Placing the subject at the intersection points creates a more balanced and engaging image. This technique draws the viewer’s eye naturally to the main subject. Moreover, it provides a sense of movement and dynamism, making the photo more compelling. Hence, the rule of thirds is a simple yet powerful tool to improve your compositions.

Leading Lines

Leading lines guide the viewer’s eye through the photograph. These lines can be straight, curved, diagonal, or even implied. They lead to the main subject, creating a sense of direction and focus. Roads, rivers, fences, or pathways often serve as leading lines. Additionally, using leading lines adds depth and dimension to your images. They connect the foreground with the background, making the photo more immersive. Therefore, incorporating leading lines into your compositions enhances the visual flow and storytelling of your photographs.

Framing

Framing involves using elements within the scene to create a “frame” around the subject. This technique directs attention to the main subject and adds context to the image. Natural frames can include trees, windows, doorways, or arches. Furthermore, framing adds depth and layers to your photograph. It provides a sense of enclosure and intimacy, drawing the viewer into the scene. Hence, effective framing emphasizes the subject and enhances the overall composition.

Symmetry

Symmetry creates a balanced and harmonious composition. It involves mirroring elements on either side of a central axis. Symmetry can be horizontal, vertical, or radial. This technique is particularly effective in architectural photography, where structures often have symmetrical designs. Moreover, symmetry adds a sense of order and stability to your images. It appeals to the viewer’s sense of aesthetics and can create a striking visual impact. Therefore, utilizing symmetry in your compositions results in visually pleasing and balanced photographs.

Depth

Creating depth in your photographs makes them more three-dimensional and engaging. Depth can be achieved using various techniques such as overlapping, perspective, and using a wide aperture for a shallow depth of field. Additionally, incorporating foreground, middle ground, and background elements adds layers to your composition. This guides the viewer’s eye through the image and creates a sense of space. Hence, understanding and applying depth techniques enhances the realism and immersion of your photos.

Interplay of Techniques

Understanding how these composition techniques interact is crucial. They do not work in isolation but complement each other. For instance, you can use the rule of thirds alongside leading lines to draw attention to the subject. Similarly, framing can be combined with depth techniques to add layers and focus. Moreover, symmetry can be enhanced by using leading lines that converge at the center. Thus, mastering the interplay of these techniques allows for more dynamic and compelling compositions.

Practical Application

In practice, experimenting with these techniques helps refine your compositional skills. Start by applying the rule of thirds to place your subject off-center. Next, look for natural leading lines to guide the viewer’s eye. Use elements in the scene to frame your subject and create context. Experiment with symmetrical compositions to achieve balance and harmony. Additionally, focus on creating depth by incorporating different layers in your photos. Therefore, regular practice and experimentation with these techniques will significantly improve your photography.

Composition Techniques

Conclusion

In conclusion, mastering composition techniques like the rule of thirds, leading lines, framing, symmetry, and depth is essential for creating engaging photographs. Each technique enhances visual interest and guides the viewer’s eye. Moreover, understanding their interplay allows for more dynamic and compelling compositions. Therefore, investing time in learning and practicing these techniques will greatly enhance your photographic skills. Embrace these principles to elevate your photography to new heights.

More Details
Jul 3, 2024
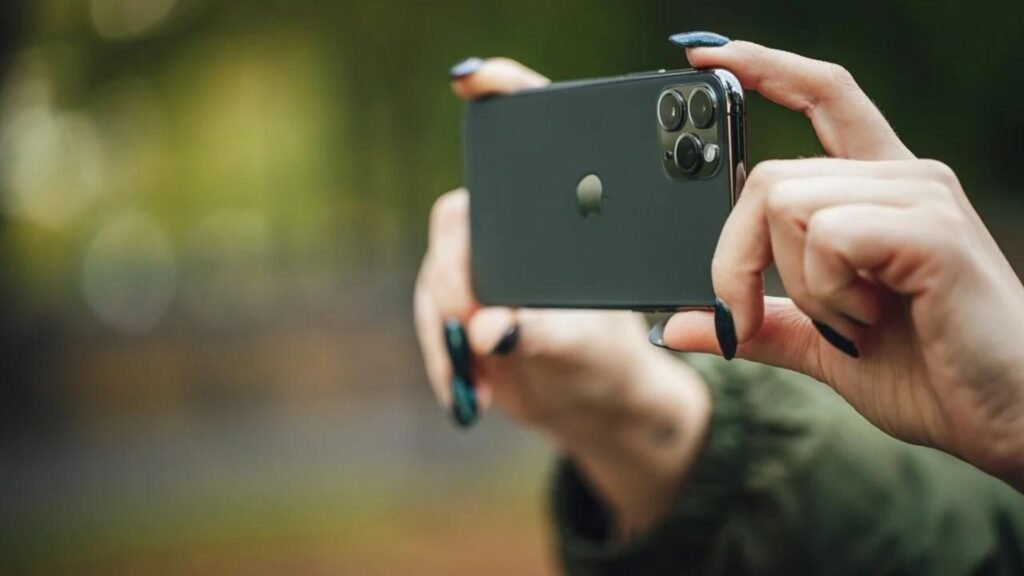
How to Take Great Photos with Your iPhone

Taking great photos with your iPhone is not just about having a good camera; it’s about knowing how to use it effectively. Here are some tips to help you capture stunning photos with your iPhone:

Understand Camera Basics

  • Familiarize yourself with the camera features on your iPhone, such as HDR (High Dynamic Range), Portrait mode, and Live Photos.
  • Learn how to adjust exposure and focus by tapping on different areas of the screen before taking a shot.

Use Gridlines for Composition

  • Enable gridlines in your iPhone camera settings to help you apply the rule of thirds and achieve balanced compositions.
  • Place key elements of your photo along the gridlines or at their intersections to create visually appealing images.

Optimize Lighting

  • Natural light is your best friend. When shooting outdoors, aim for soft, diffused light (e.g., during golden hour) to avoid harsh shadows and highlights.
  • Indoors, position your subject near windows or use additional lighting sources to enhance clarity and color in your photos.

Experiment with Perspectives

  • Change your perspective by shooting from different angles (e.g., low, high, or from the side) to add depth and interest to your photos.
  • Consider using the iPhone’s Portrait mode to create a shallow depth of field effect, blurring the background and emphasizing your subject.

Keep Your Lens Clean

  • Wipe the lens of your iPhone regularly with a clean, soft cloth to remove fingerprints, dust, or smudges that can affect image clarity.

Use Burst Mode for Action Shots

  • Hold down the shutter button (or volume button) to activate Burst mode, allowing you to capture a series of rapid-fire shots. This is ideal for capturing fast-moving subjects or action scenes.

Edit with Built-in Tools

  • Take advantage of editing tools within the Photos app on your iPhone. Adjust exposure, contrast, saturation, and more to fine-tune your photos.
  • Experiment with filters and cropping to enhance the mood and composition of your images.

Explore Third-Party Apps

  • Consider using third-party camera apps like ProCamera, Camera+, or VSCO for additional control over settings such as ISO, shutter speed, and manual focus.
  • These apps often provide more advanced features and editing capabilities compared to the native iPhone camera app.

Practice and Experiment

  • Practice regularly to improve your photography skills with your iPhone. Experiment with different settings, techniques, and subjects to discover what works best for you.
  • Review your photos to identify areas for improvement and learn from your successes and challenges.

Share and Seek Feedback

Share your best iPhone photos on social media or photography communities to receive feedback and inspiration from others. – Engage with fellow photographers, learn new techniques, and stay motivated to continue improving your iPhone photography skills.

By applying these tips and techniques, you can elevate your iPhone photography and capture memorable moments with clarity, creativity, and style.

More Details
Jul 3, 2024
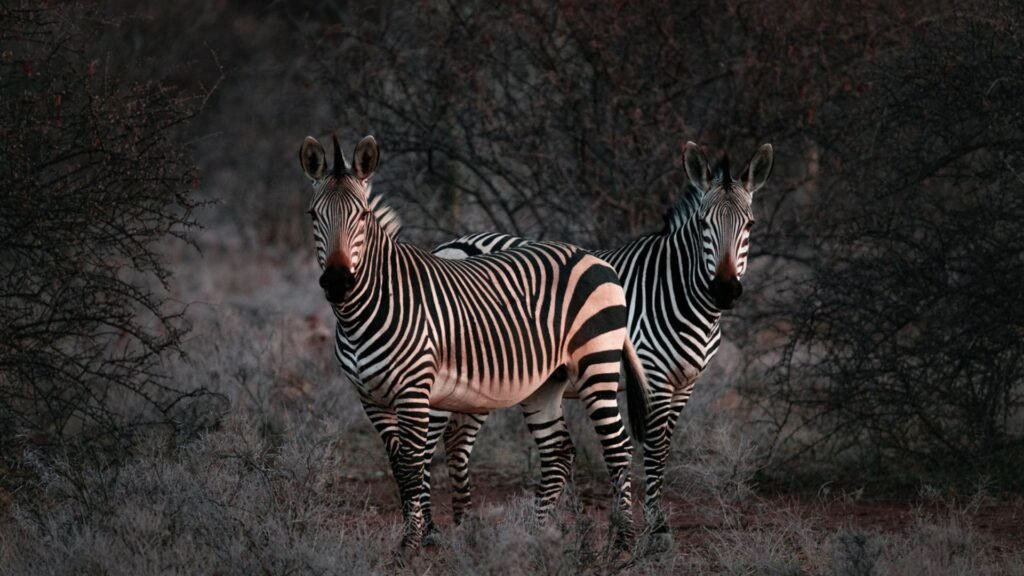
Tips for Editing Wildlife Photography

Wildlife photography is a captivating pursuit that allows photographers to capture the natural beauty and behavior of animals in their habitats. However, capturing the perfect wildlife shot often requires more than just a click of the camera; it involves post-processing techniques to enhance and refine the images. Here are essential tips and techniques to help you master the art of editing wildlife photography effectively.

Editing Wildlife Photography

1. Start with Selective Editing

The editing process begins with selecting the best images from your wildlife photography session. Choose photos that have strong compositions, sharp focus on the subject, and evoke a sense of the animal’s natural environment and behavior.

2. Adjust Exposure and Contrast

Balancing exposure and contrast is crucial in wildlife photography editing. Use exposure adjustments to ensure the subject is well-exposed without losing detail in shadows or highlights. Adjust contrast to enhance the natural lighting conditions and bring out textures and colors.

3. Enhance Sharpness and Detail

Wildlife photography often demands precise sharpness to highlight fur, feathers, or scales. Use the sharpening tool cautiously to enhance details without introducing noise. Adjust clarity and texture settings to emphasize fine details and add depth to your images.

4. Correct White Balance

Correcting white balance ensures accurate colors in your wildlife photos. Use presets like daylight, cloudy, or shade, or manually adjust the temperature and tint sliders to match the natural lighting conditions when the photo was taken. This step is crucial for maintaining the true colors of the animal and its surroundings.

5. Crop for Composition

Cropping plays a significant role in refining the composition of your wildlife photos. Focus on the animal’s eyes or distinctive features to create a compelling focal point. Avoid over-cropping, as it can reduce image quality and impact.

6. Remove Distractions

Wildlife photography often includes elements like branches, twigs, or other distractions in the background. Use cloning or healing tools carefully to remove these distractions while maintaining a natural look. Pay attention to details to ensure a seamless integration with the surrounding environment.

7. Use Color Grading for Mood

Experiment with color grading to enhance the mood and atmosphere of your wildlife photos. Adjust saturation, vibrance, and individual color channels to create a cohesive color palette that complements the natural surroundings. Color grading can significantly impact the emotional impact of your wildlife images.

8. Maintain Natural Look

Preserve the natural look and feel of wildlife in your edits. Avoid over-processing or excessive manipulation that alters the appearance of the animal or its environment. Aim for enhancements that highlight the beauty of nature without sacrificing authenticity.

9. Batch Processing for Efficiency

If you have multiple wildlife photos from the same shoot, consider batch processing to maintain consistency in editing style and save time. Apply similar adjustments such as exposure, white balance, and sharpening across multiple images simultaneously, ensuring a cohesive look and feel.

10. Experiment and Develop Your Style

Editing wildlife photography is both an art and a skill. Experiment with different editing techniques and develop your unique style. Take inspiration from nature and other photographers while honing your skills to create captivating wildlife images that tell compelling stories.

Conclusion

Editing wildlife photography requires a blend of technical proficiency and artistic vision. By applying these tips and techniques, you can elevate your wildlife images to new heights, capturing the essence of animals and their environments with clarity and impact. Remember, practice and experimentation are key to refining your editing skills and creating stunning wildlife photography that resonates with viewers.


By following these tips and techniques, you can enhance your wildlife photography editing skills and create images that captivate and inspire.

More Details
Jul 3, 2024
How to Develop Your Photography Style

Developing a unique photography style is a journey that involves discovering your creative voice, honing technical skills, and cultivating a distinct visual identity. This guide explores essential steps and considerations to help you define and refine your photography style effectively.

Understanding Photography Style

Your photography style is a reflection of your artistic vision and personal perspective. It encompasses how you see the world, interpret subjects, and convey emotions through your photographs. Developing a style involves a blend of technical proficiency, creative expression, and consistent aesthetic choices that define your body of work.

Studying Influences and Inspirations

Begin by exploring different genres of photography and studying the works of renowned photographers. Identify what resonates with you and sparks inspiration. Analyze composition techniques, use of light, color palettes, and storytelling approaches that appeal to you. By understanding the styles of others, you can start to define what aspects you wish to incorporate into your own photography style.

Experimentation and Exploration

Developing a photography style requires experimentation and exploration. Take the time to shoot diverse subjects, experiment with different lighting conditions, compositions, and editing techniques. Allow yourself the freedom to try new approaches and techniques without the pressure of immediate perfection. Through experimentation, you’ll discover what resonates with you creatively and refine your unique visual language.

Finding Your Photographic Voice

Your photography style is closely tied to your personal experiences, passions, and perspectives. Consider what subjects or themes ignite your passion and evoke emotions. Whether it’s capturing landscapes, portraits, street scenes, or abstract concepts, choose subjects that resonate with you on a deeper level. Your personal connection to your subjects will infuse authenticity and depth into your photography style.

Consistency and Cohesion

A cohesive photography style is characterized by consistent elements that tie your body of work together. This includes consistent use of composition techniques, editing styles, color schemes, and mood or atmosphere across your photographs. Aim for a visual harmony that makes your portfolio cohesive and instantly recognizable as your own.

Feedback and Reflection

Seek feedback from peers, mentors, or photography communities to gain insights into how your work is perceived. Constructive criticism can provide valuable perspectives and help you identify strengths and areas for improvement in developing your photography style. Additionally, take time to reflect on your own work critically. Evaluate which photographs resonate most with you and why, and use this self-awareness to further refine your style.

Technical Proficiency and Skill Development

Mastering technical aspects of photography, such as exposure, lighting, composition, and post-processing, is essential for expressing your style effectively. Invest time in learning and practicing these fundamentals to gain confidence in translating your creative vision into compelling images. Technical proficiency empowers you to execute your ideas with precision and clarity, enhancing the impact of your photography style.

Embracing Evolution and Growth

Photography style is not static; it evolves over time as you gain experience, refine your skills, and broaden your creative influences. Embrace this evolution and allow yourself to grow artistically. Continuously challenge yourself to push boundaries, explore new subjects, and innovate within your style. Embracing growth ensures that your photography remains dynamic and reflects your evolving artistic journey.

Conclusion

Developing your photography style is a deeply personal and rewarding process that requires dedication, creativity, and self-discovery. By studying influences, experimenting with techniques, finding your photographic voice, maintaining consistency, seeking feedback, mastering technical skills, and embracing growth, you can cultivate a distinctive photography style that reflects your unique perspective and resonates with viewers. Let your passion and creativity guide you as you embark on this enriching journey of developing your photography style.

More Details
Jul 3, 2024
How to Market Yourself as a Photographer

Marketing yourself as a photographer involves showcasing your work, building your brand, and connecting with potential clients or collaborators. Here are effective strategies to market yourself as a photographer:

Define Your Niche and Target Audience

  • Identify your photography niche (e.g., portrait, wedding, landscape, commercial) and define your target audience (e.g., couples, families, businesses).
  • Tailor your marketing efforts to appeal to the specific needs and preferences of your target clients.

Create a Professional Portfolio

  • Build a visually appealing portfolio showcasing your best work. Include diverse examples that highlight your skills, style, and expertise in your chosen niche.
  • Use a dedicated website, social media profiles (like Instagram or Flickr), or portfolio platforms (like Behance or Adobe Portfolio) to display your portfolio.

Develop Your Brand Identity

  • Define your unique brand identity, including your style, values, and personality as a photographer.
  • Design a logo, choose consistent colors and fonts, and create a cohesive visual aesthetic that reflects your brand.

Utilize Social Media

  • Leverage social media platforms to share your work, engage with followers, and attract potential clients.
  • Use Instagram, Facebook, Pinterest, and LinkedIn to showcase your portfolio, share behind-the-scenes content, client testimonials, and updates about your photography business.

Optimize Your Website for SEO

  • Ensure your website is optimized for search engines (SEO) to improve visibility and attract organic traffic.
  • Use relevant keywords, meta descriptions, and alt text for images to help potential clients find your website when searching for photography services online.

Network and Collaborate

  • Build relationships with other professionals in related industries (e.g., wedding planners, event organizers, models) to expand your network and gain referrals.
  • Attend industry events, workshops, and networking meetups to connect with potential clients and collaborators.

Offer Freebies or Special Promotions

  • Provide limited-time discounts, free consultations, or special packages to attract new clients and encourage bookings.
  • Consider offering mini-sessions or seasonal promotions to showcase your skills and attract clients who may later book full sessions.

Collect and Showcase Client Testimonials

  • Request feedback and testimonials from satisfied clients to build credibility and trust with potential clients.
  • Display testimonials prominently on your website and social media profiles to demonstrate your professionalism and customer satisfaction.

Participate in Photography Contests and Awards

  • Enter photography contests and submit your work for awards to gain recognition, build credibility, and showcase your expertise in your niche.
  • Winning or being recognized in contests can enhance your reputation and attract attention from potential clients and industry professionals.

Stay Active and Engage with Your Audience

Regularly update your portfolio and social media profiles with new work to keep your audience engaged and interested. – Respond to comments, messages, and inquiries promptly to show professionalism and build rapport with potential clients.

By implementing these strategies consistently and adapting them to your specific photography niche and target audience, you can effectively market yourself as a photographer and grow your client base over time.

More Details
Jul 3, 2024
Understanding Camera Settings: Aperture, Shutter Speed, ISO, White Balance

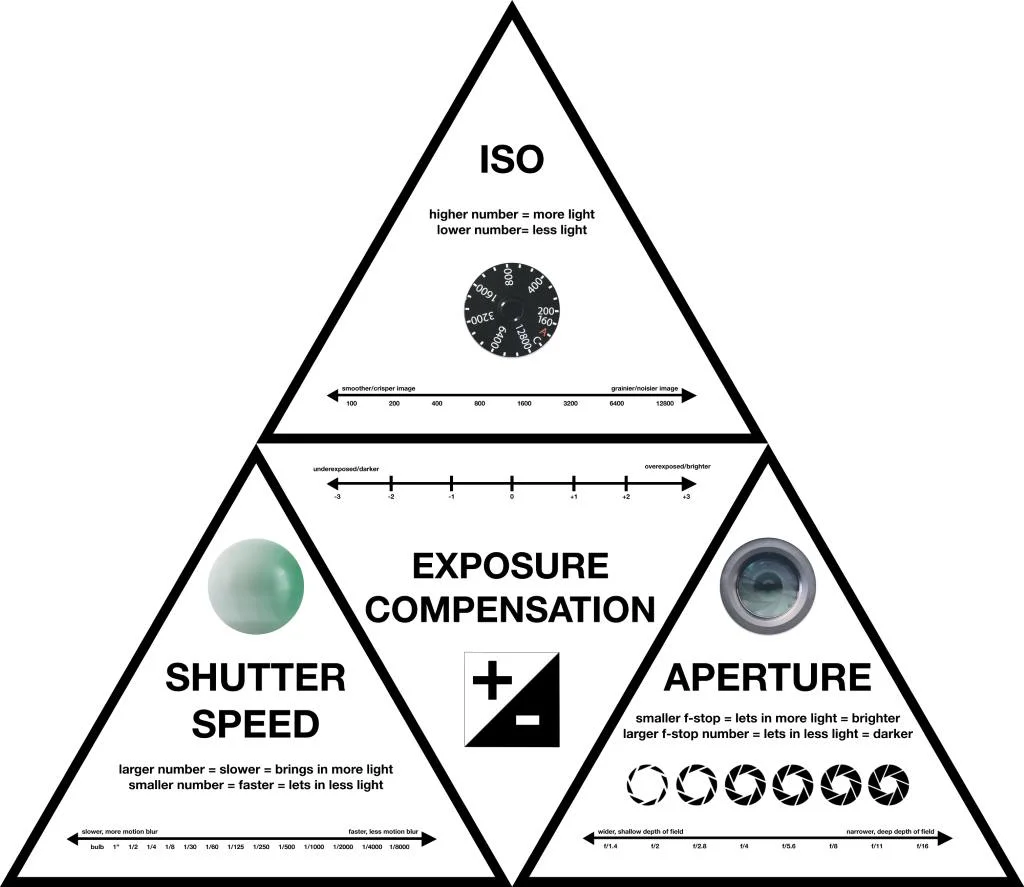
Photography is an art that relies heavily on technical knowledge. Understanding camera settings is essential for any photographer. Key settings include aperture, shutter speed, ISO, and white balance. Mastering these will significantly enhance your photographic skills.

Aperture

Aperture controls the amount of light entering the camera lens. It is measured in f-stops, such as f/2.8, f/4, and f/16. A lower f-stop number (like f/2.8) means a larger aperture, allowing more light in. This is ideal for low-light conditions and achieving a shallow depth of field, which blurs the background and isolates the subject. Conversely, a higher f-stop number (like f/16) means a smaller aperture, letting in less light. This increases the depth of field, making more of the scene in focus. Therefore, choosing the right aperture setting is crucial for controlling exposure and artistic effect.

Shutter Speed

Shutter speed determines how long the camera’s sensor is exposed to light. It is measured in seconds or fractions of a second, such as 1/1000, 1/250, or 1/30. A fast shutter speed (like 1/1000) captures fast-moving subjects sharply. This is essential for sports and action photography. Conversely, a slow shutter speed (like 1/30) allows more light to hit the sensor, which is useful in low-light situations or for creating motion blur effects. For instance, you can use a slow shutter speed to capture the smooth flow of water in a river. Thus, understanding shutter speed helps in freezing action or depicting motion.

ISO

ISO measures the sensitivity of the camera sensor to light. A low ISO number (like ISO 100) means low sensitivity, which is perfect for bright conditions and yields less grainy images. A high ISO number (like ISO 3200) increases sensitivity, suitable for darker environments but can introduce noise or grain into the photo. Therefore, the challenge lies in balancing ISO to achieve the desired exposure without compromising image quality. Adjusting ISO is crucial when lighting conditions change, and you can’t alter aperture or shutter speed.

White Balance

White balance ensures that colors in your photos appear natural. It compensates for different lighting conditions, which can cast a color tint on your photos. For instance, incandescent bulbs produce a warm, yellowish light, while fluorescent lights can create a cool, bluish tint. Cameras offer preset white balance settings like daylight, cloudy, tungsten, and fluorescent. Furthermore, many cameras allow custom white balance adjustments. Correct white balance eliminates color casts and ensures that white objects appear white. Thus, mastering white balance is essential for true-to-life color representation.

Interplay of Settings

Understanding how aperture, shutter speed, ISO, and white balance interact is vital. These settings do not operate in isolation; they influence each other. For instance, increasing ISO might allow you to use a faster shutter speed or a smaller aperture. However, it might also introduce noise. Similarly, adjusting the aperture affects the depth of field and the amount of light entering the camera, which impacts shutter speed and ISO settings. Hence, a balanced approach is necessary to achieve the desired exposure and artistic effect.

Practical Application

In practice, photographers often use the exposure triangle, which is the relationship between aperture, shutter speed, and ISO. For example, in low-light conditions, you might need to increase the ISO and open the aperture to avoid using a slow shutter speed that could cause motion blur. Conversely, in bright light, you might reduce the ISO and close the aperture to avoid overexposure. Moreover, white balance adjustments might be necessary to ensure accurate color reproduction. Therefore, practice and experimentation are key to mastering these settings.

Conclusion

In conclusion, mastering camera settings like aperture, shutter speed, ISO, and white balance is crucial for any photographer. Each setting plays a significant role in determining the exposure and quality of your photos. Moreover, understanding their interplay allows for creative control and technical precision. Therefore, investing time in learning and practicing these settings will greatly enhance your photographic skills. Happy shooting!

More Details