Jul 3, 2024
Portrait Photography

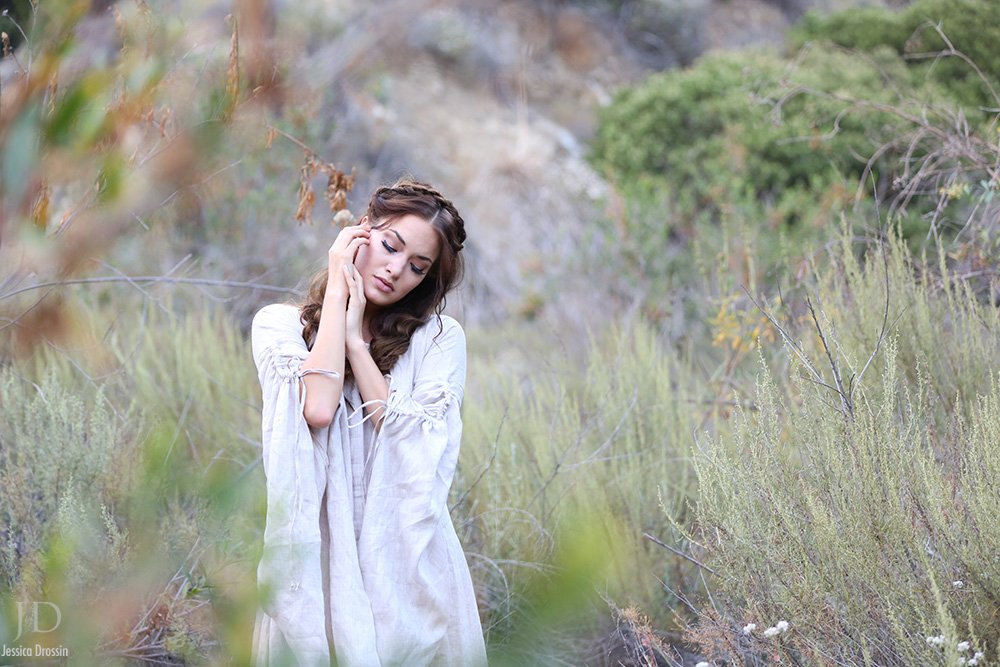
Portrait photography is a genre that focuses on capturing the personality, mood, and essence of a subject. It requires a blend of technical skill and artistic vision to create compelling and emotive portraits. Key elements include understanding lighting, composition, posing techniques, and connecting with your subject.

Lighting Techniques

Lighting is crucial in portrait photography as it sets the mood and emphasizes facial features. Natural light provides soft, flattering illumination, especially during the golden hour. Moreover, artificial light, such as studio strobes or continuous lights, offers control over intensity and direction. Using reflectors and diffusers helps soften harsh shadows and enhances skin tones. Thus, mastering lighting techniques is essential for creating captivating portraits.

Composition and Framing

Composition plays a vital role in portrait photography. The rule of thirds guides placement of the subject, creating balance and visual interest. Furthermore, framing techniques, such as using natural elements or architectural elements, add context and draw focus to the subject. Symmetry and leading lines can also enhance composition, guiding the viewer’s eye. Therefore, understanding these principles allows photographers to create impactful and well-composed portraits.

Posing and Expression

Posing is an art that helps convey the subject’s personality and mood. Directing your subject with gentle prompts and adjustments can create natural and flattering poses. Moreover, encouraging authentic expressions adds emotion and depth to the portrait. Understanding body language and facial expressions allows photographers to capture genuine moments. Hence, mastering posing techniques is crucial for portraying the subject in the best possible light.

Connection with the Subject

Establishing a connection with your subject is essential in portrait photography. Building rapport and making your subject feel comfortable encourages natural expressions and emotions. Moreover, engaging in conversation and showing genuine interest helps create a relaxed atmosphere. This connection allows photographers to capture genuine moments and emotions, resulting in more compelling portraits. Therefore, fostering a connection with the subject enhances the overall quality of the portrait session.

Background and Environment

The background plays a crucial role in portrait photography, as it complements the subject and adds context to the image. Choosing a background that is simple and unobtrusive ensures the subject remains the focal point. Moreover, using shallow depth of field (achieved with a wide aperture) can blur the background, creating separation between the subject and surroundings. Additionally, environmental portraits incorporate the subject’s surroundings, providing insight into their lifestyle or profession. Hence, paying attention to the background enhances the storytelling aspect of portrait photography.

Post-Processing and Editing

Post-processing allows photographers to enhance and refine their portraits. Basic adjustments like exposure, contrast, and color balance ensure a balanced and natural look. Moreover, retouching techniques can smooth skin, remove blemishes, and enhance facial features subtly. Using editing software like Adobe Lightroom or Photoshop provides creative control over the final image. However, maintaining a natural look is key to preserving the authenticity of the portrait. Thus, mastering post-processing techniques enhances the overall quality and appeal of portraits.

Capturing Emotion and Storytelling

Portraits have the power to convey emotions and tell stories. Capturing genuine emotions and expressions adds depth and authenticity to the image. Moreover, paying attention to details like eye contact, gestures, and body language enhances storytelling. Additionally, experimenting with different angles and perspectives can evoke different emotions and moods. Therefore, focusing on capturing emotion and storytelling elevates the impact and resonance of portrait photography.

Conclusion

In conclusion, portrait photography is a blend of technical skill and artistic vision. Mastering lighting techniques, composition, posing, and connection with the subject is essential for creating compelling portraits. Moreover, attention to detail in background selection, post-processing, and storytelling enhances the overall quality of the final image. Therefore, investing time in learning and practicing these techniques will greatly improve your portrait photography skills. Embrace these principles to capture the personality, mood, and essence of your subjects effectively.

More Details
Jul 3, 2024
How to Photograph Birds in Flight

Photographing birds in flight can be challenging but incredibly rewarding. Here are some tips to help you capture stunning photos of birds in action:

Use the Right Equipment

  • Use a camera with fast autofocus capabilities and a high frames-per-second (fps) rate to capture fast-moving birds effectively. A telephoto lens (300mm or longer) is ideal for bringing distant birds closer.

Understand Bird Behavior

  • Observe bird behavior and flight patterns to anticipate their movements. Study their habitats and feeding grounds to increase your chances of capturing them in flight.

Choose the Right Settings

  • Use a fast shutter speed (1/1000 sec or faster) to freeze motion and capture sharp details of birds in flight. Adjust your ISO and aperture settings to ensure proper exposure.

Focus on the Eyes

  • Set your camera’s autofocus mode to continuous (AI Servo for Canon, AF-C for Nikon) to track moving birds and maintain focus on their eyes, which are crucial for sharp, engaging photos.

Use Burst Mode

  • Enable burst mode (continuous shooting mode) to capture a series of rapid-fire shots when birds are in flight. This increases your chances of getting the perfect shot with wings fully extended or interesting flight poses.

Pre-focus on Landing Spots

  • If birds are landing or taking off from a specific spot (such as a perch or feeding area), pre-focus your camera on that spot and use a fast shutter speed to capture decisive moments.

Consider Background and Composition

  • Pay attention to the background and composition of your photos. Aim for clean, uncluttered backgrounds that highlight the bird’s silhouette and flight posture.

Patience and Persistence

  • Bird photography requires patience and persistence. Spend time observing and waiting for opportunities to capture birds in flight. Be prepared to take multiple shots to achieve the desired results.

Be Respectful of Wildlife

  • Practice ethical bird photography by respecting wildlife habitats and observing from a safe distance. Avoid disturbing birds or their nesting areas to minimize stress and ensure their well-being.

Post-Processing and Editing

After the photoshoot, review and edit your photos using software like Adobe Lightroom or Photoshop. Adjust colors, sharpness, and contrast to enhance the visual impact of your bird in flight photos.

Learn from Each Shot

Review your photos to analyze what worked well and areas for improvement. Learn from each experience to refine your techniques and capture better bird in flight photos in the future.

By applying these tips and techniques, along with practice and perseverance, you can improve your skills in photographing birds in flight and capture breathtaking moments of these graceful creatures in their natural environment.

More Details
Jul 3, 2024
Exposure Triangle, Exposure Compensation, Histogram Analysis

Understanding exposure is fundamental in photography. It determines how light or dark an image will appear. Key concepts include the exposure triangle, exposure compensation, and histogram analysis. Mastering these elements ensures well-exposed photographs, regardless of lighting conditions.

Exposure Triangle

The exposure triangle consists of three components: aperture, shutter speed, and ISO. These three elements work together to control the amount of light entering the camera. Aperture controls the size of the lens opening, shutter speed determines the duration the sensor is exposed to light, and ISO adjusts the sensor’s sensitivity to light. Moreover, changing one element affects the others. For instance, increasing the aperture size (lowering the f-stop number) allows more light in, thus you might need a faster shutter speed or lower ISO. Understanding this relationship is crucial. Hence, mastering the exposure triangle enables photographers to balance light and achieve the desired exposure.

Aperture

Aperture is the opening in the lens through which light passes. It is measured in f-stops, such as f/2.8, f/5.6, and f/16. A wider aperture (lower f-stop number) allows more light into the camera, which is useful in low-light conditions. Conversely, a narrower aperture (higher f-stop number) allows less light in, ideal for bright conditions. Moreover, aperture affects depth of field. A wide aperture creates a shallow depth of field, blurring the background and isolating the subject. Conversely, a narrow aperture increases depth of field, keeping more of the scene in focus. Therefore, understanding aperture is vital for controlling both exposure and depth of field.

Shutter Speed

Shutter speed controls the length of time the camera sensor is exposed to light. It is measured in seconds or fractions of a second, such as 1/1000, 1/250, or 1/30. A fast shutter speed (like 1/1000) captures fast-moving subjects sharply, freezing the action. Conversely, a slow shutter speed (like 1/30) allows more light in and can create motion blur. This is useful for artistic effects or low-light photography. Moreover, adjusting shutter speed is essential for avoiding camera shake, especially when shooting handheld. Therefore, mastering shutter speed allows photographers to control motion and light in their images.

ISO

ISO measures the sensitivity of the camera sensor to light. It ranges from low values like ISO 100 to high values like ISO 6400 and beyond. A lower ISO is ideal for bright conditions, producing images with minimal noise. A higher ISO increases sensitivity, useful in low-light conditions but can introduce grain or noise. Balancing ISO with aperture and shutter speed is crucial for achieving the desired exposure without compromising image quality. Therefore, understanding ISO and its impact on image quality is essential for effective exposure control.

Exposure Compensation

Exposure compensation allows photographers to adjust the exposure level suggested by the camera’s metering system. It is particularly useful in challenging lighting conditions where the camera’s meter might be fooled. For example, in a scene with a lot of bright or dark areas, the meter might underexpose or overexpose the image. By adjusting exposure compensation, photographers can correct this, ensuring the subject is properly exposed. This adjustment is measured in stops, such as +1, +2, -1, or -2. Moreover, using exposure compensation provides greater control over the final image. Hence, mastering this tool ensures accurate exposure in various lighting scenarios.

Histogram Analysis

The histogram is a graphical representation of the tonal values in an image. It shows the distribution of shadows, midtones, and highlights. Understanding histogram analysis helps photographers assess exposure accuracy. A well-balanced histogram typically has peaks and valleys spread across the graph. If the histogram is skewed to the left, the image is underexposed; if skewed to the right, it is overexposed. Furthermore, analyzing the histogram allows for adjustments in-camera or in post-processing. Therefore, mastering histogram analysis ensures well-exposed images with proper tonal range.

Practical Application

In practice, applying these concepts helps achieve optimal exposure. Start by understanding the exposure triangle and how aperture, shutter speed, and ISO interact. Use exposure compensation to fine-tune exposure in tricky lighting conditions. Additionally, regularly check the histogram to ensure proper exposure and make necessary adjustments. Practice in different lighting scenarios to gain confidence and experience. Moreover, combining these techniques will significantly improve your ability to achieve the desired exposure. Therefore, continuous practice and learning are key to mastering exposure in photography.

Conclusion

In conclusion, mastering exposure is essential for creating well-balanced photographs. Understanding the exposure triangle, utilizing exposure compensation, and analyzing histograms provide the necessary tools for effective exposure control. Moreover, these techniques allow photographers to adapt to various lighting conditions and achieve their creative vision. Therefore, investing time in learning and practicing these concepts will greatly enhance your photographic skills. Embrace these principles to produce consistently well-exposed and visually stunning images.

More Details
Jul 3, 2024
Best Photography Editing Techniques for Portraits

Editing portraits is an art form that involves enhancing natural beauty while maintaining authenticity. Whether you’re a beginner or seasoned photographer, mastering these editing techniques can elevate your portrait photography to new heights.

Photography Editing Techniques for Portraits

Understanding Portrait Editing

  1. Skin Retouching: Smooth out skin imperfections while preserving natural texture.
  2. Color Correction: Adjust tones to achieve lifelike skin tones and vibrant colors.
  3. Detail Enhancement: Sharpen eyes and enhance facial features to draw focus.

Techniques for Editing Portraits

1. Skin Retouching

  • Use Healing Brushes: Remove blemishes, spots, and imperfections with healing brushes or clone stamp tools.
  • Soften Skin: Apply a subtle blur or smoothing effect to achieve soft, natural-looking skin.

2. Color Correction and Enhancement

  • Adjust White Balance: Set accurate white balance to correct any color casts in the photo.
  • Enhance Skin Tones: Use selective color adjustments to refine skin tones without altering other colors.

3. Enhancing Details

  • Eyes and Teeth: Brighten eyes and whiten teeth using adjustment layers or specific tools designed for these features.
  • Hair and Clothing: Enhance details in hair and clothing to add depth and texture to the portrait.

4. Portrait Composition

  • Crop and Framing: Adjust composition to focus on the subject’s face and expression.
  • Background Blur: Use blur tools or shallow depth of field techniques to emphasize the subject and minimize distractions.

5. Lighting Adjustment

  • Dodge and Burn: Use dodge and burn techniques to subtly adjust highlights and shadows for better contrast and depth.
  • Selective Lighting: Enhance or reduce lighting on specific areas of the face to create a more balanced portrait.

6. Presets and Filters

  • Use Presets: Develop or download presets tailored for portraits to maintain consistency and speed up your workflow.
  • Custom Filters: Create custom filters or apply existing ones to achieve a unique look while maintaining a cohesive style.

Workflow Tips

  • Shoot in RAW: Capture images in RAW format for greater flexibility in editing and preserving image quality.
  • Backup and Version Control: Keep backups of your original files and save different versions as you progress through your editing process.
  • Feedback and Iteration: Seek feedback from peers or clients to refine your editing techniques and improve your skills over time.

Conclusion

Editing portraits requires a delicate balance between enhancing natural beauty and maintaining authenticity. By mastering these editing techniques and incorporating them into your workflow, you can create stunning portraits that captivate viewers and reflect the essence of your subjects.

Experiment with different tools, techniques, and styles to develop your unique editing approach. With practice and attention to detail, you can elevate your portrait photography to professional levels, capturing memorable moments with clarity, emotion, and artistry.

More Details
Jul 3, 2024
How to Master Silhouette Photography

Silhouette photography is a captivating technique that uses contrast and shape to create dramatic and artistic images. By mastering the art of capturing silhouettes, you can evoke mood, emphasize form, and tell compelling visual stories. Whether you’re photographing landscapes, people, or objects, understanding the fundamentals of silhouette photography will enhance your creative repertoire. This guide explores essential techniques and tips to help you master silhouette photography effectively.

Understanding Silhouette Photography

Silhouette photography focuses on capturing subjects as dark silhouettes against a brighter background. The technique relies on strong backlighting, where the subject appears as a solid, dark shape without visible details or features. Silhouettes create powerful visual impact by emphasizing shapes and outlines, often evoking a sense of mystery, drama, or simplicity in the composition.

Choosing the Right Conditions and Equipment

To achieve striking silhouettes, choose shooting conditions with clear, unobstructed backgrounds and strong backlighting. Position your subject between the camera and a direct light source, such as the sun during sunrise or sunset, to create distinct outlines and contrasts. Use a DSLR or mirrorless camera with manual exposure controls to adjust settings like aperture and shutter speed for optimal silhouette results.

Setting Your Camera for Silhouette Shots

Start by setting your camera to manual mode to have full control over exposure settings. Opt for a narrow aperture (higher f-number) to ensure both the subject and background remain in focus. Adjust the exposure compensation to underexpose the image, focusing on the brightness of the background rather than the subject. Use spot metering mode to measure light directly on the background for accurate exposure readings.

Positioning Your Subject

Effective silhouette photography relies on positioning your subject against a bright, contrasting background. Place your subject in profile or with a distinct outline against the light source to create clear silhouettes. Experiment with different angles and perspectives to find the most compelling composition that emphasizes the subject’s shape and form without revealing details.

Emphasizing Shape and Composition

Focus on capturing strong, recognizable shapes and forms in your silhouette compositions. Look for subjects with distinct outlines or interesting silhouettes, such as trees, buildings, or people in dynamic poses. Pay attention to negative space around the subject to enhance the visual impact and balance of the composition. Utilize leading lines or framing elements to draw attention to the silhouette and create depth within the image.

Experimenting with Creative Effects

Explore creative techniques to enhance your silhouette photography. Incorporate natural elements like clouds, mist, or reflections to add texture and interest to the background. Experiment with silhouette overlays by blending multiple exposures or using editing software to refine contrast and highlight details. Consider capturing silhouettes in different environments or during varied lighting conditions to expand your creative possibilities.

Post-Processing Techniques for Silhouette Photography

After capturing silhouette images, use post-processing techniques to fine-tune contrast, exposure, and composition. Adjust levels or curves in editing software like Adobe Lightroom to deepen shadows and enhance silhouette definition. Experiment with black-and-white conversions to emphasize shapes and minimize distractions. Refine the composition by cropping or straightening the image to enhance visual impact and storytelling.

Mastering the Art of Silhouette Photography

Achieving mastery in silhouette photography requires patience, experimentation, and a keen eye for composition and light. Continuously seek out opportunities to practice and refine your skills, experimenting with different subjects, settings, and techniques. Study the work of renowned silhouette photographers for inspiration and insights into creative approaches. Embrace the challenge of capturing evocative silhouettes that resonate emotionally and visually with viewers, conveying mood, storytelling, and artistic expression.

Conclusion

In conclusion, mastering silhouette photography offers a unique opportunity to explore creativity and visual storytelling through contrast, shape, and composition. By understanding the fundamentals of silhouette techniques, choosing the right conditions and equipment, and refining your artistic vision, you can capture compelling images that evoke emotion, convey narratives, and leave a lasting impression. Embrace experimentation, practice diligently, and enjoy the process of creating stunning silhouette photographs that showcase the beauty and power of shape and contrast in visual art.

More Details
Jul 3, 2024
How to Take Great Family Portraits

Taking great family portraits requires a combination of technical skill, creativity, and effective communication with your subjects. Here are some tips to help you capture memorable family photos:

Plan Ahead

  • Discuss with the family beforehand to understand their expectations, preferences, and any specific ideas they have for the photoshoot.
  • Choose a location that is meaningful or visually appealing, such as a park, beach, or even their home.

Consider Lighting

  • Schedule the photoshoot during the golden hour (early morning or late afternoon) when natural light is soft and flattering.
  • If shooting indoors or during midday, look for shaded areas or use diffusers to soften harsh sunlight.

Coordinate Outfits

  • Advise the family to coordinate their outfits in terms of color palette and style. Avoid busy patterns and opt for complementary colors that enhance each other.

Use a Tripod and Remote Shutter

  • Set up your camera on a tripod to ensure stability and sharpness in your photos. Use a remote shutter or timer to avoid camera shake when taking group shots.

Establish Rapport

  • Create a relaxed and comfortable atmosphere to help the family feel at ease during the photoshoot. Engage with them, share jokes, and encourage natural interactions.

Capture Candid Moments

  • Encourage spontaneous interactions and candid moments among family members. These often result in genuine smiles and emotions that make for memorable photos.

Vary Poses and Compositions

  • Experiment with different poses and compositions to add variety to your family portraits. Include close-ups, full-body shots, and group formations.

Focus on Faces and Expressions

  • Ensure faces are well-lit and in focus. Pay attention to expressions and emotions, capturing genuine smiles and connections between family members.

Use Depth of Field Creatively

  • Create depth and visual interest in your portraits by using a shallow depth of field (low aperture) to blur the background and emphasize the family members.

Edit Thoughtfully

After the photoshoot, review and edit your photos to enhance colors, contrast, and exposure. Use editing software to refine your portraits while maintaining a natural look.

Deliver and Share Photos Promptly

Deliver the edited photos to the family in a timely manner. Consider creating an online gallery or sharing them via cloud storage for easy access and sharing.

By following these tips and adapting them to suit the family’s preferences and dynamics, you can create beautiful family portraits that capture special moments and emotions, providing lasting memories for years to come.

More Details
Jul 3, 2024
How to Use a Camera Drone Effectively

Using a camera drone effectively requires understanding both the technical aspects of drone operation and creative techniques for capturing stunning aerial photos and videos. Here’s a guide on how to use a camera drone effectively:

Familiarize Yourself with Local Regulations

  • Before flying your drone, familiarize yourself with local regulations and obtain any necessary permits or licenses. Follow airspace rules and restrictions to ensure safe and legal operation.

Learn Drone Operation Basics

  • Read the drone’s manual thoroughly to understand its features, controls, and safety protocols.
  • Practice flying your drone in an open, obstacle-free area to gain confidence and proficiency in maneuvering and controlling the drone.

Plan Your Shots

  • Before flight, plan your shots and consider the desired composition, angles, and perspectives. Visualize the scenes you want to capture and determine optimal flight paths.

Use GPS and Autonomous Modes

  • Utilize GPS features and autonomous flight modes (such as waypoints or follow-me mode) to automate flight paths and maintain stability while focusing on capturing photos or videos.

Optimize Camera Settings

  • Adjust camera settings (ISO, shutter speed, white balance) based on lighting conditions and desired effects. Shoot in RAW format for greater flexibility in post-processing.

Monitor Battery Life and Weather Conditions

  • Monitor drone battery levels and flight time to ensure safe return-to-home (RTH) capability. Avoid flying in adverse weather conditions (strong winds, rain) that could affect drone performance.

Frame Your Shots Carefully

  • Frame your shots using the drone’s live video feed on your controller or smartphone. Pay attention to composition rules (rule of thirds, leading lines) to create visually appealing photos and videos.

Experiment with Perspectives

  • Take advantage of the drone’s aerial perspective to capture unique angles and viewpoints that are not possible with traditional photography.
  • Experiment with low-altitude and high-altitude shots to vary the scale and depth of your aerial compositions.

Smooth Movements and Transitions

  • Use slow and smooth movements when panning, tilting, or flying the drone to avoid jerky footage. Gradually accelerate or decelerate movements for cinematic transitions.

Edit and Enhance Footage

After capturing aerial footage, edit and enhance your photos and videos using editing software (e.g., Adobe Premiere Pro, Final Cut Pro, Lightroom) to adjust colors, contrast, and stabilize footage if necessary.

Respect Privacy and Environment

Respect privacy rights and avoid flying over private property or sensitive areas without permission. – Be mindful of wildlife and natural habitats when flying in outdoor settings to minimize disturbance and environmental impact.

By following these tips and practicing regularly, you can maximize the capabilities of your camera drone and capture breathtaking aerial photos and videos that showcase unique perspectives and creative compositions.

More Details
Jul 3, 2024
Focus and Sharpness in Photography

Focus and sharpness are critical elements in photography. They determine the clarity and detail of your images. Mastering these aspects enhances the overall quality of your photographs. Key techniques include understanding autofocus and manual focus, selecting the right focus points, and employing various methods to ensure sharpness.

Focus and Sharpness in Photography

Understanding Autofocus and Manual Focus

Autofocus (AF) and manual focus (MF) are two primary focusing methods. Autofocus uses the camera’s internal mechanisms to automatically adjust focus. It is fast and convenient, especially for moving subjects. Modern cameras offer various autofocus modes like single-point, continuous, and dynamic AF. These modes cater to different shooting scenarios. Moreover, autofocus is particularly useful in dynamic situations where quick adjustments are needed. However, it can sometimes struggle in low light or with low-contrast subjects.

Manual focus, on the other hand, requires the photographer to adjust the focus ring on the lens. This method provides greater control and precision. It is ideal for static subjects and macro photography, where fine-tuning is necessary. Additionally, manual focus is invaluable when shooting in low-light conditions or with subjects that have complex textures. Therefore, mastering both autofocus and manual focus is essential for versatile and precise focusing.

Selecting the Right Focus Points

Modern cameras offer multiple focus points across the frame. Selecting the right focus points is crucial for ensuring the subject is sharp. Single-point AF allows precise focus on a specific area, which is ideal for portraits and still life. Zone AF covers a larger area and is useful for tracking moving subjects. Moreover, dynamic AF follows the subject as it moves across the frame, maintaining sharpness. Understanding when to use each focus mode enhances your ability to capture sharp images consistently. Therefore, learning to select the appropriate focus points is fundamental to achieving focus accuracy.

Employing Methods to Ensure Sharpness

Ensuring sharpness involves several techniques and tools. One effective method is using a tripod. A tripod stabilizes the camera, reducing the risk of motion blur. This is particularly important in low-light conditions or when using slow shutter speeds. Additionally, using a remote shutter release or the camera’s timer minimizes camera shake during exposure. Another technique is using the mirror lock-up function in DSLR cameras to reduce vibration caused by the mirror movement. Hence, these methods collectively contribute to sharper images.

Depth of Field and Aperture

Depth of field (DoF) significantly affects sharpness. It is the zone of acceptable sharpness within an image. A shallow depth of field (achieved with a wide aperture, like f/2.8) isolates the subject by blurring the background. This is useful for portraits and macro photography. Conversely, a deep depth of field (achieved with a narrow aperture, like f/16) keeps more of the scene in focus, ideal for landscapes. Understanding and controlling depth of field allows photographers to highlight the subject while maintaining overall sharpness. Thus, aperture settings play a critical role in managing focus and sharpness.

Hyperfocal Distance

Hyperfocal distance is a focusing technique used to maximize depth of field. By focusing at the hyperfocal distance, everything from half that distance to infinity will appear sharp. This is particularly useful in landscape photography, where maintaining sharpness throughout the scene is essential. Calculating hyperfocal distance involves considering the aperture and focal length. Moreover, many photographers use hyperfocal distance charts or smartphone apps to determine the optimal focus point. Therefore, mastering hyperfocal distance ensures that your landscapes are sharp from foreground to background.

Lens Quality and Maintenance

The quality of your lens also impacts sharpness. High-quality lenses have superior optics that produce sharper images. Investing in prime lenses, known for their sharpness, can significantly improve your image quality. Furthermore, maintaining your lenses is crucial. Regularly cleaning the lens elements and ensuring they are free of dust and smudges helps maintain optimal sharpness. Additionally, using lens hoods reduces lens flare, which can affect sharpness and contrast. Hence, choosing and maintaining high-quality lenses is essential for achieving sharp images.

Conclusion

In conclusion, mastering focus and sharpness is vital for creating high-quality photographs. Understanding autofocus and manual focus, selecting the right focus points, and employing various techniques ensure sharp images. Moreover, controlling depth of field and using hyperfocal distance enhances overall sharpness. Therefore, investing time in learning these aspects will significantly improve your photographic skills. Embrace these techniques to elevate the clarity and detail of your images, resulting in stunning and professional-quality photographs.

More Details
Jul 3, 2024
How to Master Portrait Photography Shots

Portrait photography is a nuanced art form that goes beyond simply capturing an image; it’s about conveying the essence and personality of your subject through visual storytelling. Whether you’re capturing professional headshots, intimate family portraits, or artistic character studies, mastering portrait photography requires a blend of technical proficiency, creativity, and interpersonal skills. This guide delves into essential techniques and considerations to help you elevate your portrait photography skills to new heights.

Understanding Portrait Photography Shots

Firstly, portrait photography centres on capturing the character, emotion, and unique qualities of individuals or groups. It involves creating images that resonate emotionally and aesthetically with viewers, often focusing on the face, expressions, and gestures of the subject. By understanding the fundamentals of composition, lighting, posing, and post-processing, you can create compelling portraits that leave a lasting impression.

Choosing the Right Equipment

Secondly, start by selecting the appropriate camera and lenses for portrait photography. A digital single-lens reflex (DSLR) or mirrorless camera offers versatility and control over settings, while prime lenses (typically 50mm to 85mm) are popular for their natural perspective and ability to achieve pleasing background blur (bokeh). Consider investing in lenses with wide apertures (low f-number) to maximize depth of field control and capture sharp, detailed portraits.

Mastering Composition and Framing

Thirdly, composition plays a pivotal role in portrait photography, influencing how the viewer perceives the subject. Explore compositional techniques such as the rule of thirds, leading lines, and framing to create balanced, visually appealing portraits. Experiment with different angles, perspectives, and distances to find the most flattering and expressive compositions for your subjects.

Utilizing Natural and Artificial Lighting

Lighting is fundamental in portrait photography, affecting mood, texture, and overall image quality. Natural light, such as soft window light or outdoor sunlight during the golden hour, can produce flattering, diffused illumination that enhances skin tones and details. Alternatively, artificial lighting setups using studio lights, reflectors, or speed lights provide control over light intensity and direction, allowing you to create dramatic effects or fill in shadows as needed.

Effective Posing Techniques

Posing is key to capturing authentic expressions and conveying the personality of your subjects. Guide your subjects through natural poses that highlight their best features and complement the overall composition. Encourage relaxed body language and genuine interactions to capture candid moments that reflect their true essence. Use posing variations, such as standing, sitting, or reclining poses, to add variety and visual interest to your portraits.

Managing Depth of Field

Control over depth of field allows you to isolate your subject from the background, drawing attention to their facial expressions and eyes. Use wide apertures (low f-numbers) for shallow depth of field in close-up portraits, emphasizing details while blurring distractions in the background. Adjust aperture settings accordingly for group portraits or environmental portraits, balancing depth of field with the context of the scene.

Engaging with Your Subject

Building rapport and creating a comfortable environment are essential for eliciting natural expressions and emotions from your subjects. Establish clear communication and provide gentle guidance throughout the photo session to help them feel relaxed and confident in front of the camera. Foster a collaborative atmosphere where ideas can flow freely, allowing you to capture genuine moments and expressions that reflect their true personality.

Post-Processing and Editing Techniques

Enhance your portrait photography through post-processing techniques that refine and polish your images. Use editing software like Adobe Lightroom or Photoshop to adjust exposure, contrast, colour balance, and sharpness. Retouch portraits subtly to improve skin tones, remove blemishes, and enhance facial features while preserving natural-looking results. Experiment with black-and-white conversions, creative filters, or selective adjustments to add artistic flair and emphasize mood in your portraits.

Continuous Learning and Practice

Achieving mastery in portrait photography is an ongoing journey of learning, experimentation, and refinement. Study the work of renowned portrait photographers to gain inspiration and insights into different styles and approaches. Dedicate time to practice regularly with diverse subjects and settings, honing your technical skills and developing a distinctive photographic style that resonates with your artistic vision.

Conclusion

In conclusion, mastering portrait photography shots requires a blend of technical expertise, artistic vision, and interpersonal skills to create compelling images that capture the essence and individuality of your subjects. By mastering composition, lighting, posing, and post-processing techniques, you can elevate your portrait photography skills and create memorable images that evoke emotion, tell stories, and leave a lasting impression on viewers. Embrace creativity, explore new techniques, and enjoy the process of capturing portraits that showcase the beauty and personality of your subjects with authenticity and artistry.

More Details
Jul 3, 2024
Tips for Editing Underwater Photography

Underwater photography presents unique challenges due to water’s filtering effect on light and color. Editing these photos requires specialized techniques to restore natural colors, enhance clarity, and bring out the beauty of underwater scenes. This guide explores essential tips and techniques to help you master editing for underwater photography.

Understanding the Challenges

  1. Color Distortion: Water absorbs and scatters light, causing color loss and shifting hues towards blue-green.
  2. Low Contrast: Underwater scenes often lack contrast due to diffused light and particles in the water.
  3. Backscatter: Particles and microorganisms in the water can cause unwanted specks and haze in photos.

Tips for Editing Underwater Photography

1. Correct White Balance

Adjust the white balance to counteract the blue-green tint caused by water. Use the white balance tool in your editing software or manually adjust temperature and tint sliders until natural colors are restored.

2. Enhance Contrast and Clarity

Increase contrast and clarity to add definition to underwater scenes. Use tools like contrast adjustments, clarity sliders, and selective sharpening to bring out details without over-processing.

3. Remove Backscatter

Use the spot healing brush or clone stamp tool to remove backscatter and unwanted particles from your photos. Work carefully to preserve the natural look of the underwater environment.

4. Adjust Exposure

Correct exposure to balance highlights and shadows. Underwater environments may have uneven lighting, so use exposure adjustments to recover details in darker areas and prevent overexposure in brighter parts.

5. Use Vibrancy and Saturation Sparingly

Increase vibrancy or saturation slightly to enhance colors without making them appear unnatural. Avoid excessive saturation, which can distort colors and make the photo look unrealistic.

6. Fine-Tune Levels and Curves

Adjust levels and curves to fine-tune tonal range and contrast. Use the histogram to guide adjustments and achieve a balanced distribution of tones in your underwater photos.

7. Sharpen Wisely

Apply sharpening selectively to enhance details without introducing noise. Use masking to apply sharpening only to areas with distinct edges, such as marine life or coral formations.

Workflow Tips

  • Shoot in RAW: RAW files retain more image data and provide greater flexibility during editing, especially for correcting white balance and exposure.
  • Use Presets: Develop or download presets tailored for underwater photography to streamline your editing process and maintain consistency across your photos.
  • Batch Process: Apply similar adjustments to a batch of underwater photos to save time and ensure uniformity in editing style.

Conclusion

Editing underwater photography requires a blend of technical skills and artistic judgment to overcome the challenges posed by water’s influence on light and color. By applying these tips and techniques, you can enhance the vibrancy, clarity, and natural beauty of your underwater shots. Experiment with different editing tools and workflows to develop your unique style and create captivating images that showcase the wonders of the underwater world.

Mastering underwater photography editing takes practice and patience, but with the right techniques and tools at your disposal, you can transform your underwater captures into stunning visual narratives that captivate and inspire.

More Details