Jul 3, 2024
Tips for Using Lightroom in Photography Editing
Adobe Lightroom is a powerful tool for organizing, editing, and enhancing photographs. Whether you’re a beginner or seasoned photographer, mastering Lightroom can greatly improve your editing efficiency and the quality of your final images. Here are some tips to help you navigate and utilize Lightroom effectively:
1. Organize Your Catalog
Before diving into editing, organize your photos within Lightroom’s catalog. Use keywords, flags, and ratings to categorize and filter images based on projects, dates, or subjects. This organization system helps streamline your workflow and makes it easier to locate specific photos for editing.
2. Understand the Basic Editing Tools
Familiarize yourself with Lightroom’s basic editing tools located in the Develop module. These include exposure, contrast, highlights, shadows, whites, and blacks sliders. Learn how each adjustment affects your image and practice using them to achieve the desired look and feel.
3. Master the Histogram
The histogram in Lightroom displays the distribution of tones in your image, from shadows on the left to highlights on the right. Use the histogram to guide your edits and ensure proper exposure. Adjust exposure and contrast until the histogram is balanced and avoids clipping in the shadows or highlights.
4. Use Presets for Efficiency
Lightroom presets are pre-defined editing settings that can be applied to your photos with a single click. Experiment with built-in presets or create your own to establish consistent editing styles across your work. Adjust presets as needed to suit different lighting conditions and subjects.
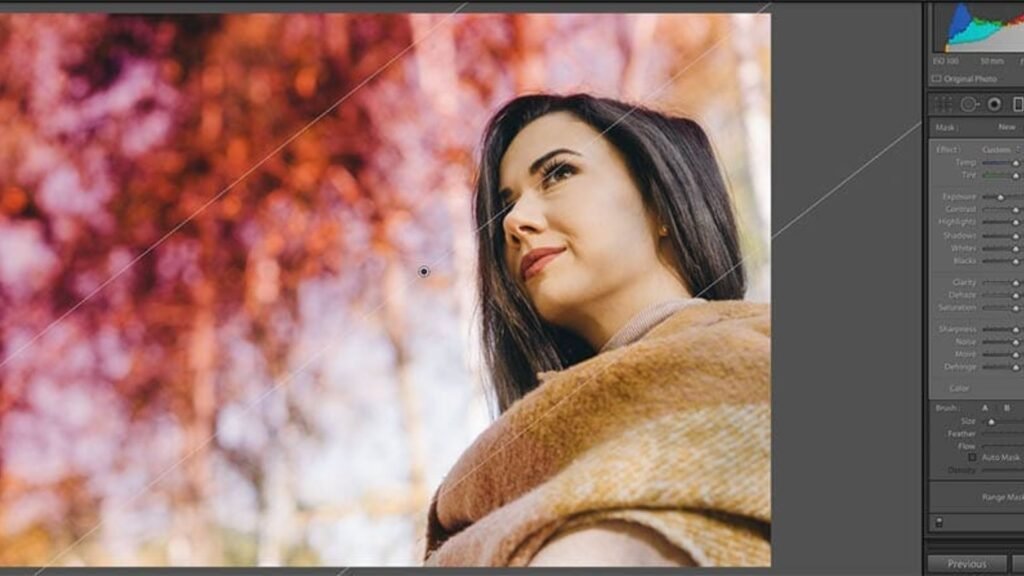
5. Utilize Local Adjustment Tools
Enhance specific areas of your photo using Lightroom’s local adjustment tools such as the Adjustment Brush, Graduated Filter, and Radial Filter. These tools allow you to selectively apply adjustments to parts of an image, such as brightening a subject’s face or darkening a distracting background.
6. Practice Non-Destructive Editing
Lightroom uses non-destructive editing, meaning your original photos remain untouched. Edits are stored as instructions rather than altering the original file, preserving image quality. Take advantage of this feature by experimenting with different edits and reverting to the original if needed.
7. Utilize Sync and Batch Editing
Save time by using Lightroom’s sync and batch editing features. Apply edits from one photo to multiple images with similar lighting conditions or subjects. Adjustments such as exposure, white balance, and sharpening can be synchronized across selected photos, ensuring consistency in your edits.
8. Monitor Color Management
Pay attention to color accuracy and consistency when editing in Lightroom. Calibrate your monitor regularly to ensure colors appear as intended. Use the Color Calibration panel and the HSL (Hue, Saturation, Luminance) sliders to fine-tune specific color ranges and maintain natural-looking tones.
Conclusion
Mastering Adobe Lightroom enhances your ability to edit and refine photographs efficiently and creatively. By implementing these tips and exploring Lightroom’s extensive features, you can elevate your photography editing skills and achieve professional-quality results. Practice regularly, experiment with different tools and techniques, and adapt your editing workflow to suit your unique style and projects. With dedication and proficiency in Lightroom, you can unlock the full potential of your photographic vision.
More Details